Kawasaki Zx7R - April 2011 to JuLY 2013
Evolving out of the Zxr750, in 1996 Kawasaki Heavy Industries released the Zx7r, a 750cc Inline Four sportsbike, which subsequently remained pretty much unchanged up until 2003 when Kawasaki dropped it from their model range. As of 2012, this was the last 750 sportsbike that they made, leaving Suzuki with the market all to itself.
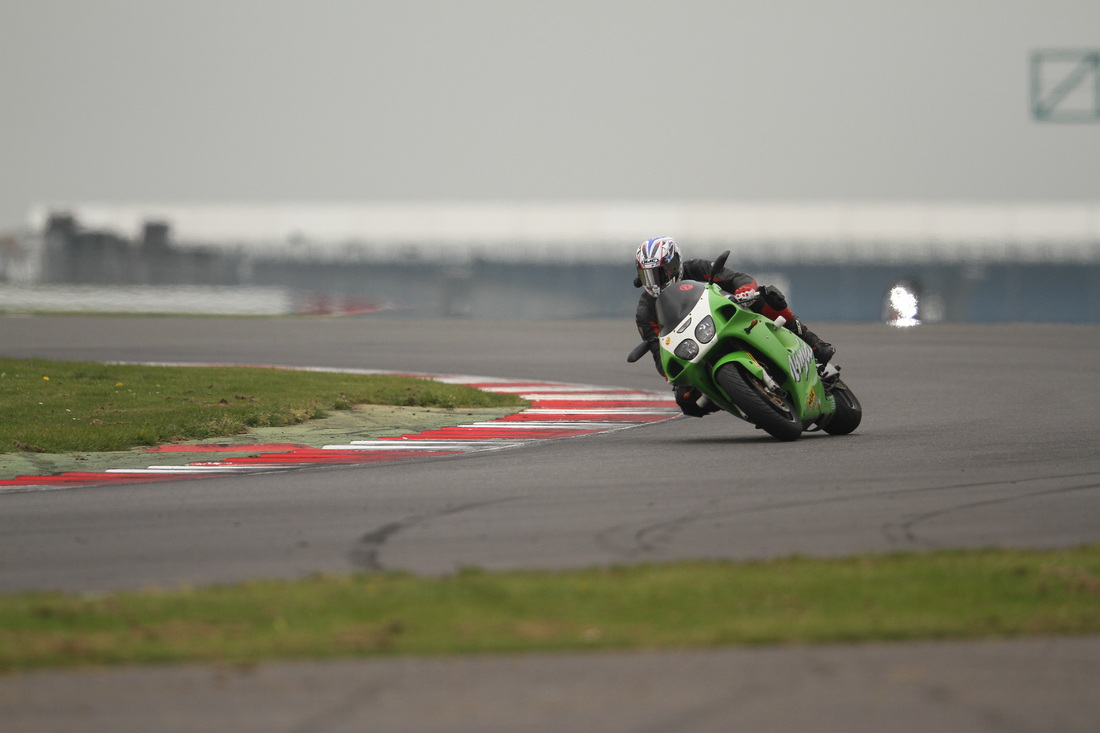
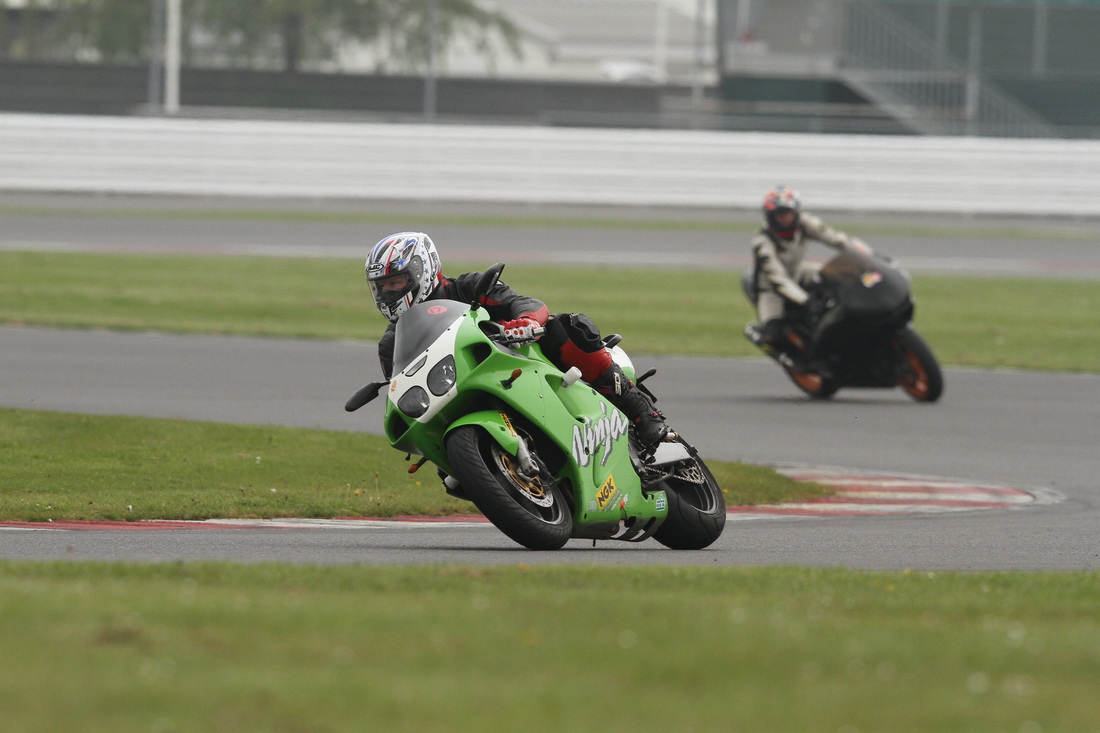
Different to the Zx7RR, the homologated bike Kawasaki used for Superbike Racing which came with flat side carbs, a multi adjustable chassis, better suspension and a different gear box, the Zx7r was intended to be used on the road as well as the racetrack. Riders the world over have praised the chassis, especially the front end, which has a great reputation for feedback and stability. I have heard many a rider say that it is one of the best looking bikes Kawasaki even made.
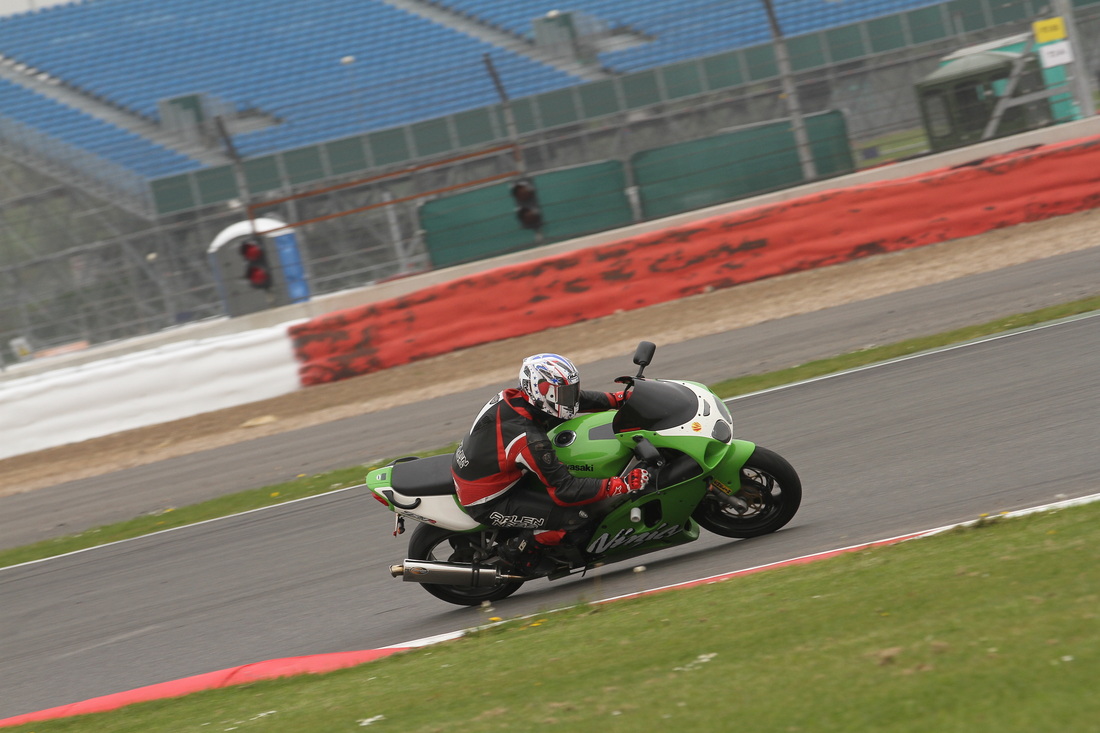
Compared to modern bikes, the 7 is, well, how can I put this, a bit of an elephant. It’s a big heavy bike, admittedly not in the same league as a ZZR-1400, but if you compare it to a modern 1000cc bike, or even the GSXR 750 it was competing with during the ‘90s, she’s a big old bird. This isn’t necessarily a bad thing, as in the real world that extra size and bulk makes it that much easier to ride. For a sportsbike, it’s comfy and it’s roomy and that comes from a man who is 6’3. In all my years riding it, I have never had cramp. The only discomfort I feel is normally after an hour of so filtering out of London in heavy traffic, then the riding position starts taking its toll on my upper arms and if I’ve been riding for more than three hours, by knees stiffen up, but this is a Sportsbike, not a tourer.
The Zx7R was always a fairly basic bike, but it is powered by a 749cc, Double Overhead Cam (DOHC), four stoke, inline four engine which produces 57.9lb of torque at 9,300 RPM, with a claimed maximum BHP of 123, which will get the bike knocking on the door of 160 mph. If you’re brave/stupid enough to ride one that fast, you’ll be happy to know that the 320mm twin discs will be grabbed by six piston Tokico callipers. Keeping the wheels on the ground, the standard bike came with adjustable suspension front and rear.
Different to the Zx7RR, the homologated bike Kawasaki used for Superbike Racing which came with flat side carbs, a multi adjustable chassis, better suspension and a different gear box, the Zx7r was intended to be used on the road as well as the racetrack. Riders the world over have praised the chassis, especially the front end, which has a great reputation for feedback and stability. I have heard many a rider say that it is one of the best looking bikes Kawasaki even made.
Compared to modern bikes, the 7 is, well, how can I put this, a bit of an elephant. It’s a big heavy bike, admittedly not in the same league as a ZZR-1400, but if you compare it to a modern 1000cc bike, or even the GSXR 750 it was competing with during the ‘90s, she’s a big old bird. This isn’t necessarily a bad thing, as in the real world that extra size and bulk makes it that much easier to ride. For a sportsbike, it’s comfy and it’s roomy and that comes from a man who is 6’3. In all my years riding it, I have never had cramp. The only discomfort I feel is normally after an hour of so filtering out of London in heavy traffic, then the riding position starts taking its toll on my upper arms and if I’ve been riding for more than three hours, by knees stiffen up, but this is a Sportsbike, not a tourer.
The Zx7R was always a fairly basic bike, but it is powered by a 749cc, Double Overhead Cam (DOHC), four stoke, inline four engine which produces 57.9lb of torque at 9,300 RPM, with a claimed maximum BHP of 123, which will get the bike knocking on the door of 160 mph. If you’re brave/stupid enough to ride one that fast, you’ll be happy to know that the 320mm twin discs will be grabbed by six piston Tokico callipers. Keeping the wheels on the ground, the standard bike came with adjustable suspension front and rear.
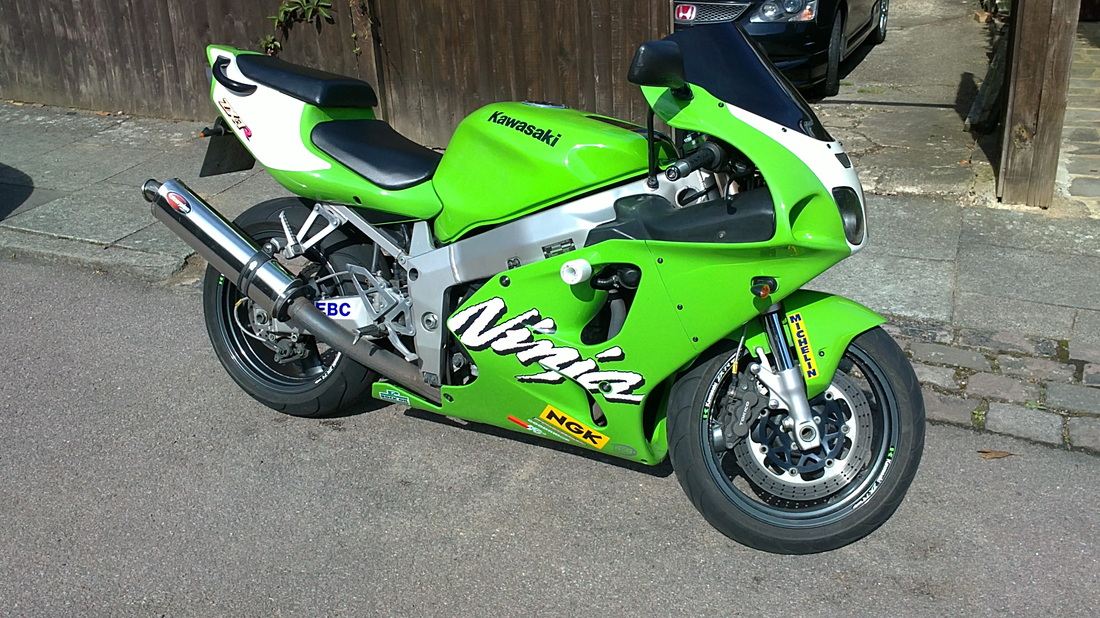
Bike SpecsFrame Twin spar, aluminium
Rake angle 25 degrees Trail 99mm Wheelbase 1435mm Length 2090mm Height 1130mm Width 740mm Seat Height 790mm Weight (dry) 203kg Capacity 749cc Bore 73mm Stoke 44.7mm Comp Ratio 11.5:1 Tank size 18L (including reserve) |
Why A Zx7R?I was looking for a second bike, predominately to use on track and I didn’t want to, nor did I have £3k to do so. I was looking more at £1500 and made a short list which included an early R6, A GSXR 750, A Ducati 600SS and the Zx7R. After doing some ebay searches I found a Ninja one up for sale at £1500 down in Gravesend. I was watching it for a few days thinking I should offer him £1200, when it was bought up by somebody else. Knowing I’d missed out, I dropped the seller an email saying that if the sale fell through, to let me know, as I’d be interested. I got a call, two days later and was told the the sale had indeed fallen through and was asked if I was still interested. I was and we arranged a test ride for the following Saturday.
I drove down on a very sunny February afternoon, met the seller and took the bike out for the first time. I felt good, the engine pulled and didn't jump of our gear when under power, but the brakes seemed a bit spongy. I stopped at a local supermarket and gave the bike a good look over. There were so signs of abuse and it clearly hadn't been dropped and I knew I could sort the brakes. I was very interested and rode back to talk to the seller. It turns out he just wasn't using the bike which it was why it was up for sale. He had agreed on £1200 with the person who reneged and I was happy to match it so the deal was done. I had myself a Zx7r, in green naturally. |
mods and sods
R&G heated grips and bar ends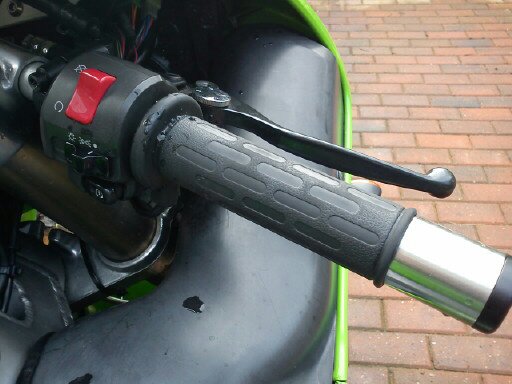
I've been riding into Central London all year round since 2007 and have been sick and tired of getting cold hands in the winter, so this summer (2012) I rocked up to Metropolis and got these fitted. I had already changed the horrid grips the bike came with a pair of Progrips which will probably now find a home of the Ducati, but now I get the benefit. They heat up quickly and really help heat up the palms of the hands. The back of the hand and the fingers especially tend to stay cold as they are more exposed to the cold levers and the cold air, but all in all, a really great purchase. The Bar ends replaced the tatty originals and were put on at the same time and for the the same reasons as the crash mushrooms.
goodridge braided hoses
The bike came to me, still with the original hoses attached. In order to improve the braking performance I replaced the tired originals with some braided hoses by Goodridge. I was so impressed with them that I replaced the hyrdaliuc clutch hose with a matching replacement as well.
philips motovision headlight bulbs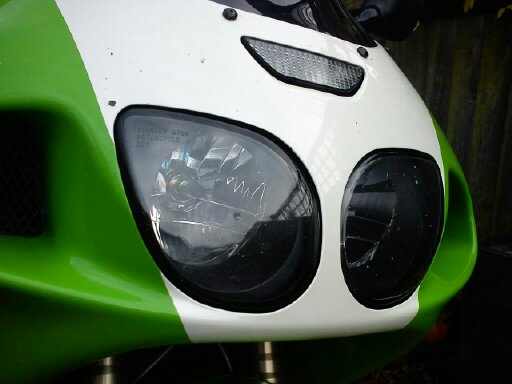
Despite being able to turn my headlights off, I still make a point of riding with them on at all times. These Philips Motovision bulbs replace the originals, but have a slight but distinctive orange reflection which helps the bike stand out against the other road users. A simple but a very effective upgrade
Renthal rear sprocket
It didn't take long before, what appeared to be the original chain and sprockets, to prove themselves past their sell by date. I ordered a new set online and with a little help from the guys at North London Motorcycle, got these fitted. A chain is a chain, but this sprocket is slightly lighter then the OEM part, plus when its clean, the gold looks pretty good. I decided to keep the number of teeth the same as I was and indeed still am happy with the performance of the bike.
|
EBC Discs and nissin four pots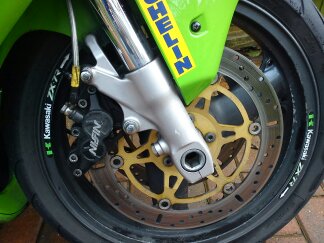
Even when I bought the bike, I was never really happy with the brakes. The original six piston Tokicos felt very spongy compared to my Z1000 and after my first trackday on the bike, the discs appeared to be warped. I cleaned them up and changed the hoses to some braided Goodridge ones (see below 'First job. The Brakes') but that didn't cure the problem. I picked up a set of refurbished Nissin calipers off Ebay, which were a straight swap and I went for the EBC Pro Lites, which are better and cheaper than the OEM parts. Now the brakes are spot on with very little travel at the level, but still great levels of feel and power. Handy really when you realise how heavy the bike it.
replacement screen
Again the big black screen came with the bike and looking at the state of the original, this looks a lot nicer. There are a few down sides to it. When crouched down, you can't see through it and when I'm riding it seems to direct the wind blast at my neck, which then comes up into my helmet and, if cold enough, makes my eyes water. Not ideal. This decal you can see in the photo was provided by one of the many great people on, ironically enough, the Ducati forum
R&G tail tidy
Again the bike came with a R&G tail tidy when I bought the bike, but after one to many knocks but other riders in Central London, the number plate hanger snapped across the middle. I sourced a piece of plastic and replaced the broken part and was able to secure the indicators on with the original R&G equipment.
Oberon footpegs
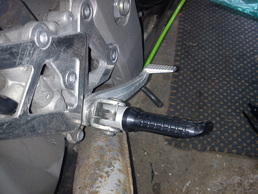
For a bike that is over thirteen years old the original rubber footpegs were knackered, especially the left one. I found myself slipping in the rain and it wasn't much better in the dry. After speaking with the Oberon guys at Motorcycle live in 2011, I ordered these anodised replacements. They look much better and in the dry, the levels are grip are excellent but in the wet they are terrible. I find myself having to lock my heel into the peg to guarantee my feet don't move when I have to shift my weight. Some of the black colouring quickly wore off, but the have taken some abuse pretty well, especially at Rockingham where I started to wear away the ends of each peg.
|
r&g Crash mushrooms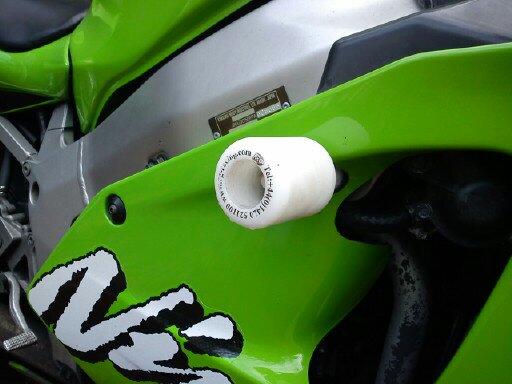
I Iput these on before I took the bike to the track, just for peace of mind really. Drilling the fairing was a total palaver and I had to open up the hole in the fairing before everything went back together easily. I went for white over the traditional black as they looked less out of place and sort of go with the white of the 'Ninja' logo. Thankfully I haven't tested them properly at the track, but they did help when I dropped the bike in the car park at the Little Chef on the A3 at Wisley. The bike came to rest nicely on the mushrooms and rear grab handle. Crisis avoided
oxford mini indicators

The originals were long gone when I got the bike and when I broke one of the replacements when putting the bike back together after changing the brake lines, I decided to hunt down two sets (one for each end) with a slightly curved profile, which would suit the lines of the bike. My local Hein Gericke supplied these and thankfully they don't come with any faux carbon. The bulbs are very bright and fitting them was easier than I feared it would be.
Scorpion Exhaust
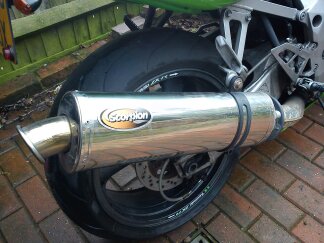
When I first got the bike this Scorpion exhaust came with it. I've still got the original end can in the garage, but haven't had to put it on for the MOT man as this Scorpion exhaust comes with a removable baffle. In the lower end of the rev range the exhaust gives a nice deep growl but when the revs get high, it creates a great screaming noise. Besides, its looks a darn sight better than the cannon that is the original.
stainless steel downpipes
After fourteen years the original mild steel pipes cracked and were beyond repair. I sourced these new from Sandy Bike spares via Ebay for £200 and they have proven to be vast improvement. Not only have they replaced the rusted mess that was there originally, vastly improving the look of the bike, but the bike seems to respond a little crisper to use throughout the rev range and coupled with the Scorpion end can, gives the exhaust a really solid fruity tone.
|
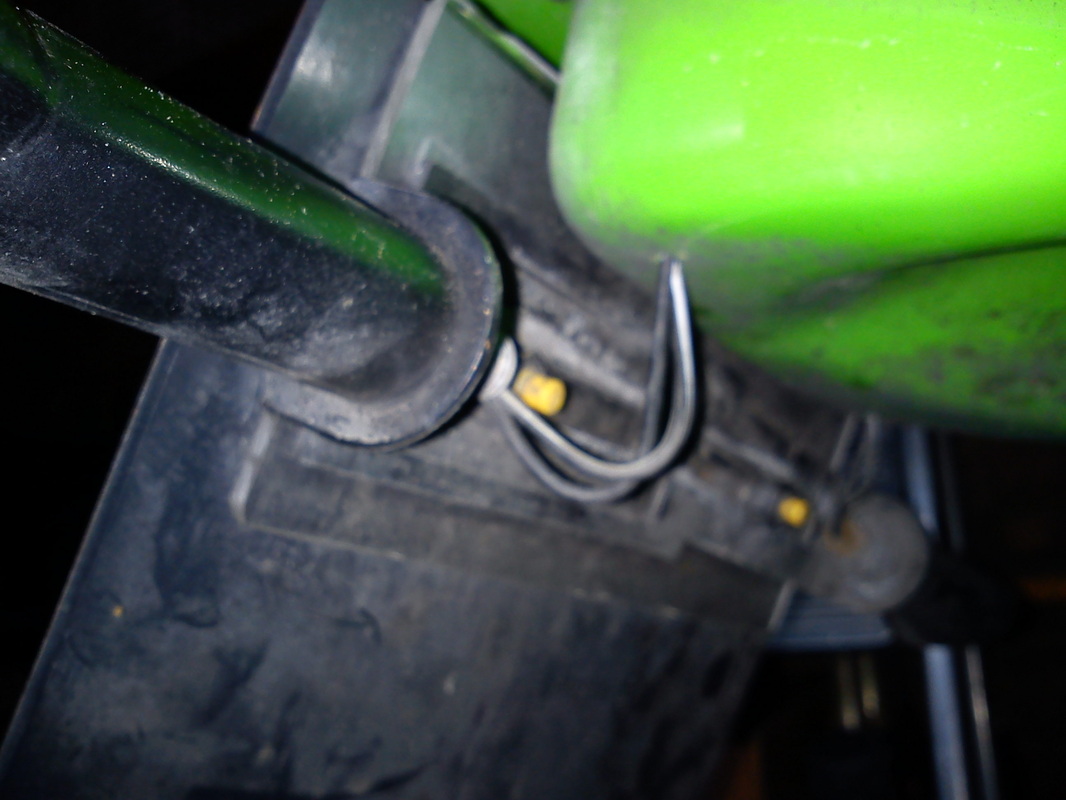
The first job. The brakesWell what a day, and I do mean all day. I started taking the brakes apart at 10:40ish in the morning after taking the fairings off the day before. The plan was to replace all the brake lines with the Goodridge braided lines that I picked up and at the same time change the front pads for some HH EBC pads, whilst leaving the back caliper alone. I decided to enjoy myself and take it nice and slow, making sure not to rush anything to avoid any mistakes. I started by draining the front, which led me to take off the front callipers to change to pads, clean etc. I worked out the best way to route the new hoses through and attached all the banjos up. Despite my best efforts this is where my mistake came. I misread the information regarding the torque settings and managed to sheer, not one, but two banjo bolts in the left calliper. I got the first out, but the second just wouldn’t budge. I cursed myself for being so stupid, but took the offending calliper to my friends at North London Motorcycle training, who really are a great bunch of people. The mechanic got the remains of the banjo out in less the two minutes. You would be amazed at how happy that made me. Back home after a quick detour to pick up some new crush washers and I put it all back, making sure not to over tighten the banjos. Moment of truth. I added the new brake fluid to populate the system. This took ages, probably because my technique was shocking, but eventually the lever stopping coming back to the bar.
Now the rear. To get to the rear reservoir I had to take off the rear panels, which turned out to be a true walk through history. What I found was some serious bodging with the wires and the fitting of an undertray. I found a scotoiler, which I had no idea was there, two rags stuck in one of the gaps and some coins, a twenty pence piece and two pennies . It really looks like an idiot had attached the undertray. A bit of jiggery pokery later and the rear line was drained, changed and was back up and running. The lines do look great, I chose the ones with the clear coating. I put the rear body work and the front fairing back on and just as I was putting my tools away I noticed one of the horrid clear indicators on the front fairing was hanging off. Turns out, that the plastic the holding the lens to the backing plate (on the inside of the fairing) had snapped. It was too late to fix it and my next stop was searching the web for a solution, which turned out to be some new indicators. I just have to work out a way to stop the indicator banging around too much in the meantime. Masking tape is great stuff isn’t it. All in all it was a great learning experience and despite a few setbacks it was great fun and has given more a great feeling of accomplishment. 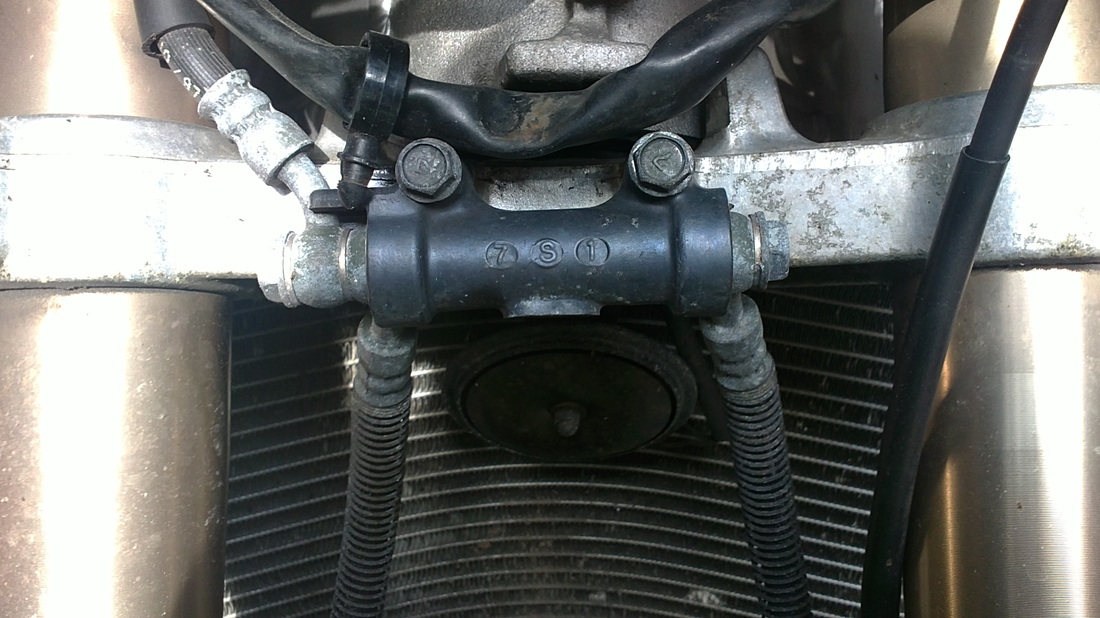 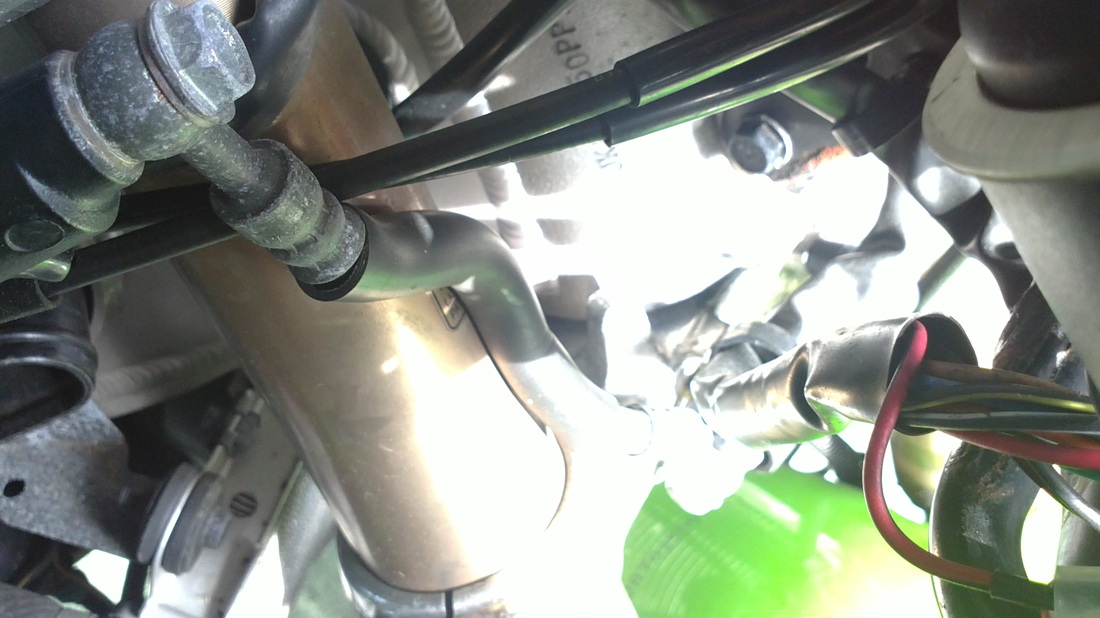 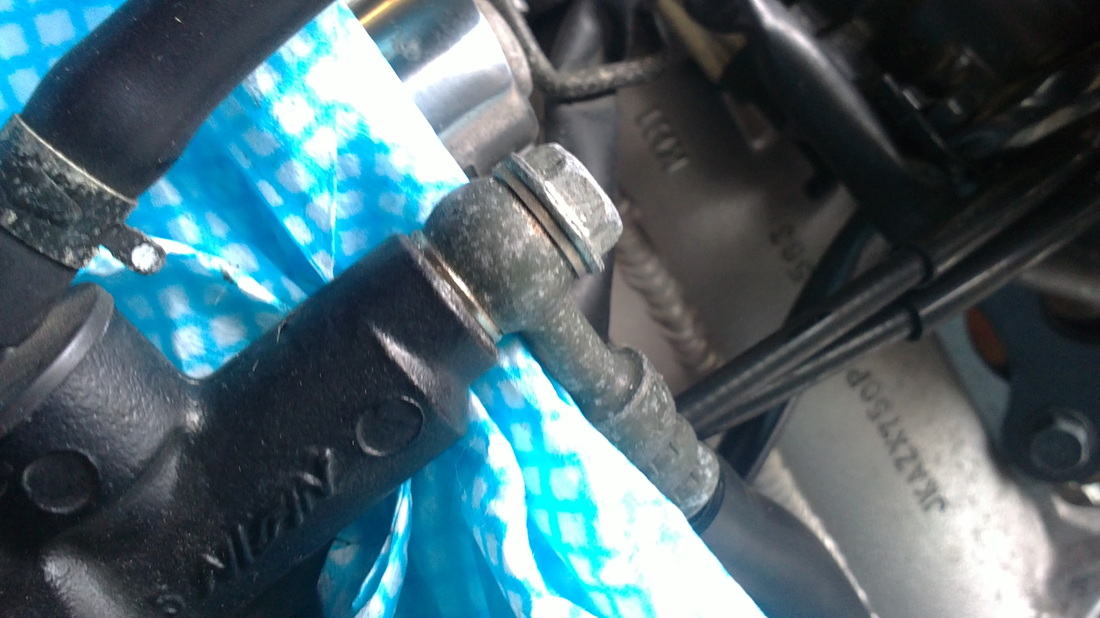 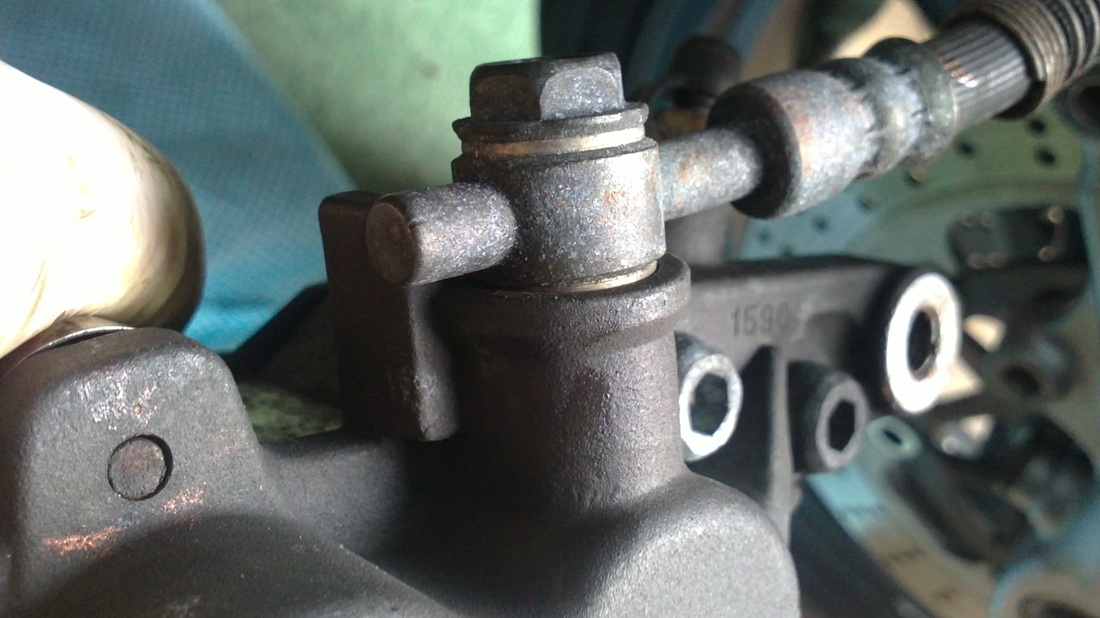 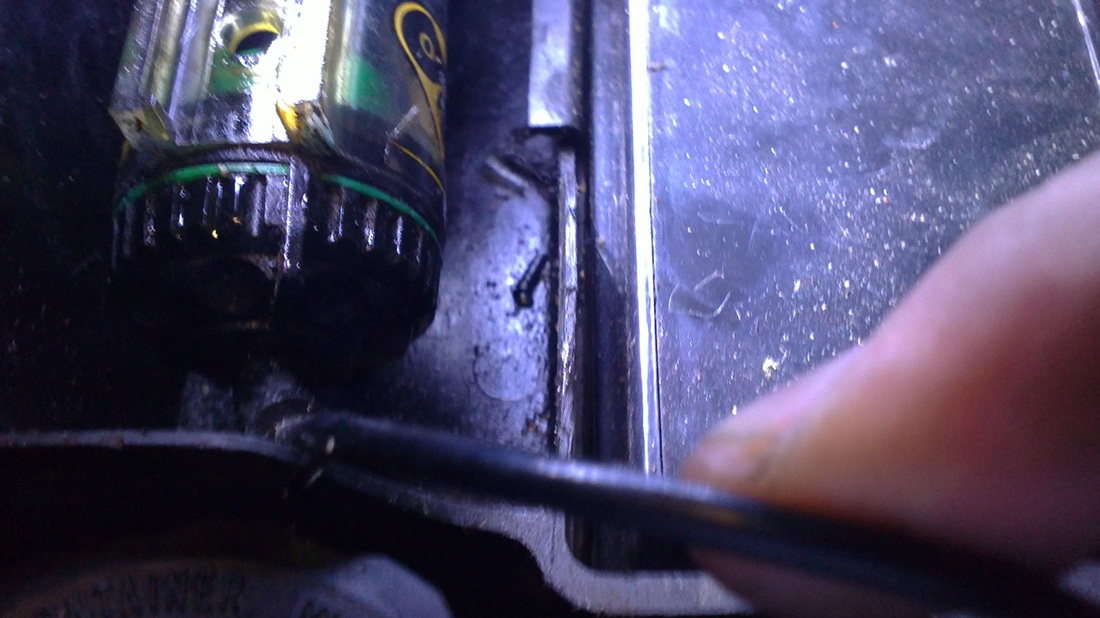 |
Home: March 2010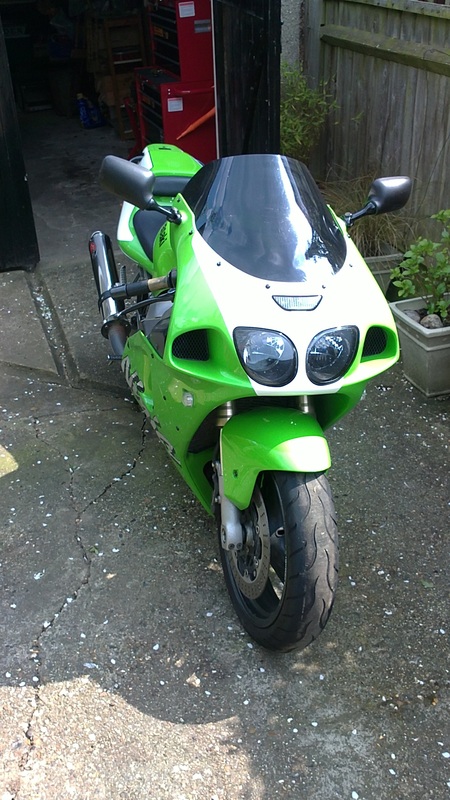  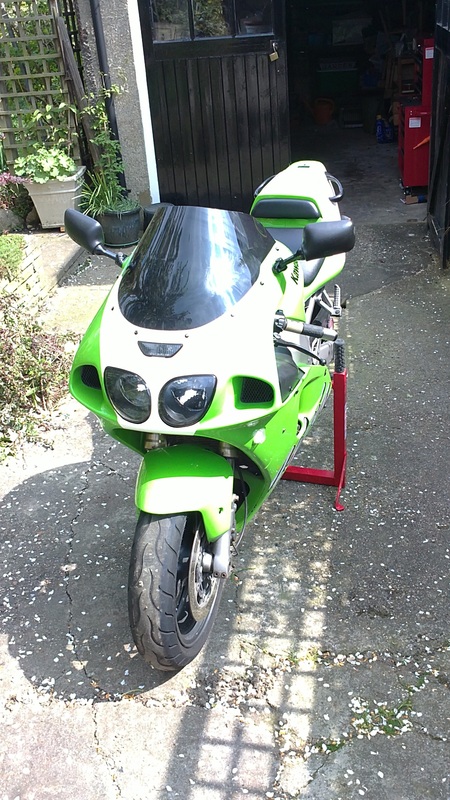 Brands hatch: july 2011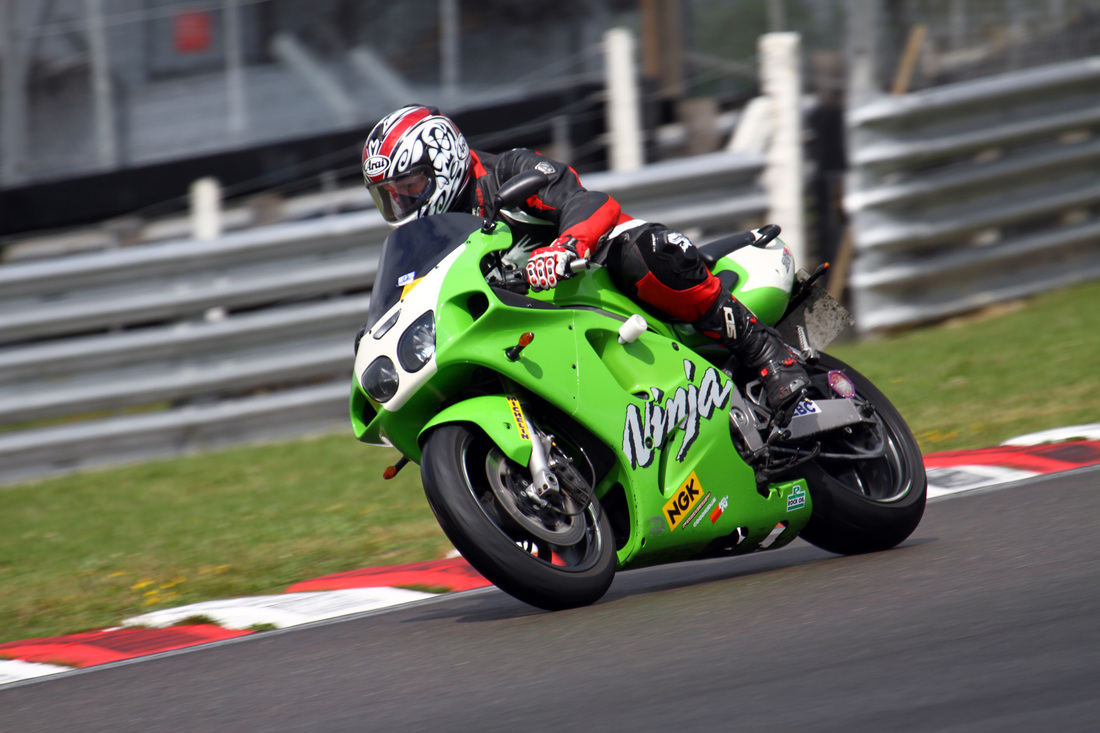 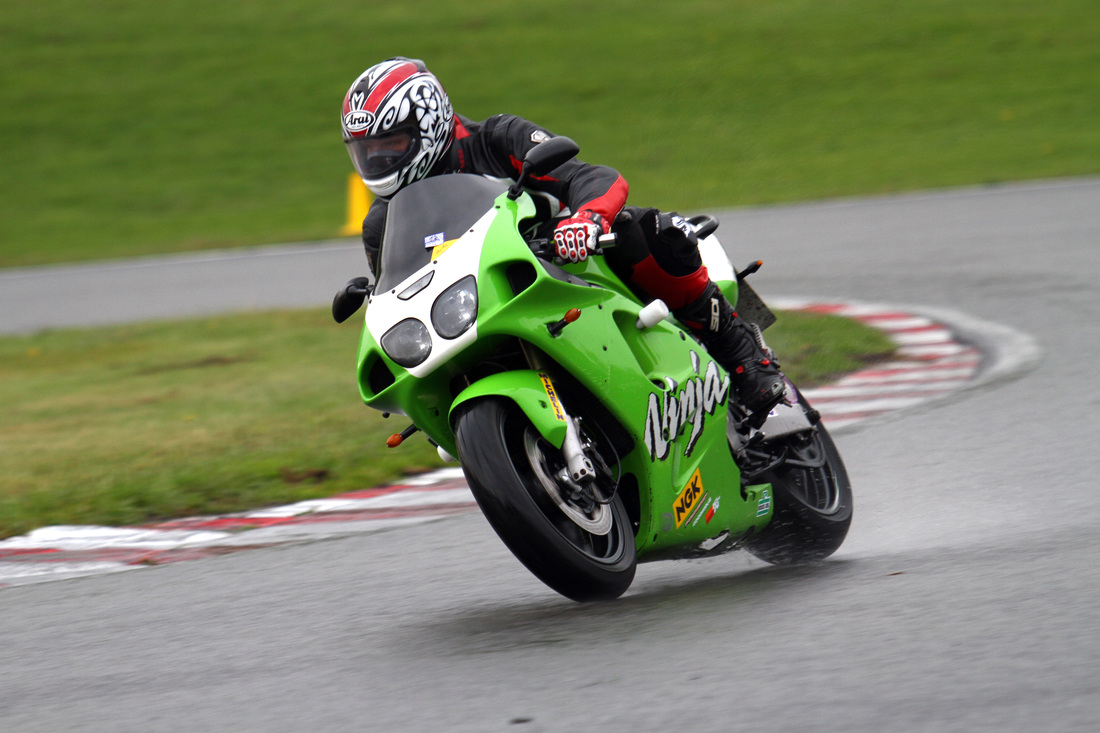  Snetterton: Aug 2011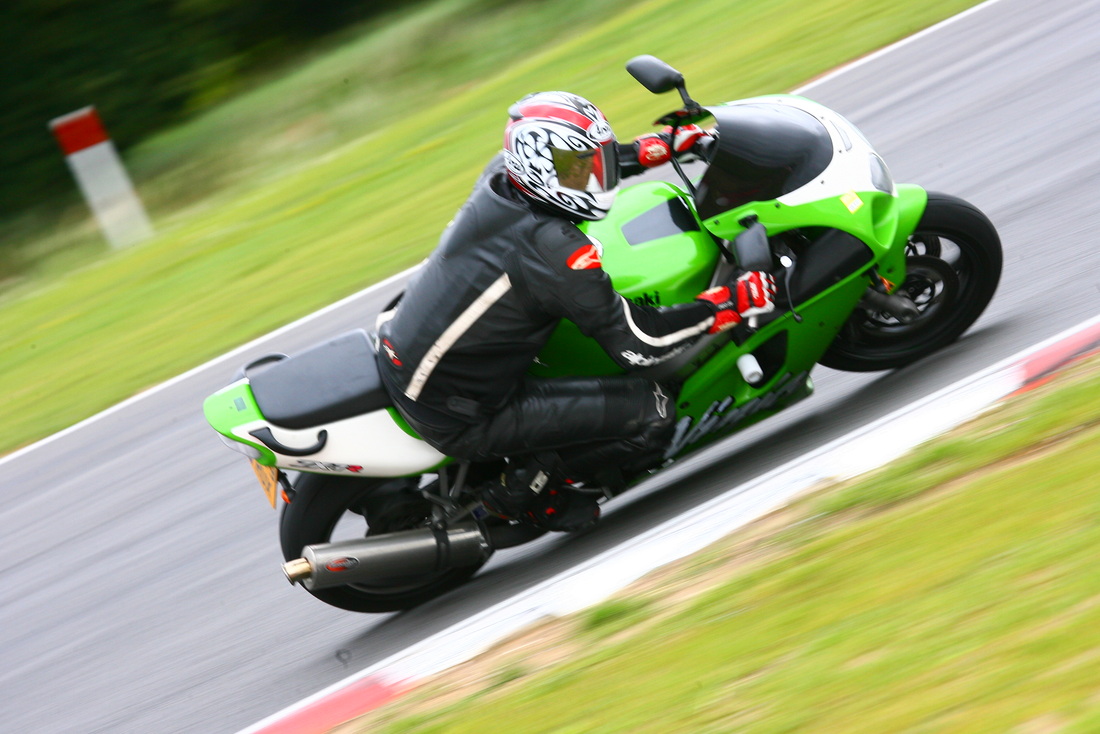 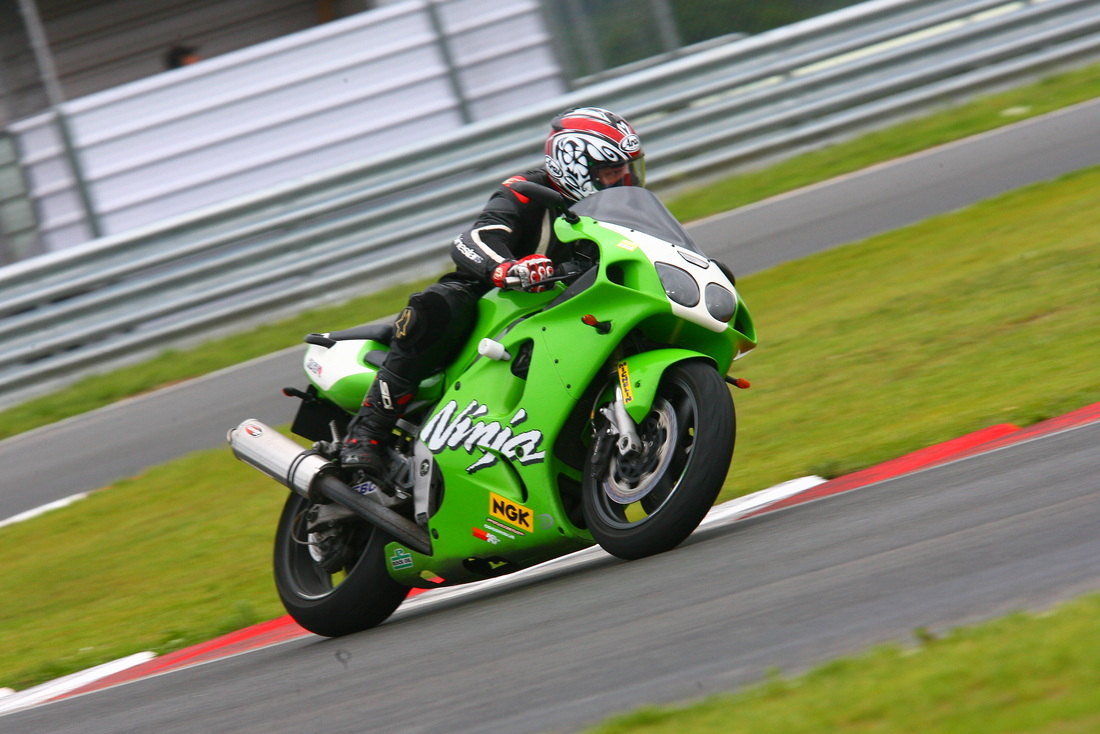 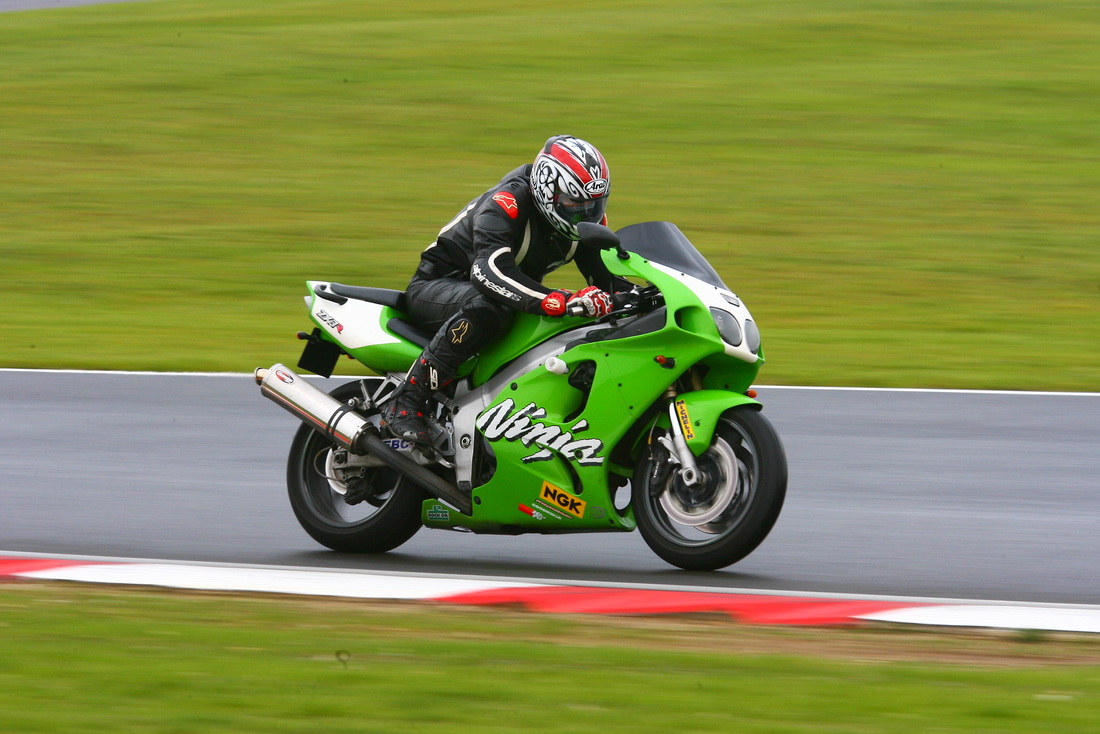 Rockingham: Aug 2012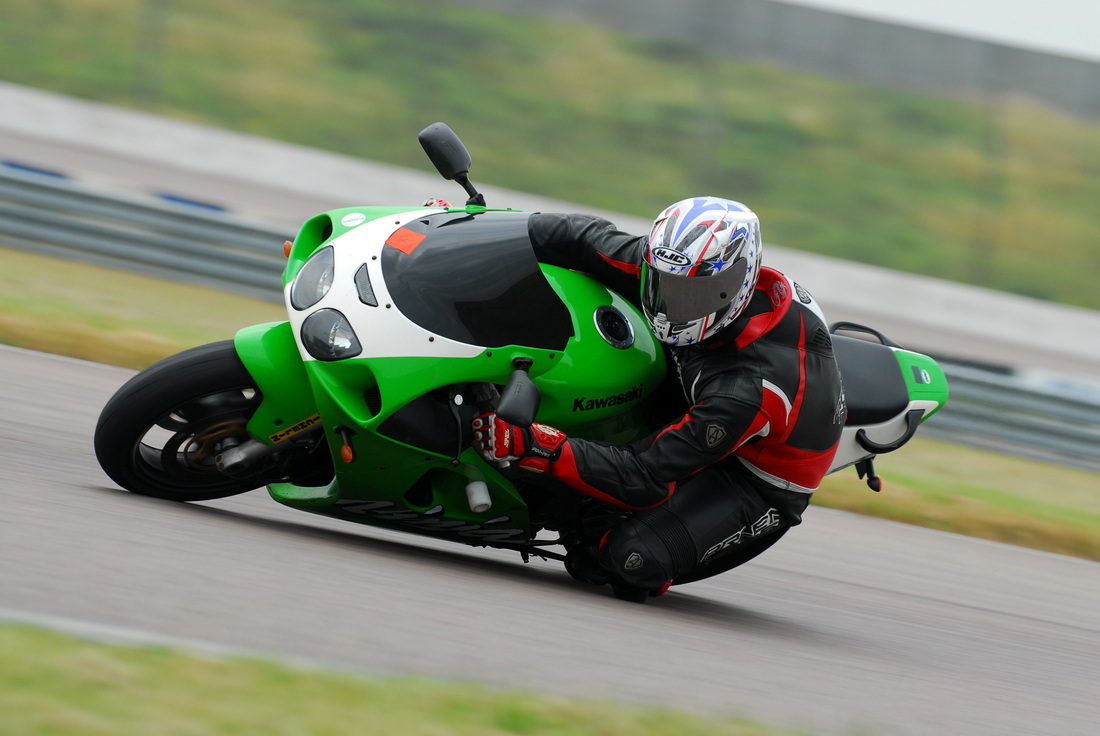 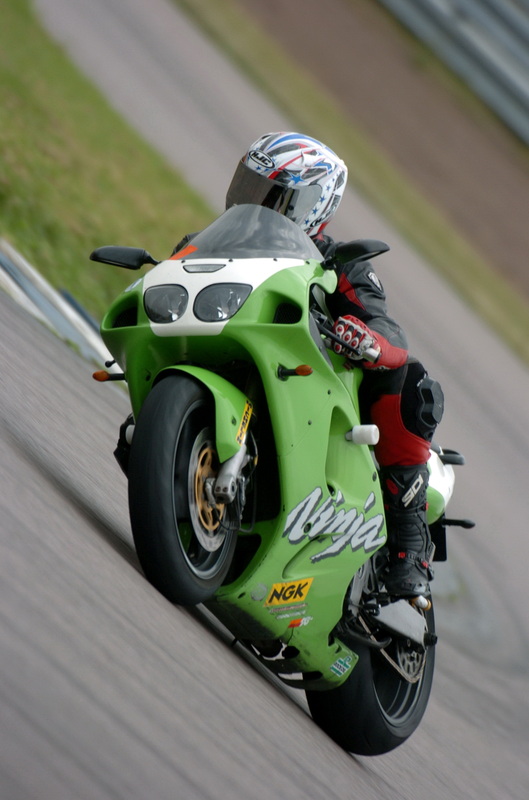 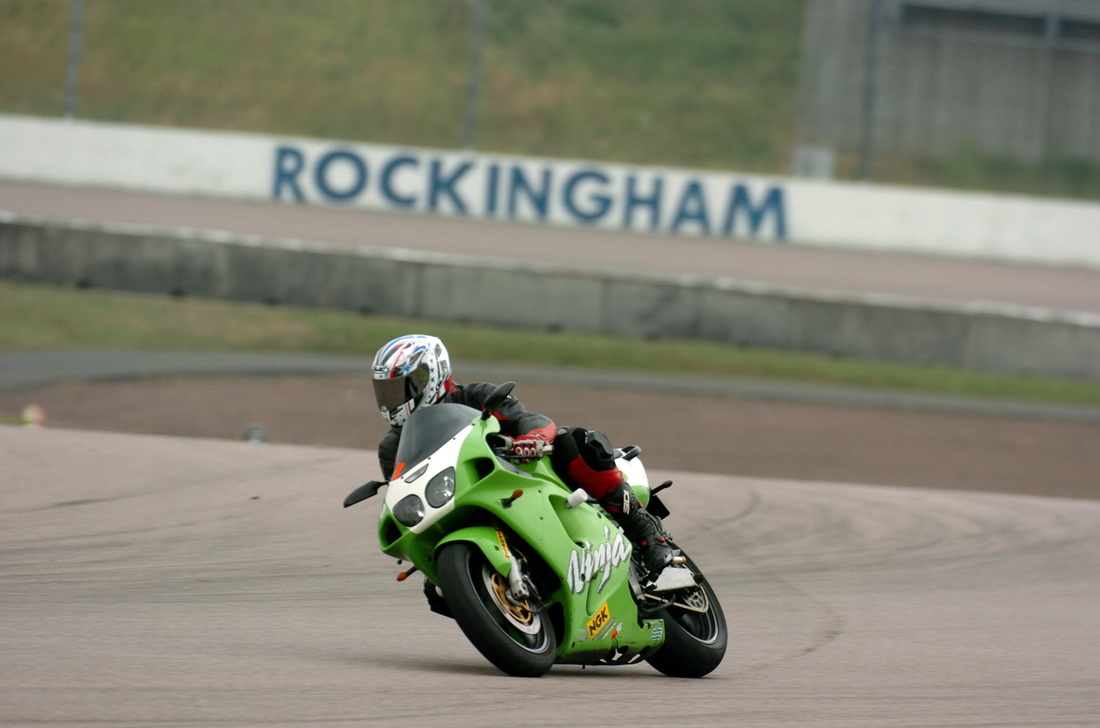 silverstone gp: may 2013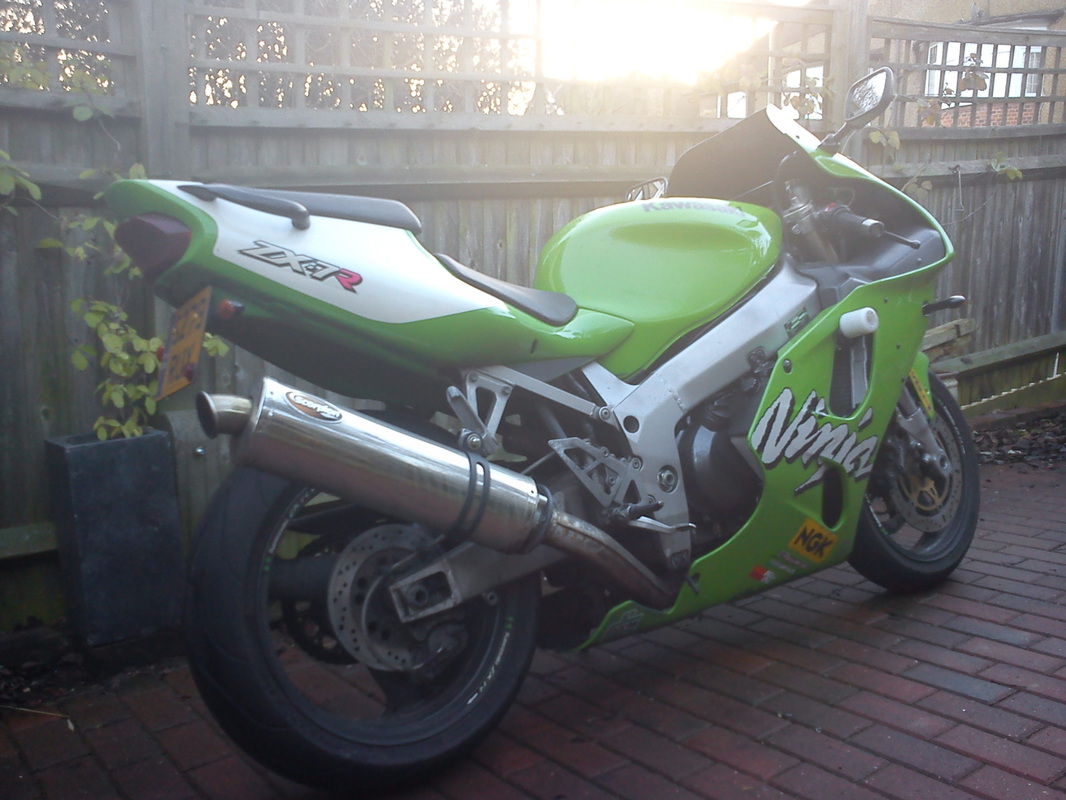
|