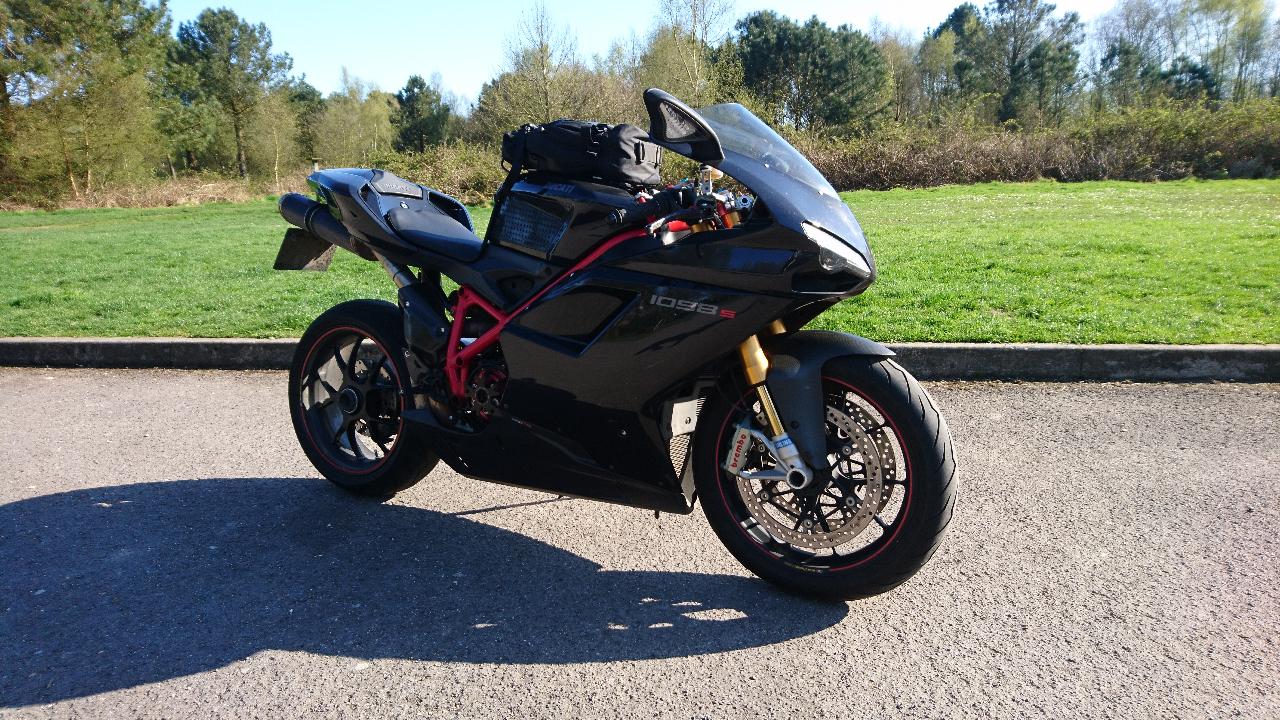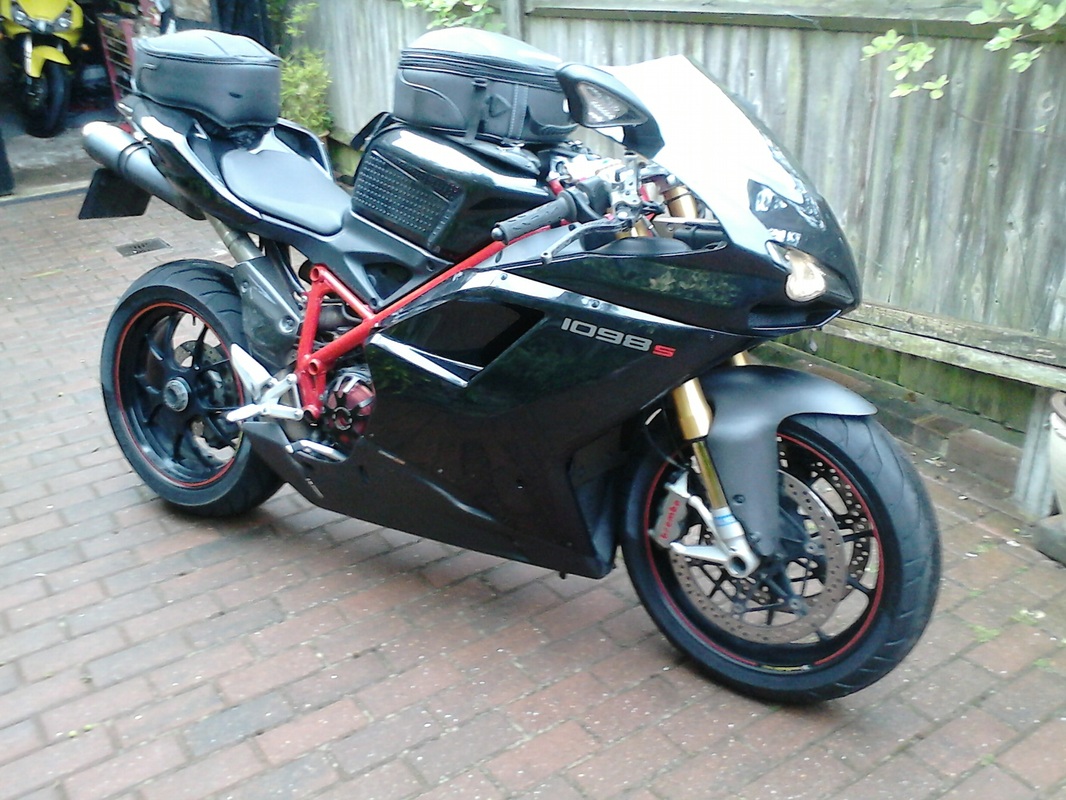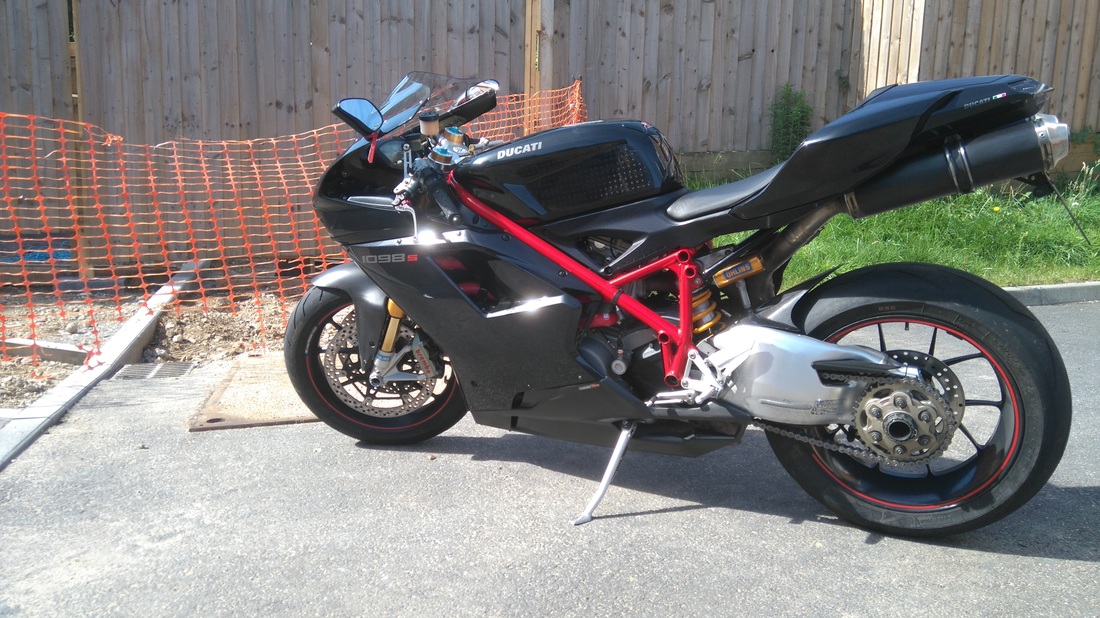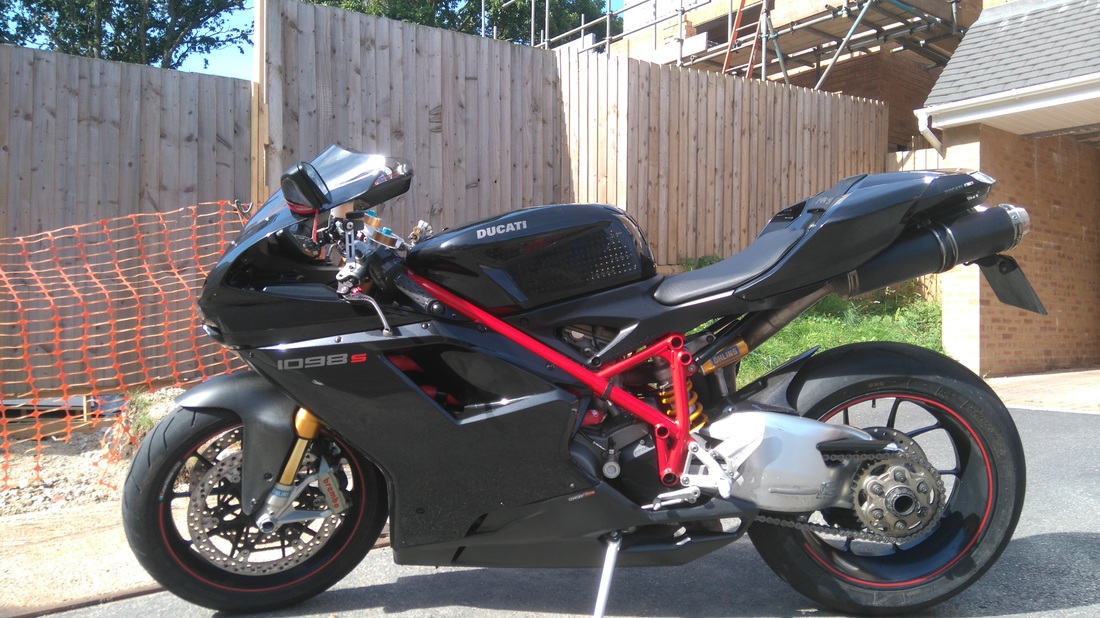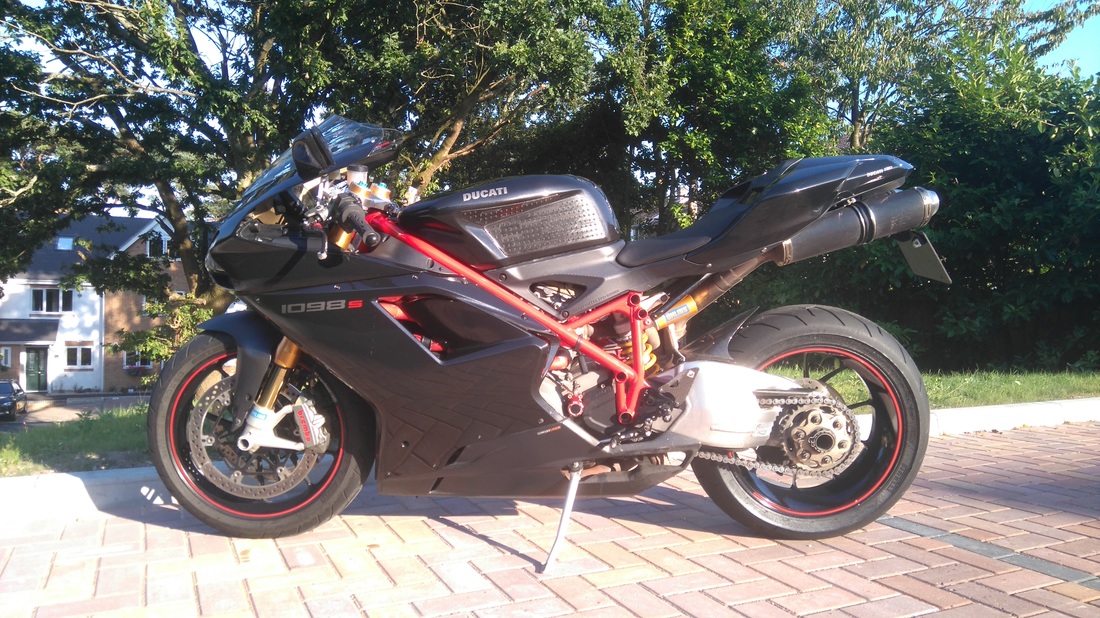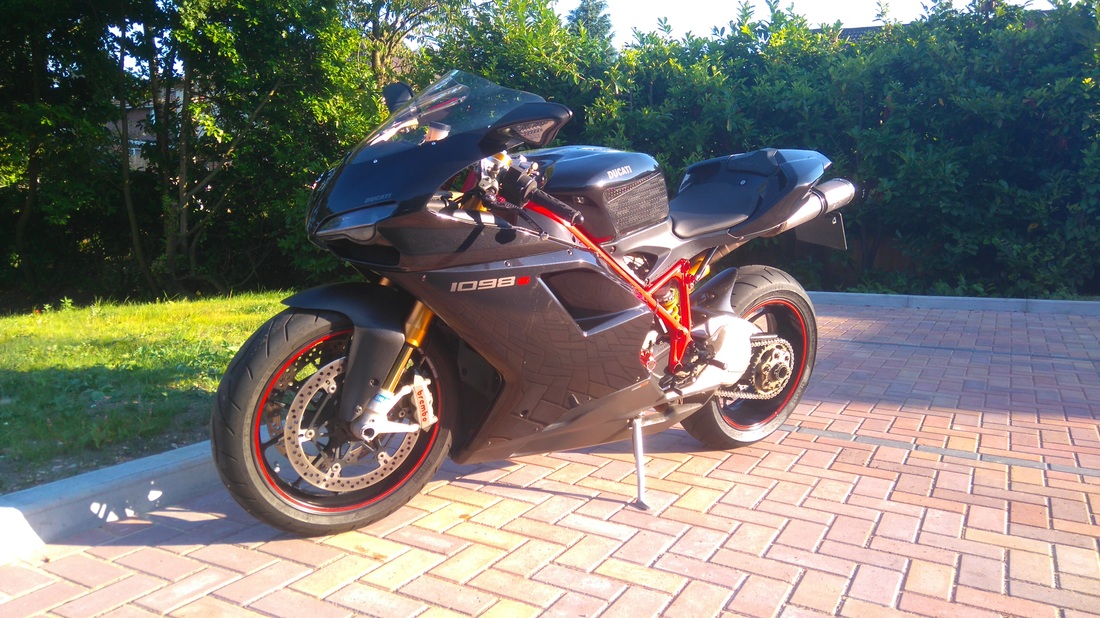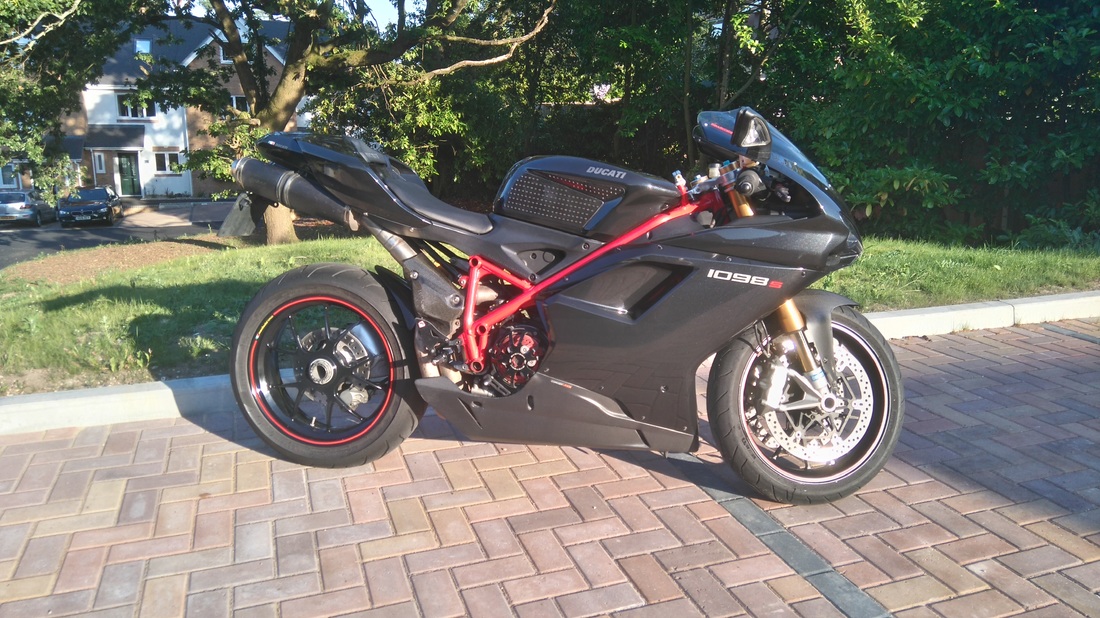
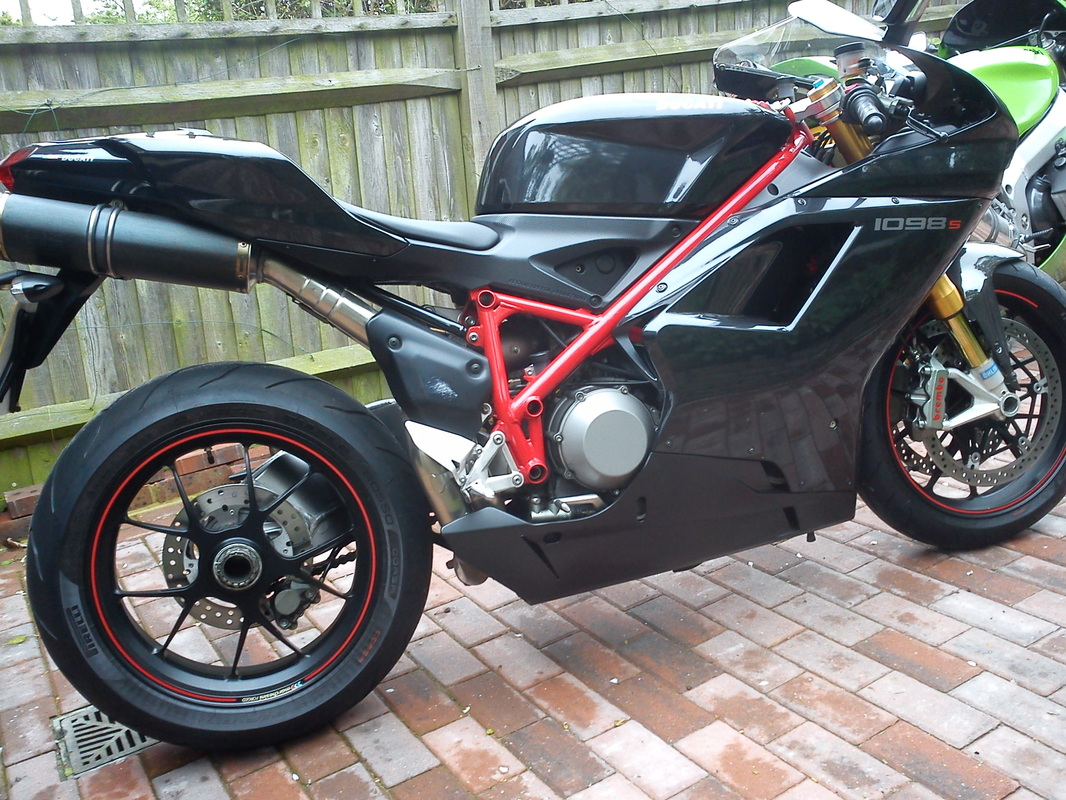
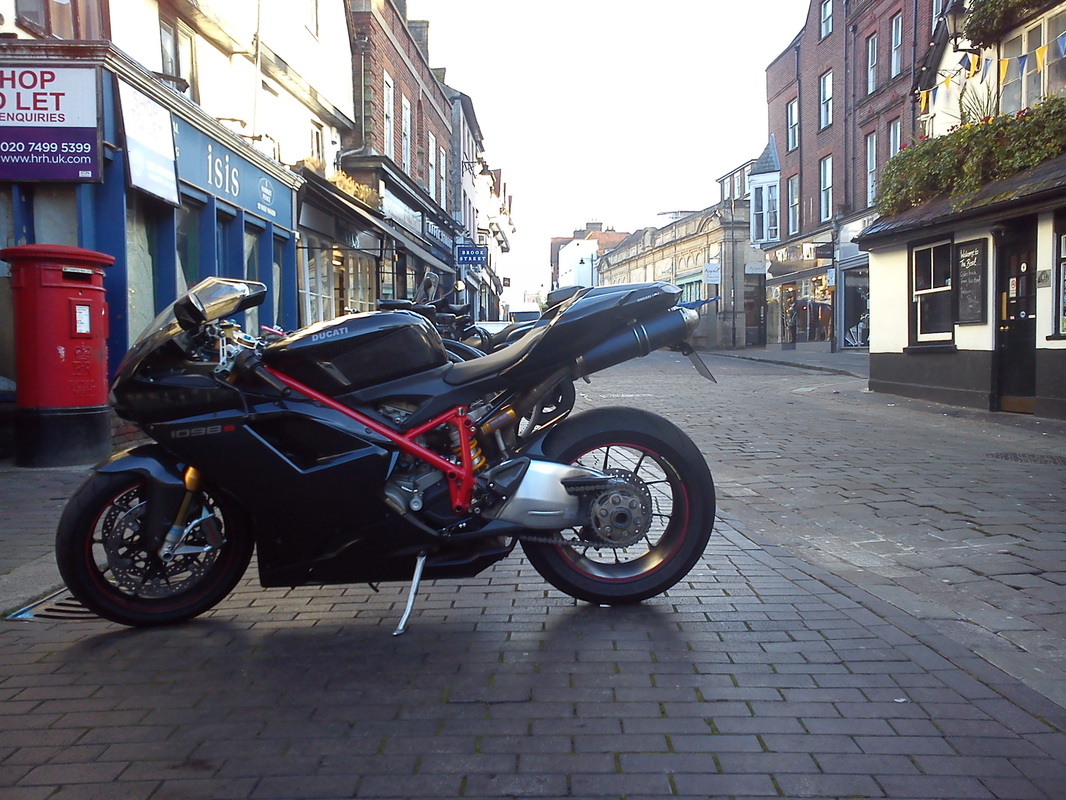
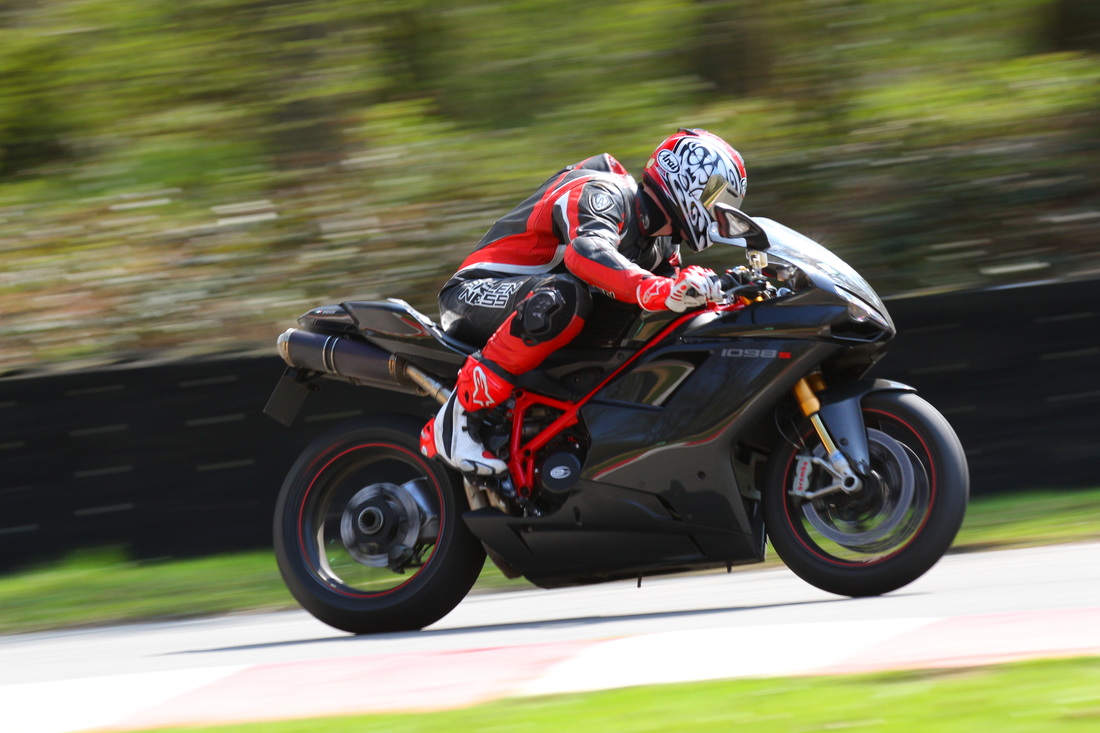
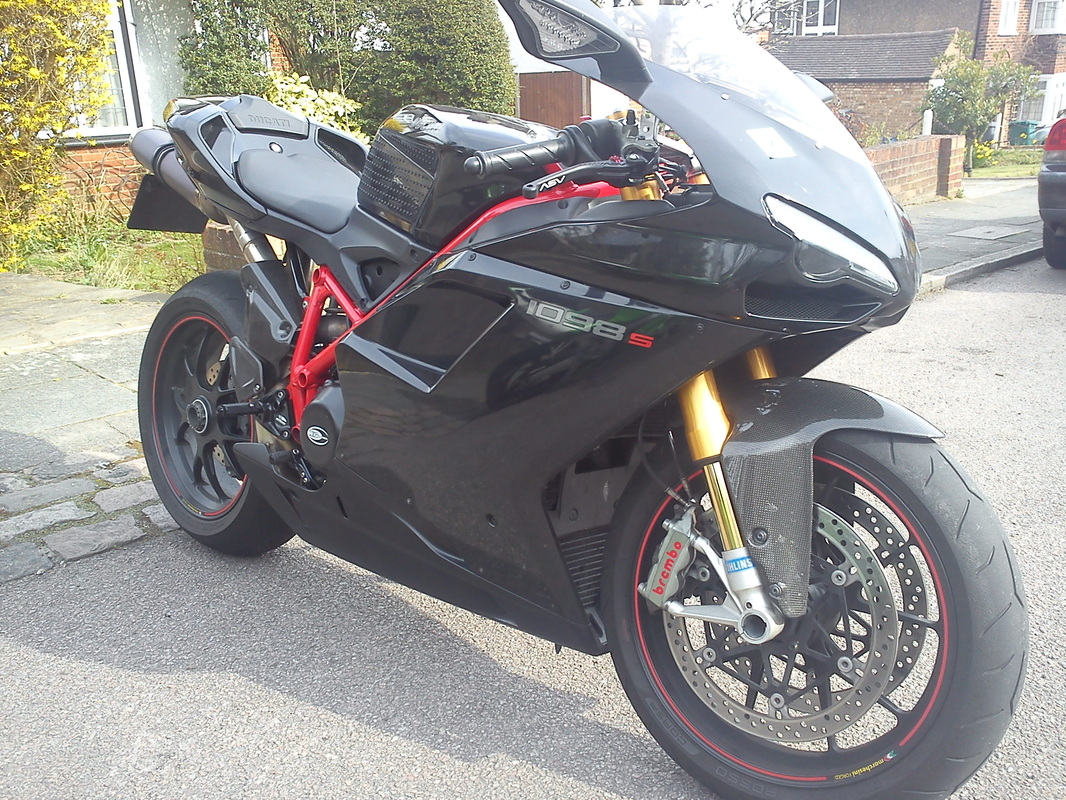
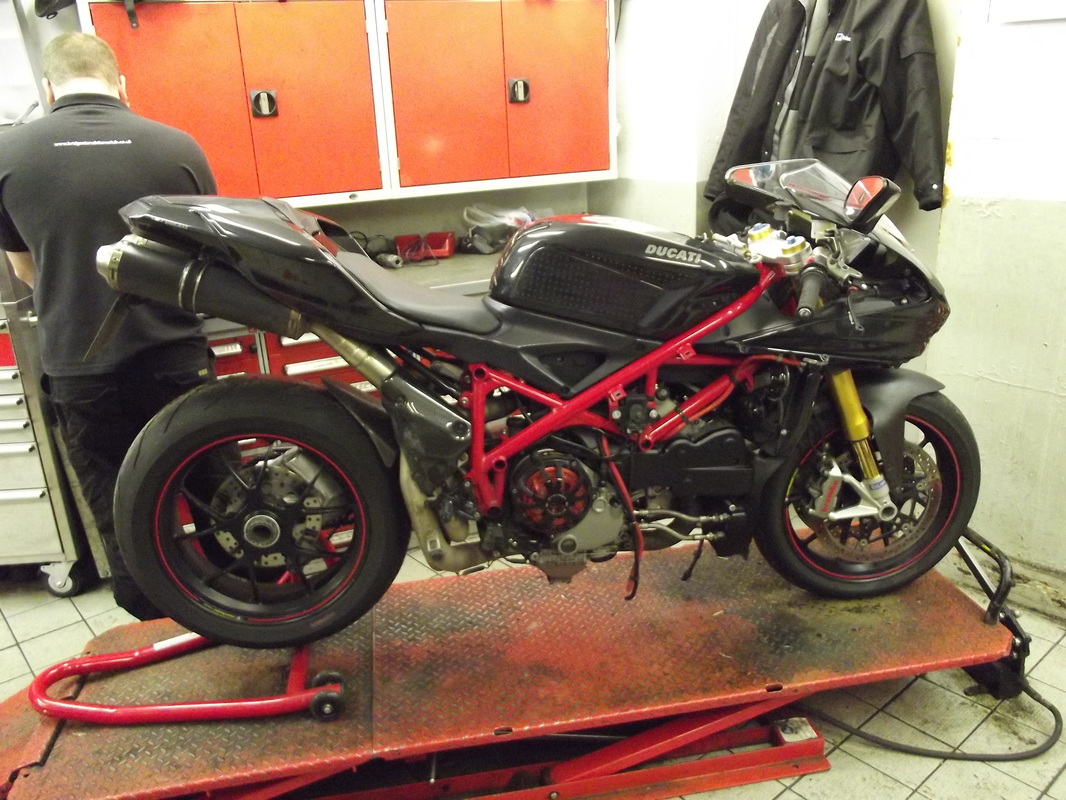
ducati 1098s 2012 -
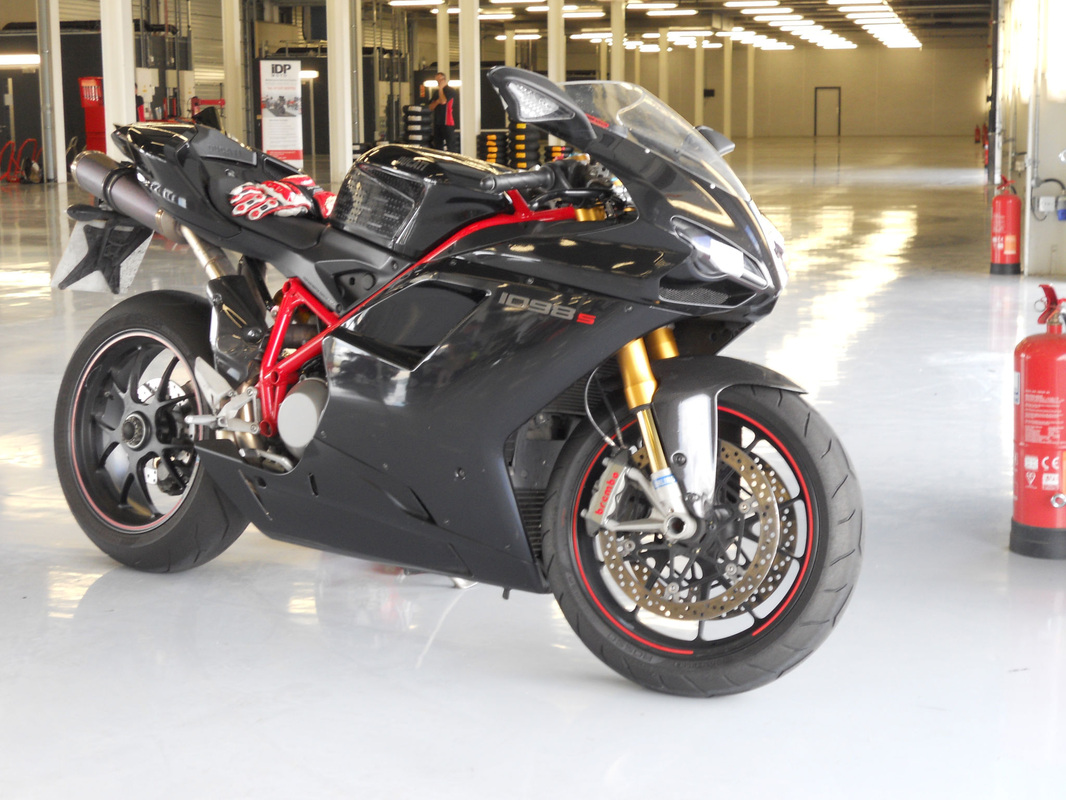
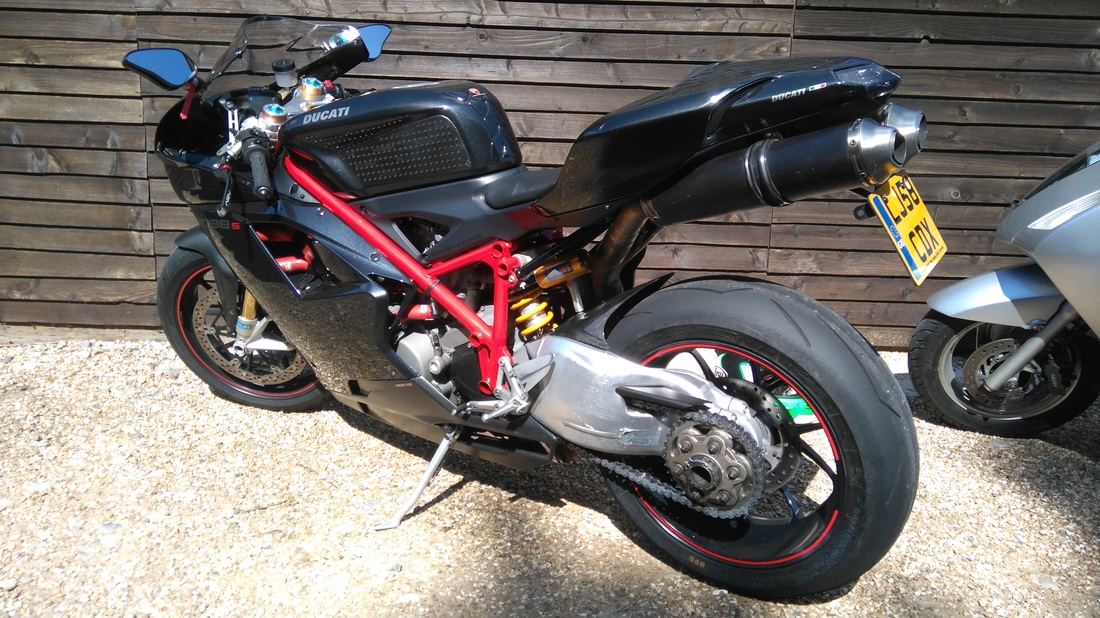
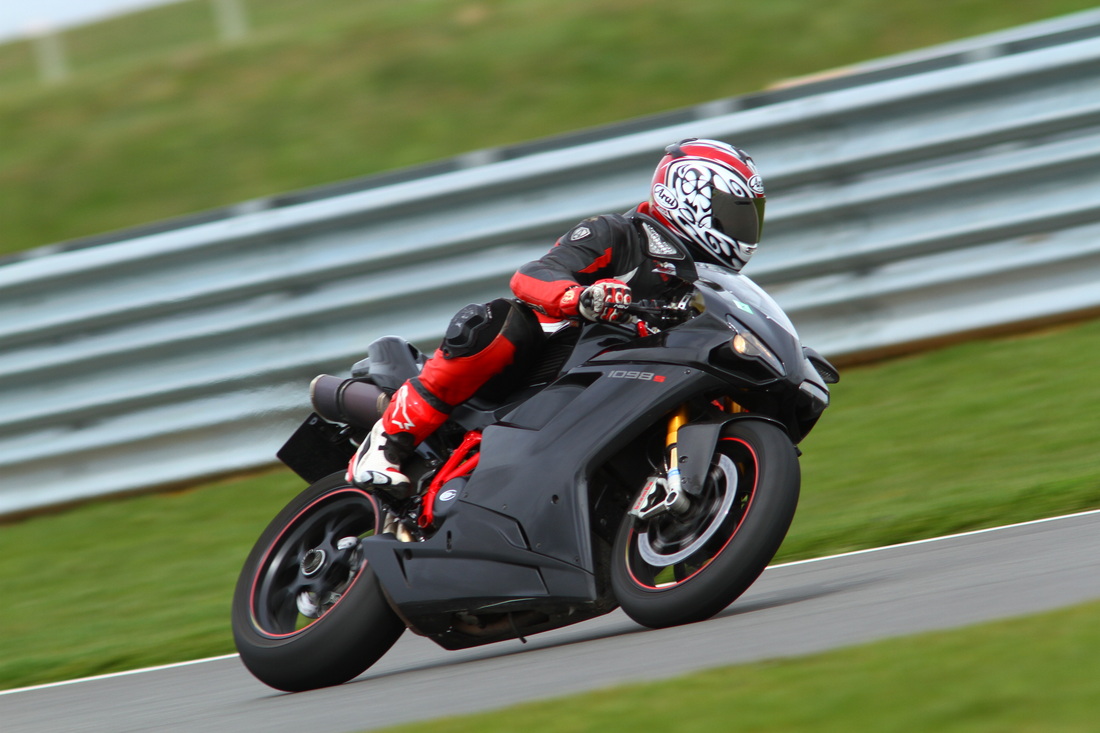
In 2007, Ducati released the 1098 and following the disappointing sales of the stellar 999, which was seen by some as a somewhat radical change of design, the new bike took its styling cues from the iconic 916 family. These included the twin oval underseat exhausts, the classy single sided swingarm and the layout of the headlights. Ducati released three variants; the standard 1098, the 1098s, which included higher spec Ohlins suspension and lighter wheels, and the 1098R which had all the benefits of the S, but was also slightly lighter and more powerful thanks to the revised bore and stoke values. It was this bike that was the basis for the World Superbike Championship, helping Troy Bayliss and Carlos Checa become World Champions.
Designed by Gianandrea Fabbo, Ducati senior designer, the 1098 is capable of reaching 180mph thanks to its 1099cc 90 degree Desmo V-Twin which kicks out 160bhp @9750rpm. When released, the 1098 was the most powerful production twin ever made. To give you some idea of the relentless pursuit of additional power, the current (2012) Ducati 1199 Panigale is knocking out 195bhp, from an engine that is only 100cc bigger.
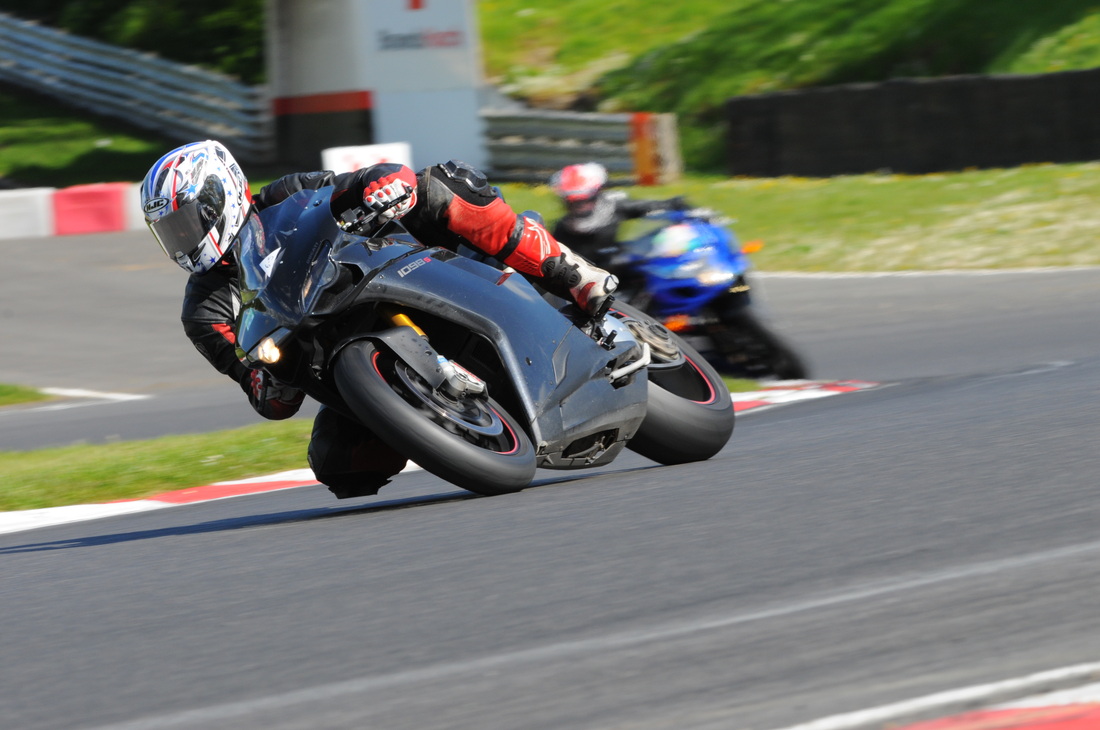
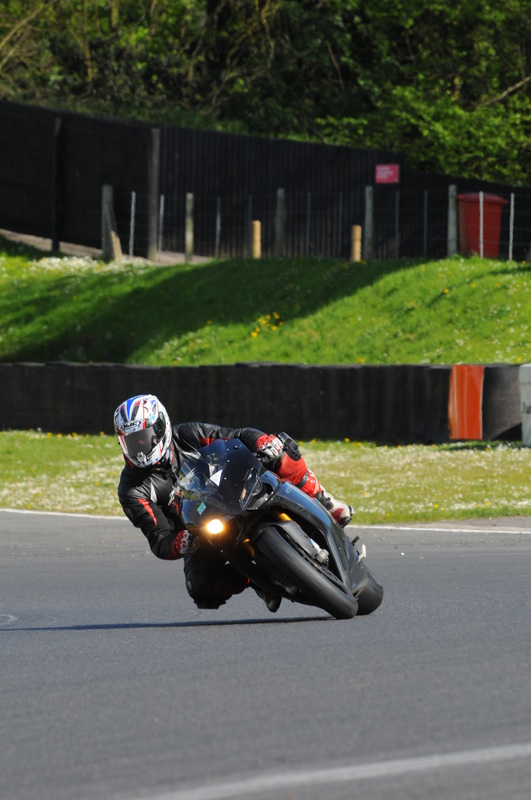
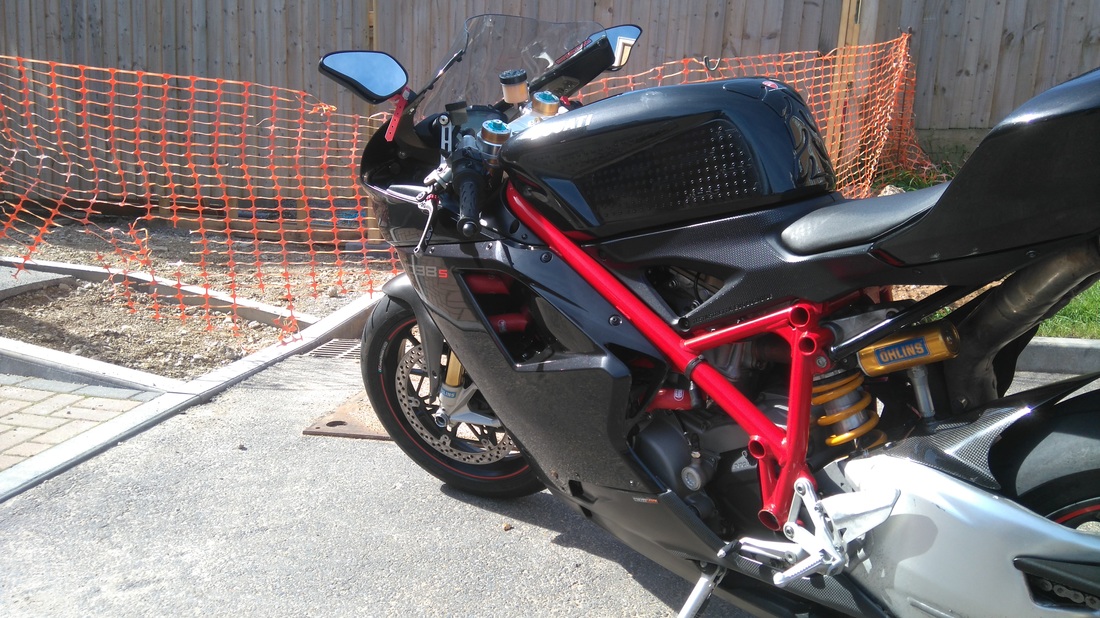
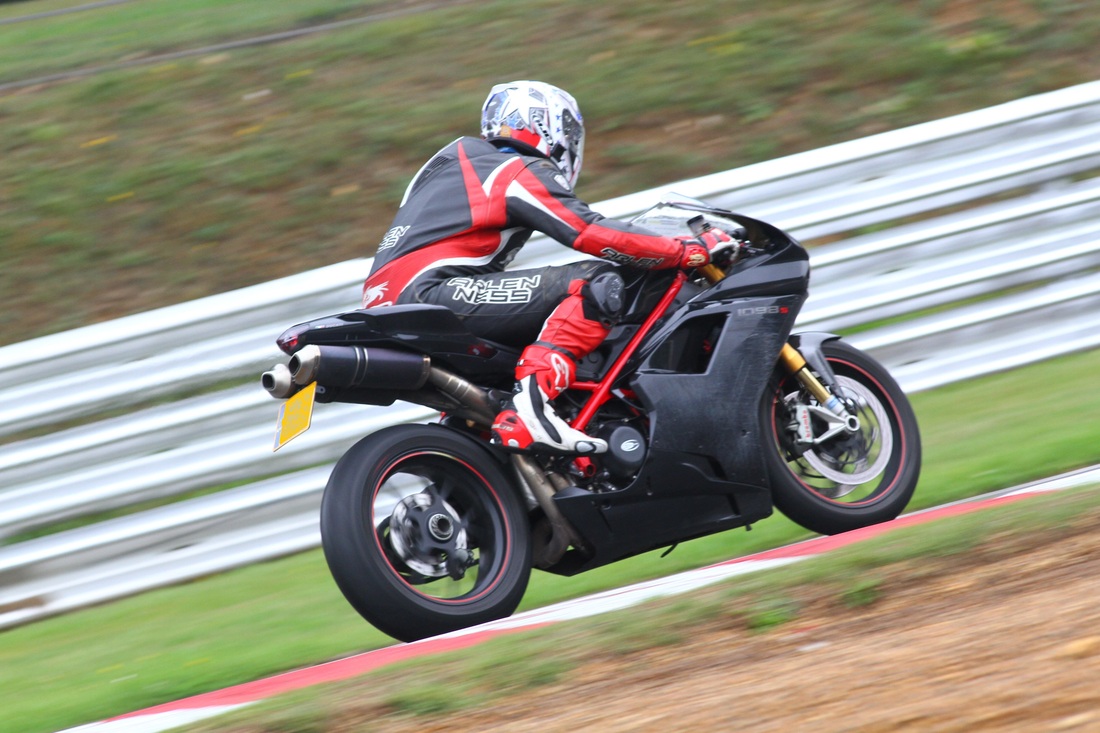
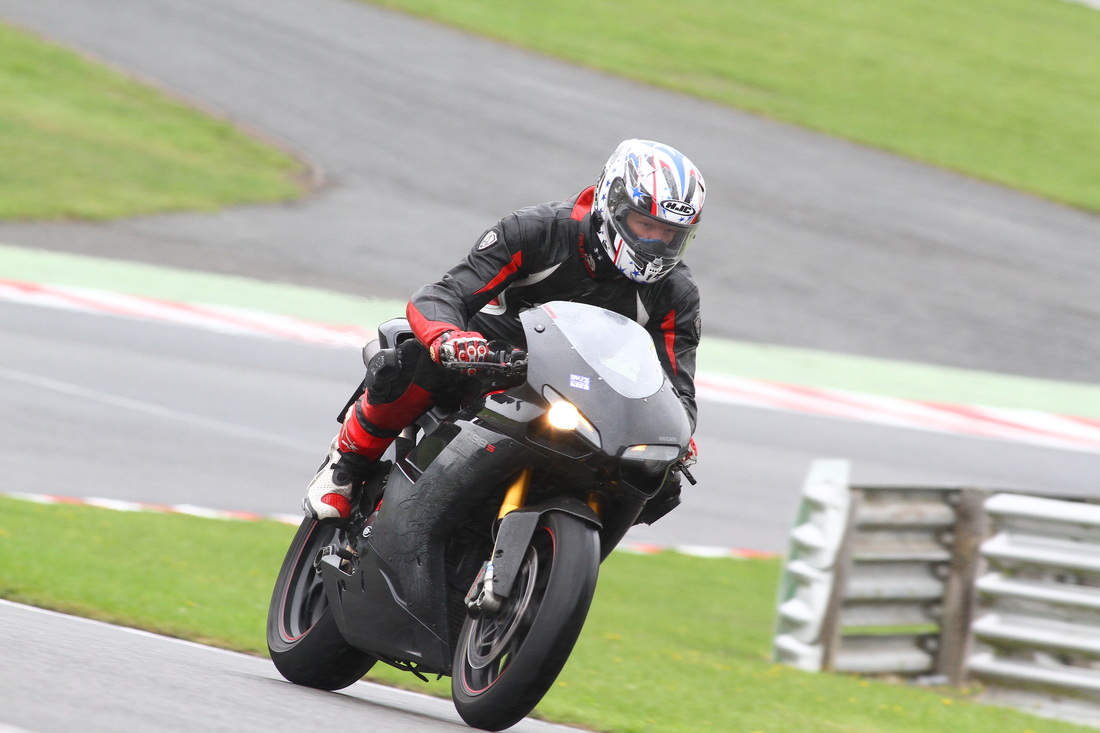
Like all Twins, the 1098 is very narrow at the waist and when riding, especially after riding an inline four, your knees feel like they could be touching. This narrowness allows for much greater level of freedom and movement on the bike and makes it easy to find that perfect body position for each and every corner. The dash is fully digital, giving you all the information you need and comes with a series of red lights warning the rider that they are about to run out of revs, which happens very quickly in the lower gears. In those lower gears the Ducati struggles to stick to the lower speed limits. I have found that I need to slip the clutch all the way up to 30mph when in first and to try it in second makes it almost un-rideable. Ducati designed this bike to go fast, very fast
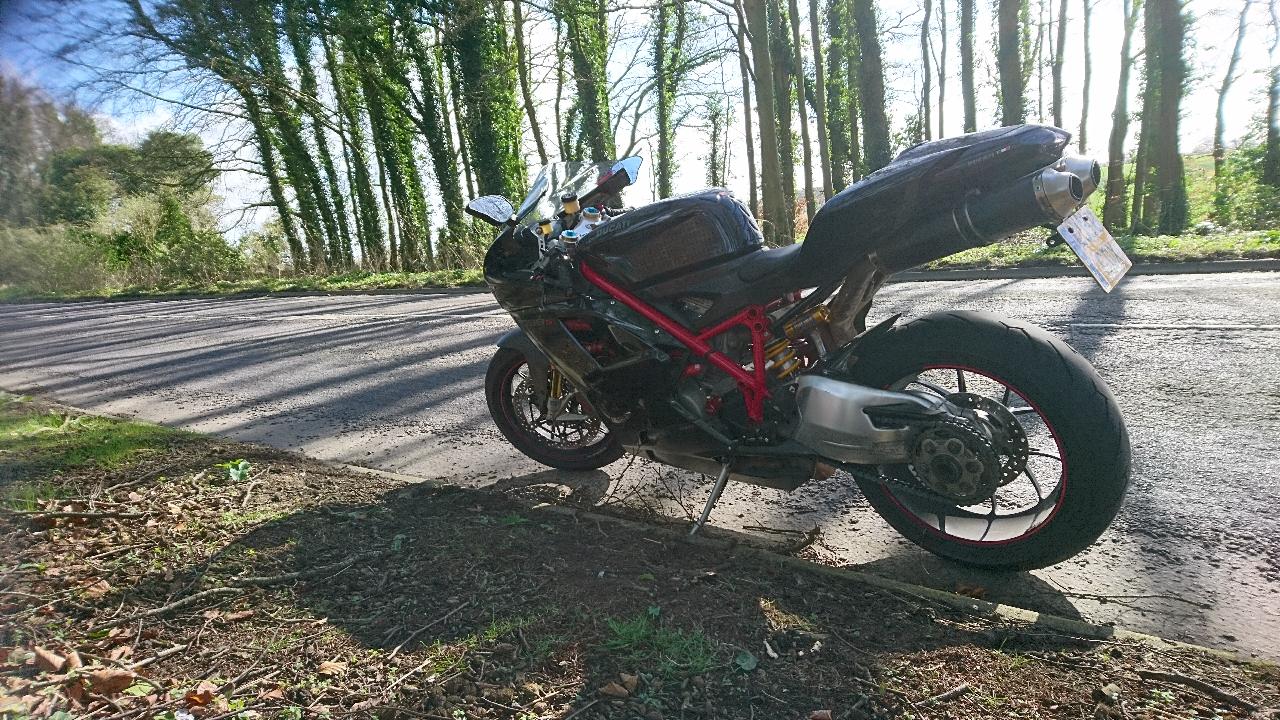
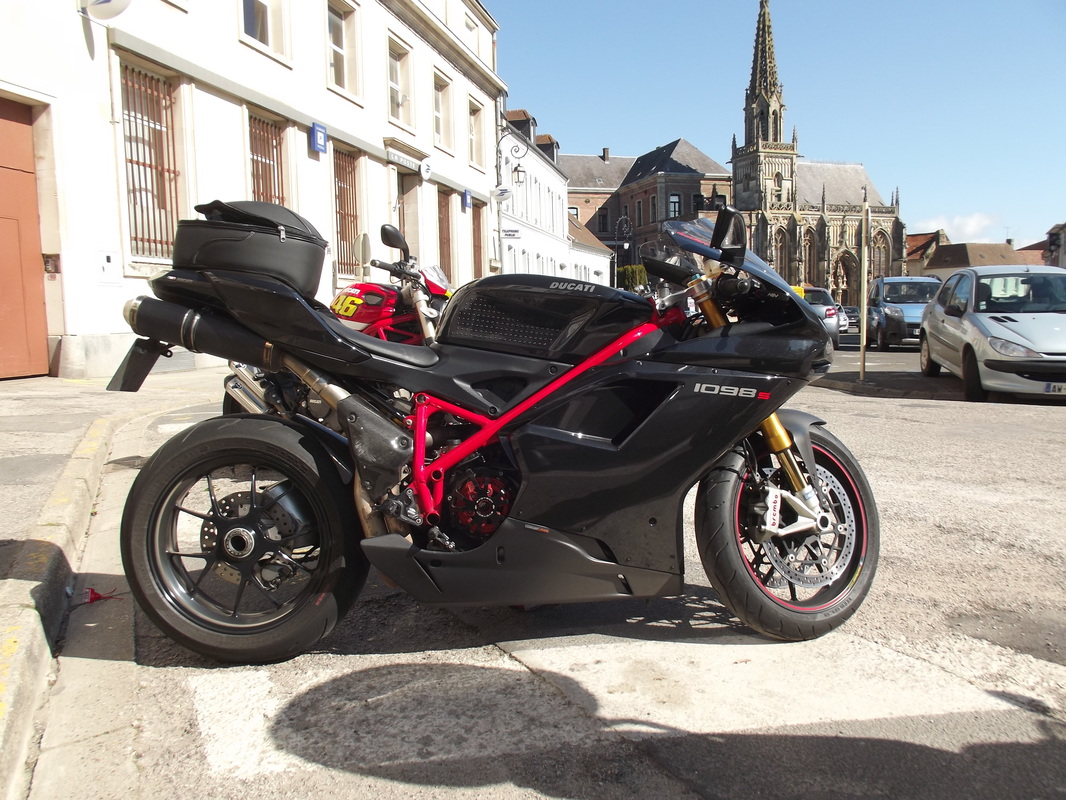
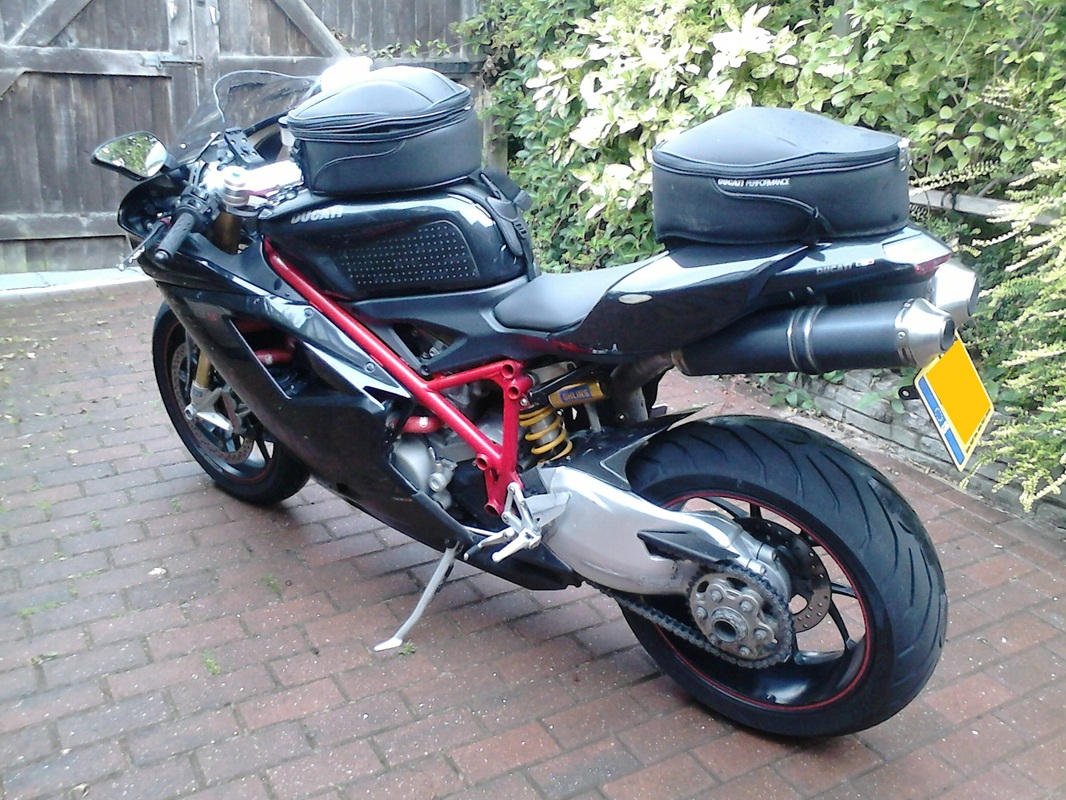
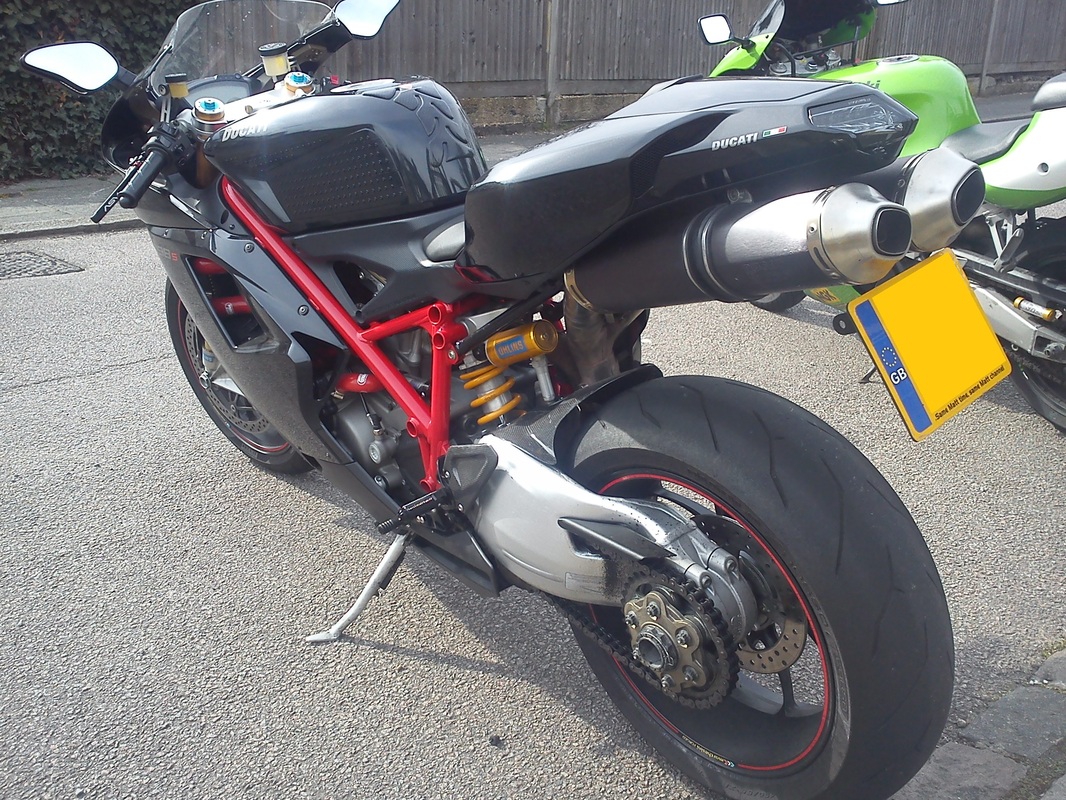
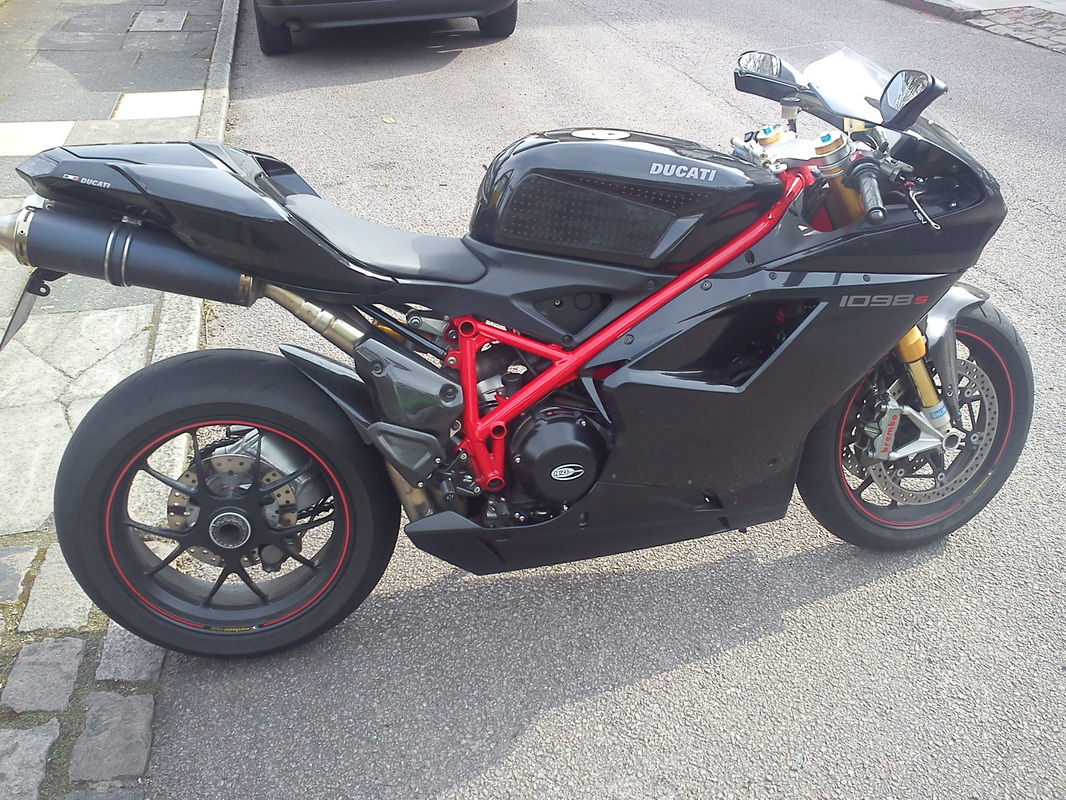
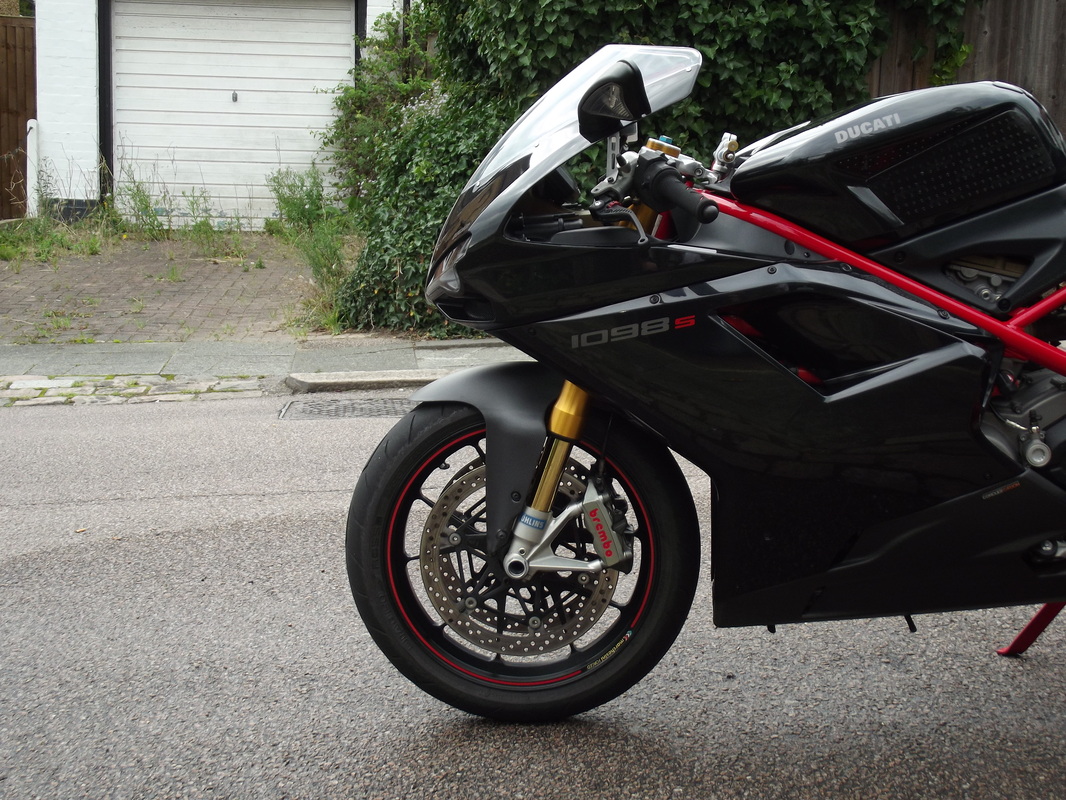
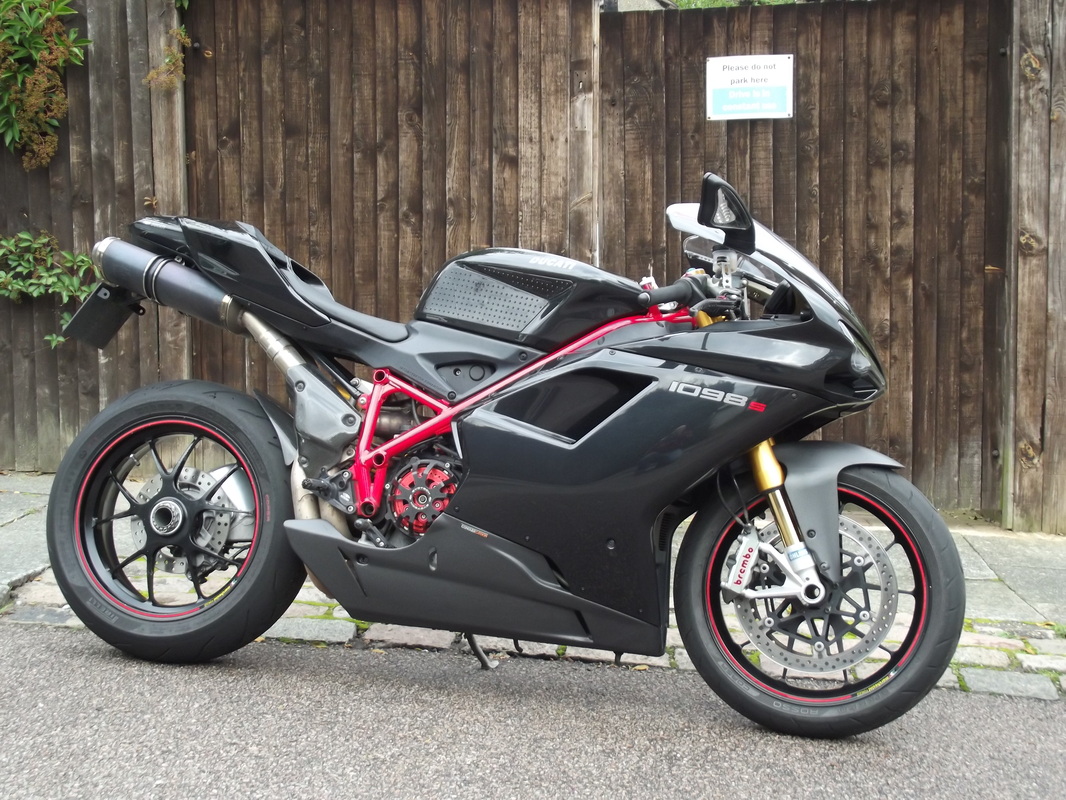
This bike has some wonderful touches to it. There is no pillion seat and no pillion pegs, the mirrors, which have the front indicators built in, are easily removed and with a tail tidy fitted, the rear number plate is removed by two screws. The wheels are forged Marchesini, which came shod with Pirelli Diablo Rosso Corsas giving supreme levels of grip and feel for the rider, especially when warm and the bike is being ridden as designed. The brakes are Brembo monoblocks which grab onto two 330mm discs enabling fearful stopping power and then there is that noise. At start up the dry clutch rattles away and the engine rubbles into life, but it’s when the bike is on the move and that as the distinctive Ducati roar fills the air, that you know there is something very special about the 1098.
For 2008 Ducati bored out the engine and renamed the bike the 1198. With almost identical bodywork, the new bike now produced a staggering 168bhp. As with recent tradition, Ducati produced the smaller 848 ‘sister’ bike which is still being sold today some five years later (2012). Many people believe that 2013 will be the final year that Ducati produce a bike within the 1098/1198/848 family as Ducati are expected to produce an 849 which will be the smaller version of the 1199. It will be these two Sportbikes that will carry the Ducati name to the end of the decade.
Designed by Gianandrea Fabbo, Ducati senior designer, the 1098 is capable of reaching 180mph thanks to its 1099cc 90 degree Desmo V-Twin which kicks out 160bhp @9750rpm. When released, the 1098 was the most powerful production twin ever made. To give you some idea of the relentless pursuit of additional power, the current (2012) Ducati 1199 Panigale is knocking out 195bhp, from an engine that is only 100cc bigger.
Like all Twins, the 1098 is very narrow at the waist and when riding, especially after riding an inline four, your knees feel like they could be touching. This narrowness allows for much greater level of freedom and movement on the bike and makes it easy to find that perfect body position for each and every corner. The dash is fully digital, giving you all the information you need and comes with a series of red lights warning the rider that they are about to run out of revs, which happens very quickly in the lower gears. In those lower gears the Ducati struggles to stick to the lower speed limits. I have found that I need to slip the clutch all the way up to 30mph when in first and to try it in second makes it almost un-rideable. Ducati designed this bike to go fast, very fast
This bike has some wonderful touches to it. There is no pillion seat and no pillion pegs, the mirrors, which have the front indicators built in, are easily removed and with a tail tidy fitted, the rear number plate is removed by two screws. The wheels are forged Marchesini, which came shod with Pirelli Diablo Rosso Corsas giving supreme levels of grip and feel for the rider, especially when warm and the bike is being ridden as designed. The brakes are Brembo monoblocks which grab onto two 330mm discs enabling fearful stopping power and then there is that noise. At start up the dry clutch rattles away and the engine rubbles into life, but it’s when the bike is on the move and that as the distinctive Ducati roar fills the air, that you know there is something very special about the 1098.
For 2008 Ducati bored out the engine and renamed the bike the 1198. With almost identical bodywork, the new bike now produced a staggering 168bhp. As with recent tradition, Ducati produced the smaller 848 ‘sister’ bike which is still being sold today some five years later (2012). Many people believe that 2013 will be the final year that Ducati produce a bike within the 1098/1198/848 family as Ducati are expected to produce an 849 which will be the smaller version of the 1199. It will be these two Sportbikes that will carry the Ducati name to the end of the decade.
Bike specsFrame Tubular steel trellis in ALS 450
Rake Angle 24 degrees Wheelbase 1430mm Seat height 820mm Weight (dry) 171kg Capacity 1099cc Bore 104mm Stoke 64.7mm Comp Ratio 12.5:1 Tank size 15.5l |
|
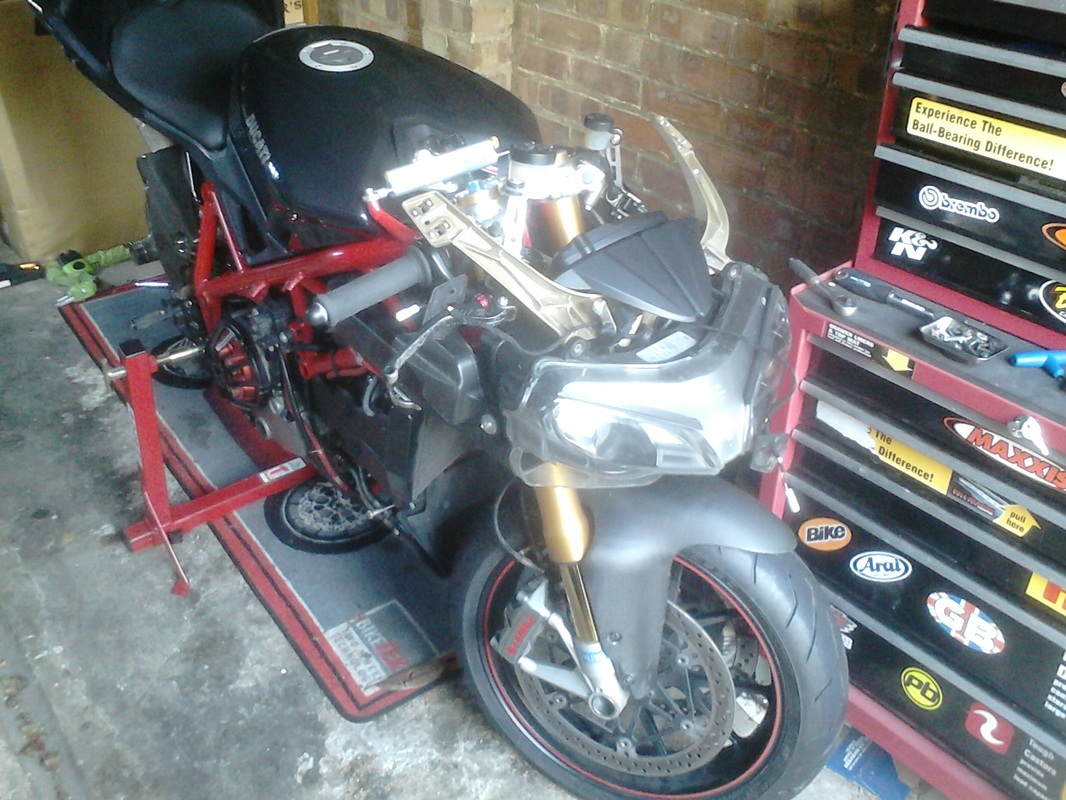
Current mods and sods
samco coolant hoses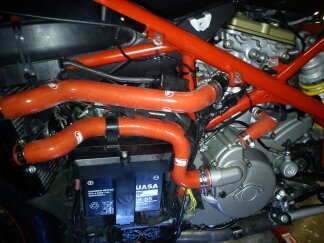
Samco are a British company and make the best performance coolant hoses in the world, which are made from the finest European silicones and are designed for use in a variety of different performance vehicles. There was absolutely nothing wrong with the original coolant hoses on the Ducati, but I really liked the idea of having some red Samco hoses hooked up. They allow the engine to run cooler and therefore enhance performance. Now I know I'm not good enough to utilise any real performance upgrades when on track, but they do look good and well, sometimes that's all the excuse I need.
full barnett clutch set up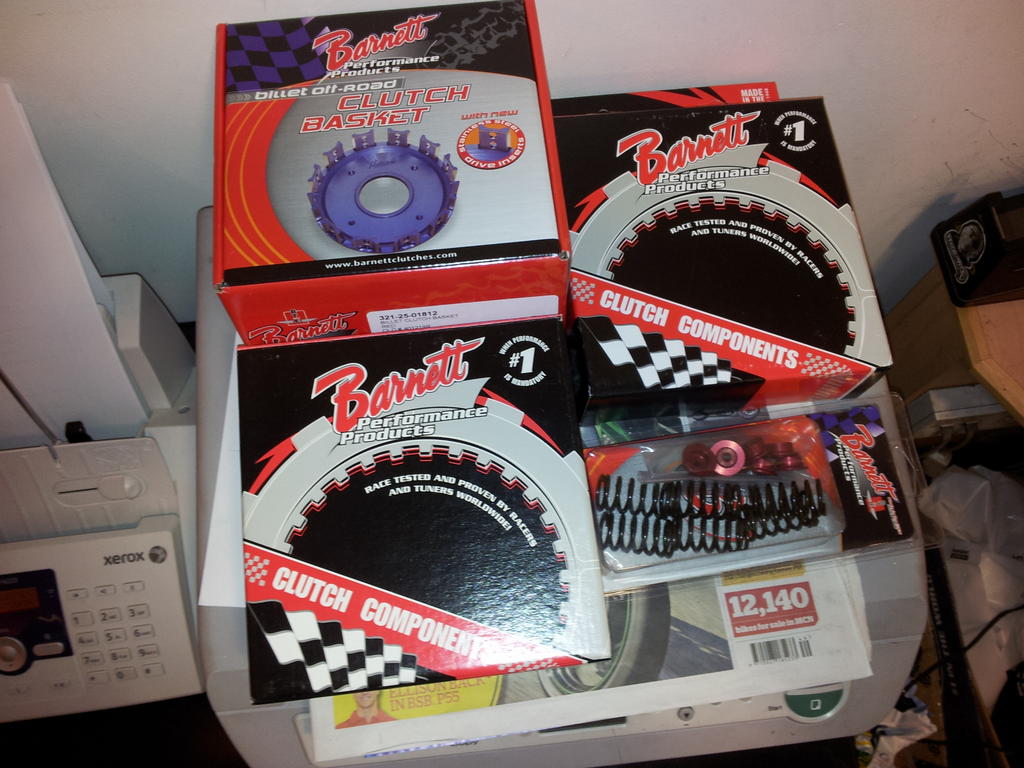
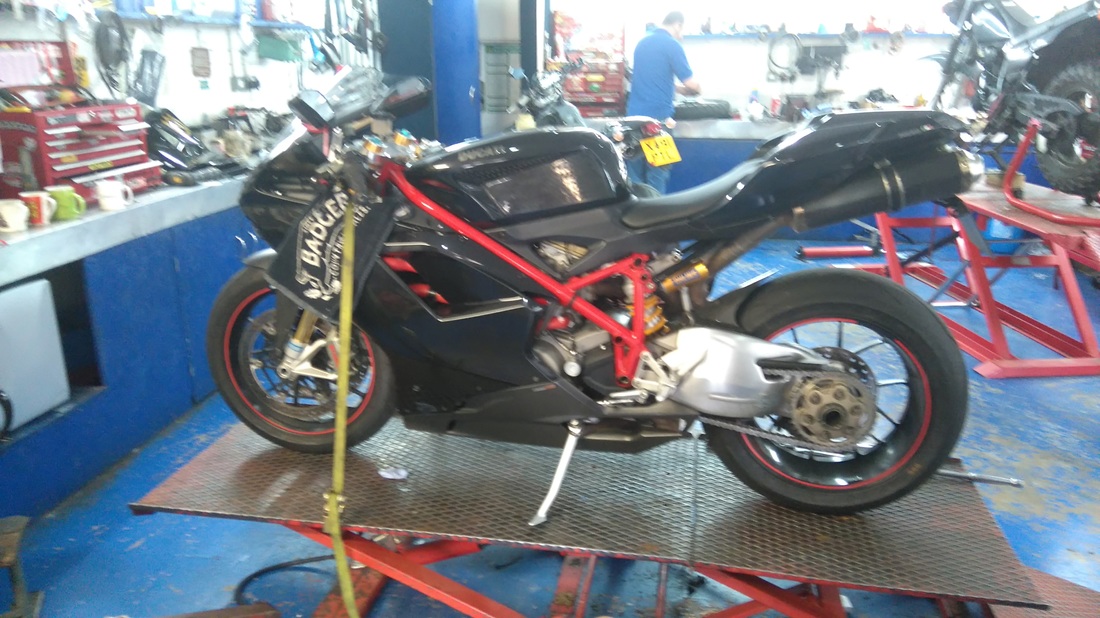
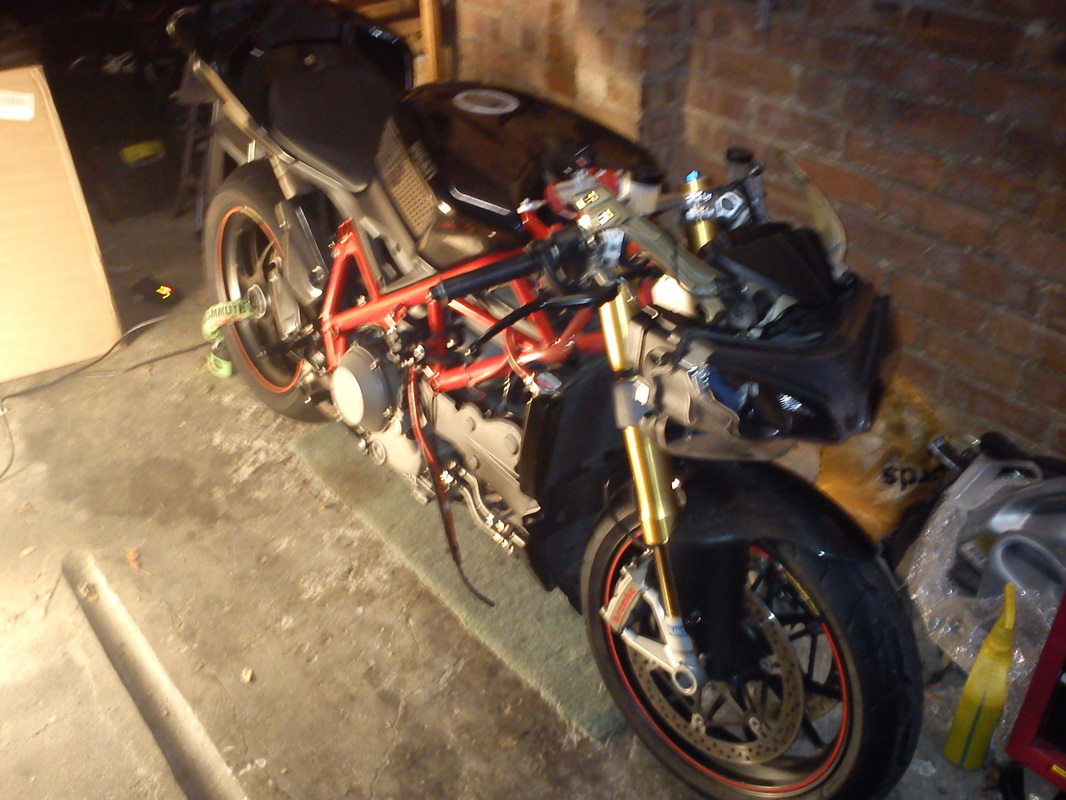
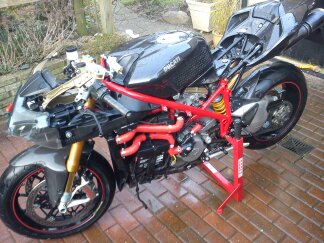
After 7000 miles the original clutch was utterly knackered. I was getting lots of slip in the last trackdays of 2012 and when the bike went into the shop to investigate, it wasn't pretty. The original basket had taken an absolute battering, the steels were burnt and the friction plates looked very sorry for themselves. Instead of fitting a OEM replacements I went for a full Barnetts set up. Their systems have a very good reputation and their baskets include a reinforced steel cradle which diverts any day to day damage to the plates instead. I went for a nice red cradle and red pressure plate, which although fit the colour scheme of the bike, its totally irrelevant as I don't run and open clutch cover. It will look nice when its apart on the bench thou. EDIT: This was replaced in 2017 after 5 years hard service.
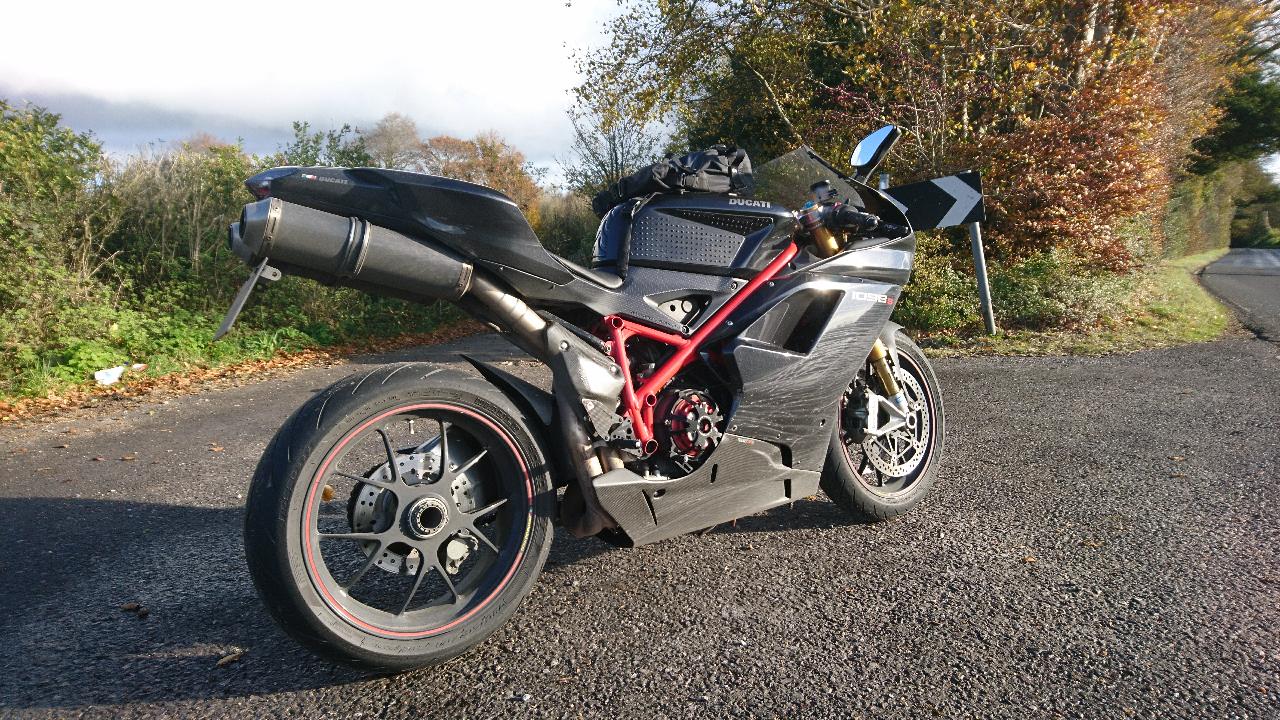
Satin carbon fibre mudguard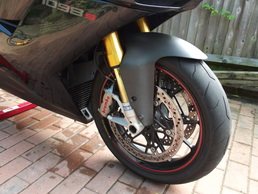
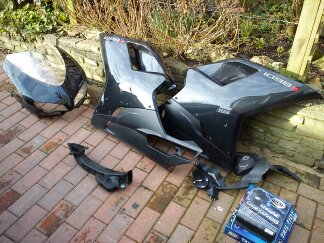
I picked this up from Conquest Carbon down in Wimborne to replace my original that was damaged in the accident I had a Brands Hatch in 2013. Where the original was a gloss finish, this is a lovely satin finish, which mirrors the look some of the 848s and the 1199 Panigale. I really like the way it contrasts with the gloss panels
evotech radiator guards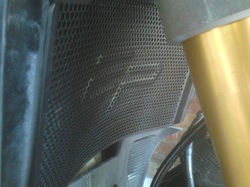
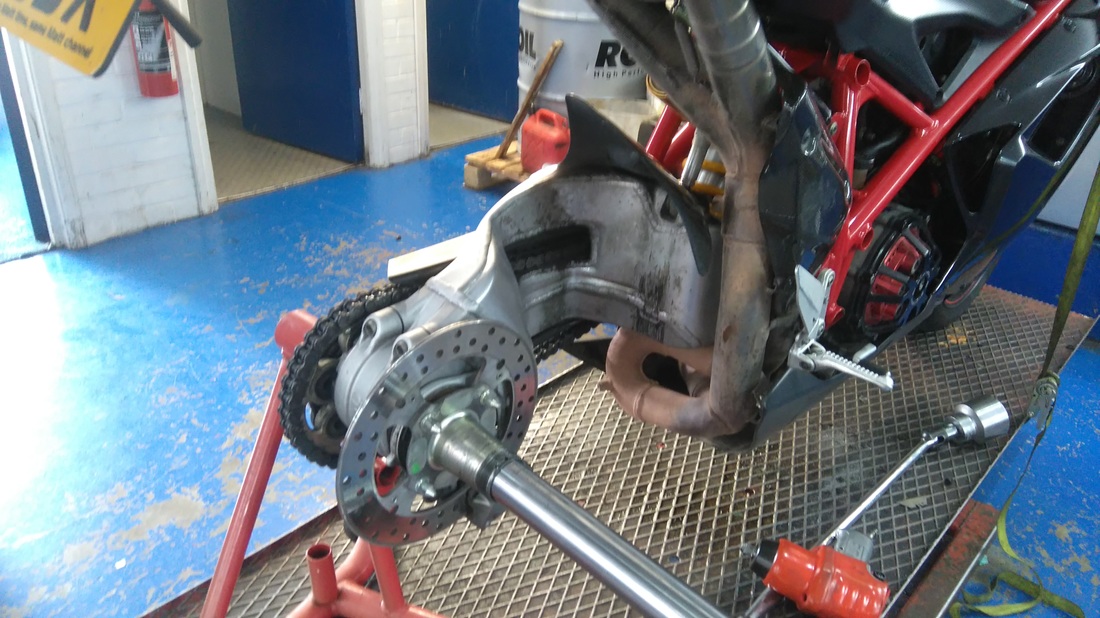
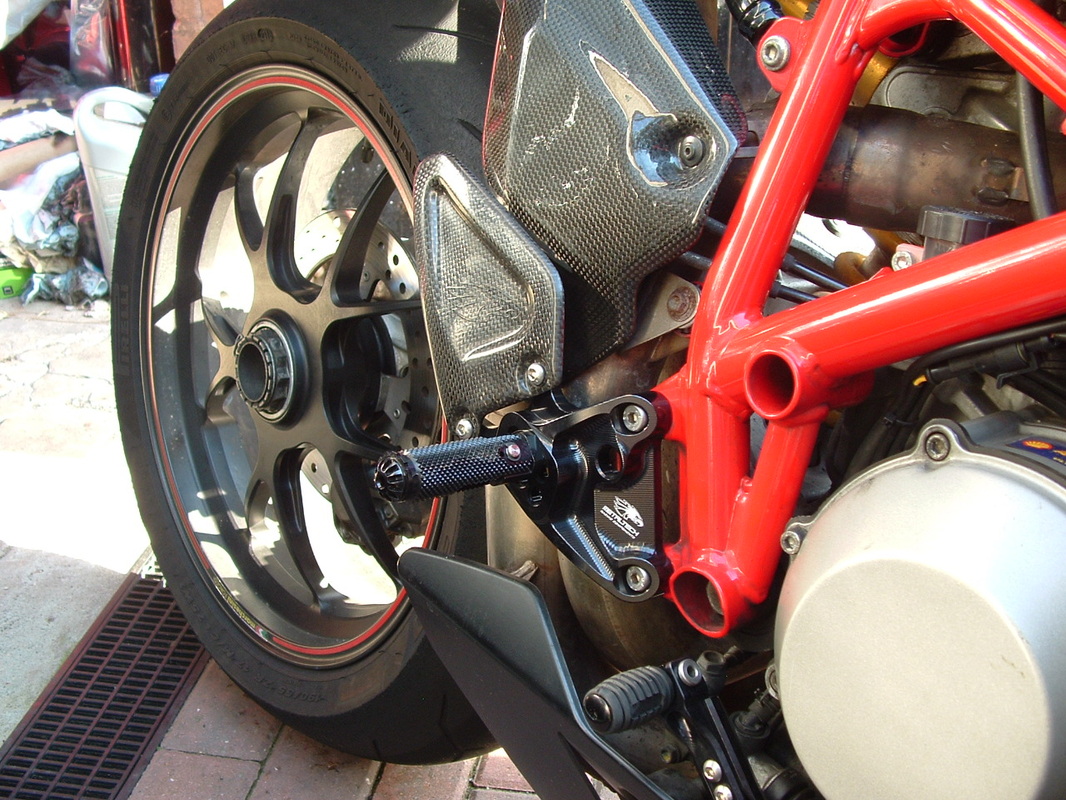
The 1098s has a radiator and an oil cooler at the front of the bike. The large one (pictured above) covers the entire face of the main radiator and the smaller V shaped one, covers the front of the oil cooler which sits directly underneath. I've put these on to avoid the problem of having a stone puncture the radiator, which although unlikely, would ruin any trip and would certainly be more expensive that the cost of the guards. DUCAbike - WSBK rearsets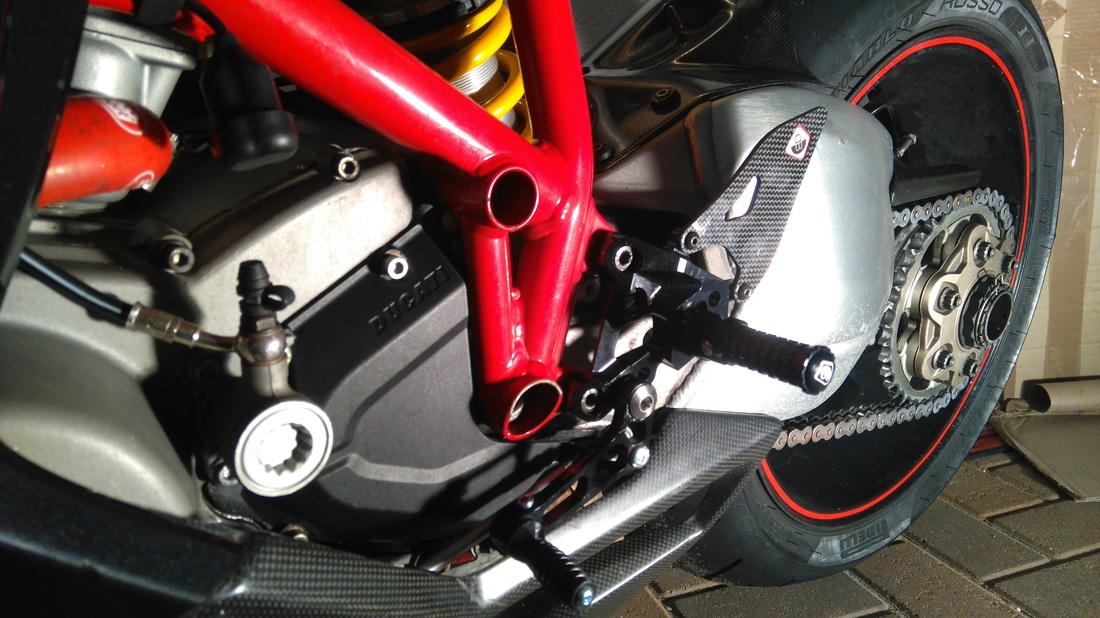
So, after just under a year after actually buying these, I've put them on the bike. There is nothing really wrong with the standard pegs, but I much prefer the look of these. Fairly easy to fit, although if you look closely the heel guards are on upside down. In reality, that makes no difference whatsoever. The quality is excellent, but I did have to source a longer bolt to attach the gear linkage. There are several adjustments that can be made to the pegs, allowing me to set them up perfectly for my big feet and as the Ducati won't be going on track again, I've set the peg position to a nice middle ground, giving me a decent amount of clearance without compromising comfort.
|
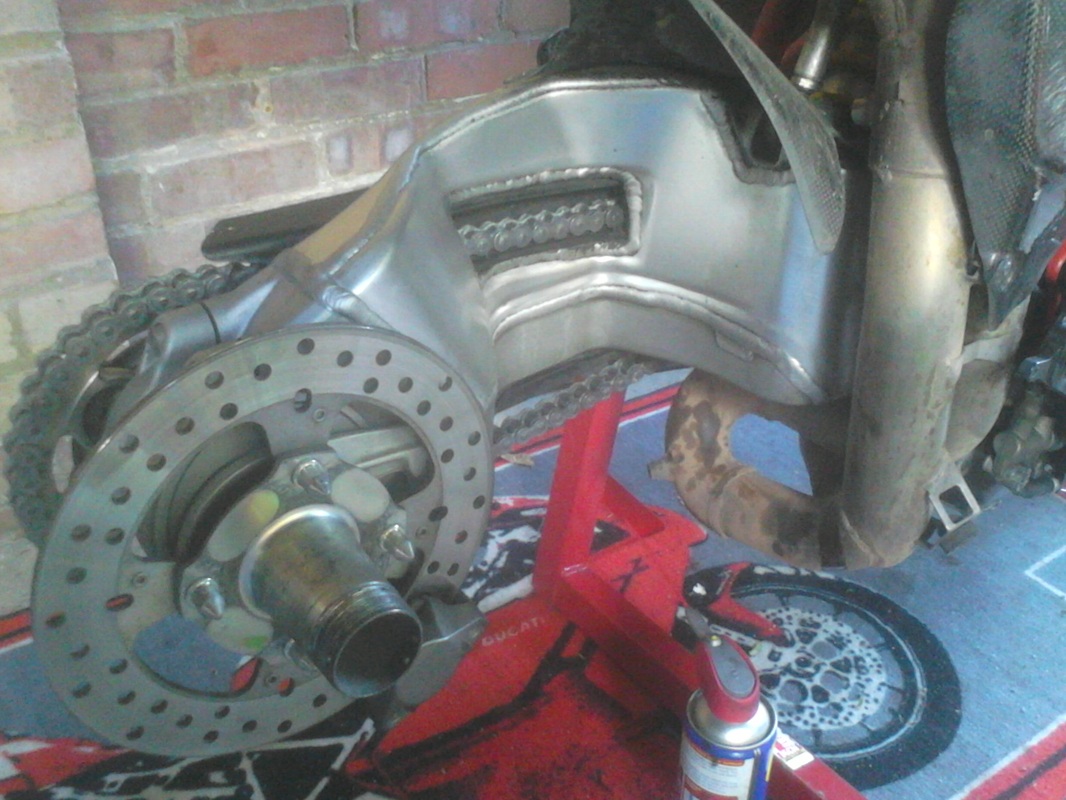
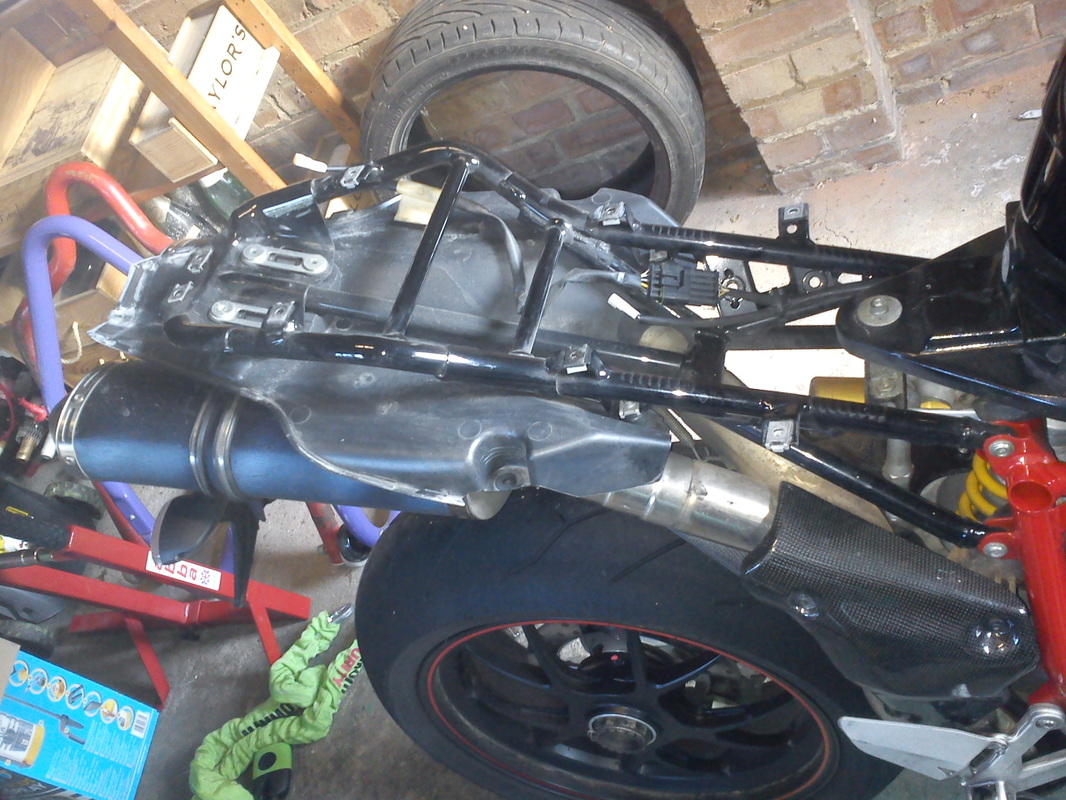
carbon fibre short rear hugger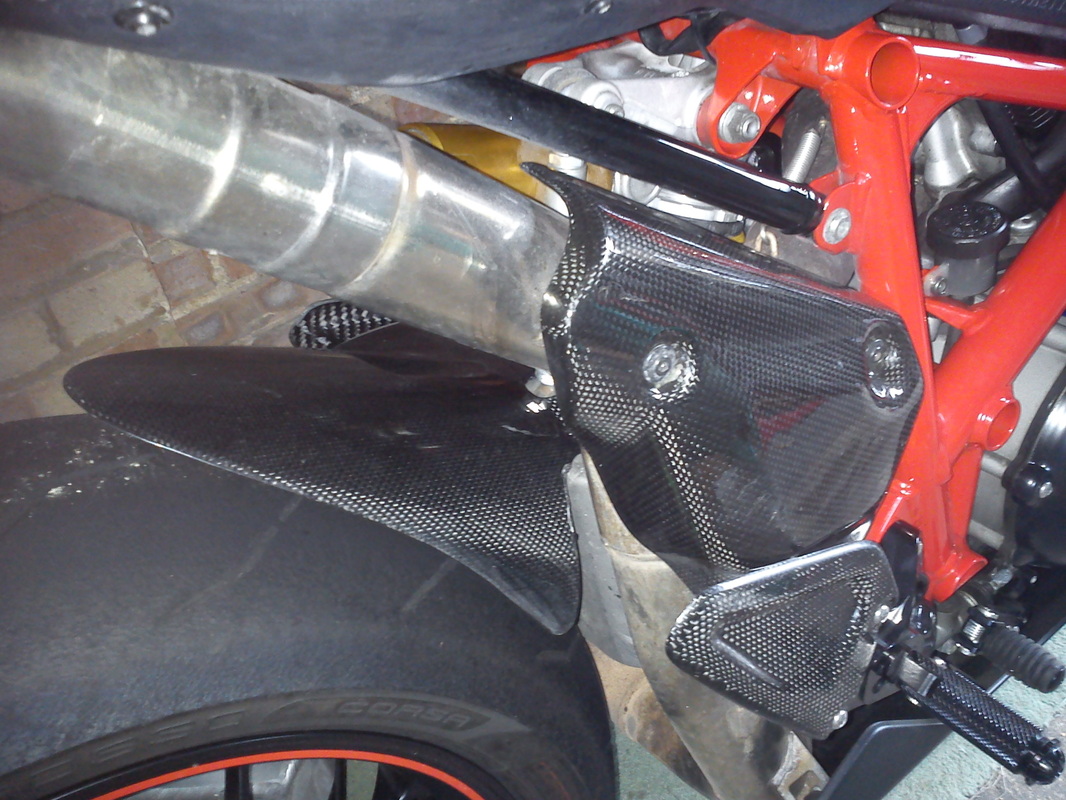
As standard the Ducati never came with a rear hugger, which left the rear shock and parts of the exhaust vulnerable to all kinds of dirt and crap that would be kicked up by the rear wheel. I searched the web an found Paul at The Carbon King who supplied me the hugger through Ebay. It took a little bit of fiddling to get the it attached mainly because one of the three swingarm mounting bolts was a real pig to get to. I attached it using some standard screws but bought some rubber washers which allowed me to tighten it down without the risk of cracking or scratching any of the surfaces.
asv brake / clutch levers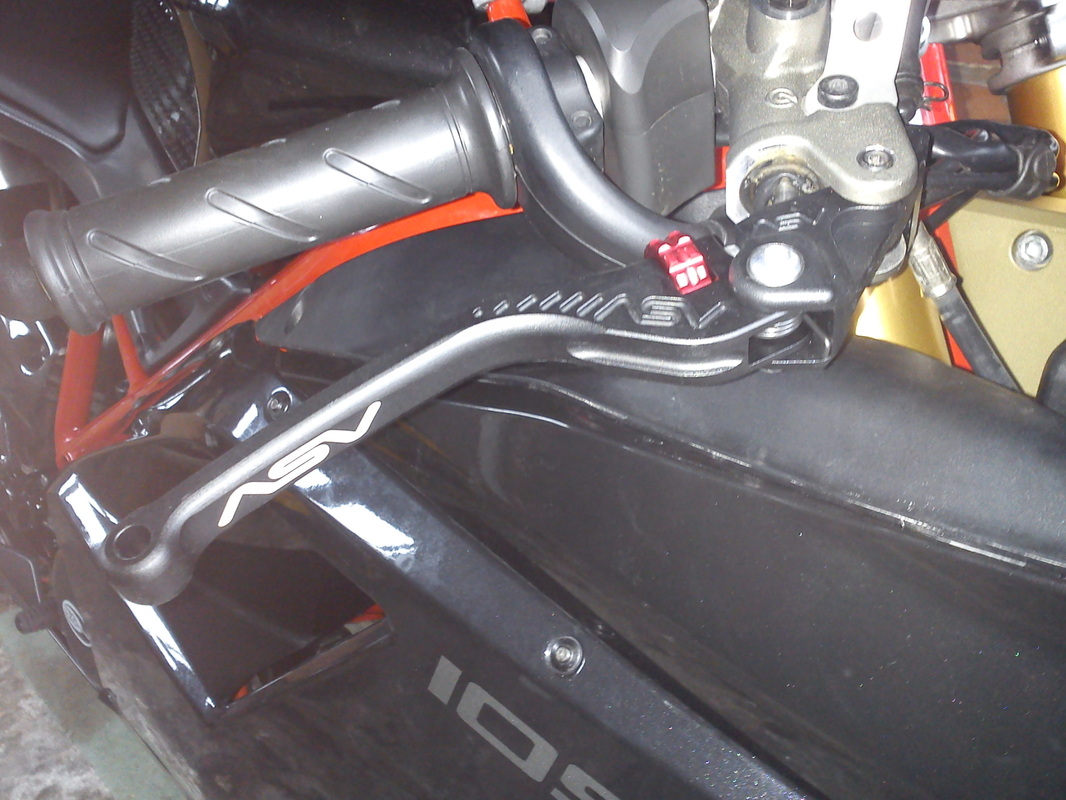
Replacing the stock levers on any bike is a really easy and popular modification to make. My friend Kevin has a set of the shortie versions of these levers on his 999 and I always liked the way they looked and felt. The design really suits my Ducati and the build quality is excellent. They claim to be unbreakable, but all the means is that if the bike goes down, the clips ons will snap instead of the levers. With the use of the little wheel you can adjust the span to suit each hand. I chose to fit the longer versions as although most of my breaking is done with two fingers, I use all four when pulling in the clutch, so instead of having one short and one long, I felt a matching pair would be the best decision.
SATIN CARBON FIBRE BELLY PAN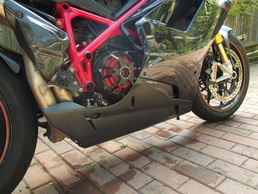
This is just pure unnecessary bling. I had already replaced the damaged belly pan following my unscheduled visit to the gravel at Paddock Hill, but I wanted to make life a little easier and leave each set of fairings with matching lowers. So, as I needed to order a new mudguard (see left) I ordered this up to. Again this has a lovely satin finish. Bit fiddly to fit, but well worth it in the end
airblade double bubble screen
I've decided to upgrade to a double bubble screen to help improve the airflow and reduce buffeting when the riding speeds increase. I've gone for a slight tint as I fancied a change. Hopefully this one will last longer than the Zero Gravity one that didn't fair too well in my Brands Hatch crash. |
carbon fibre exhaust heat shield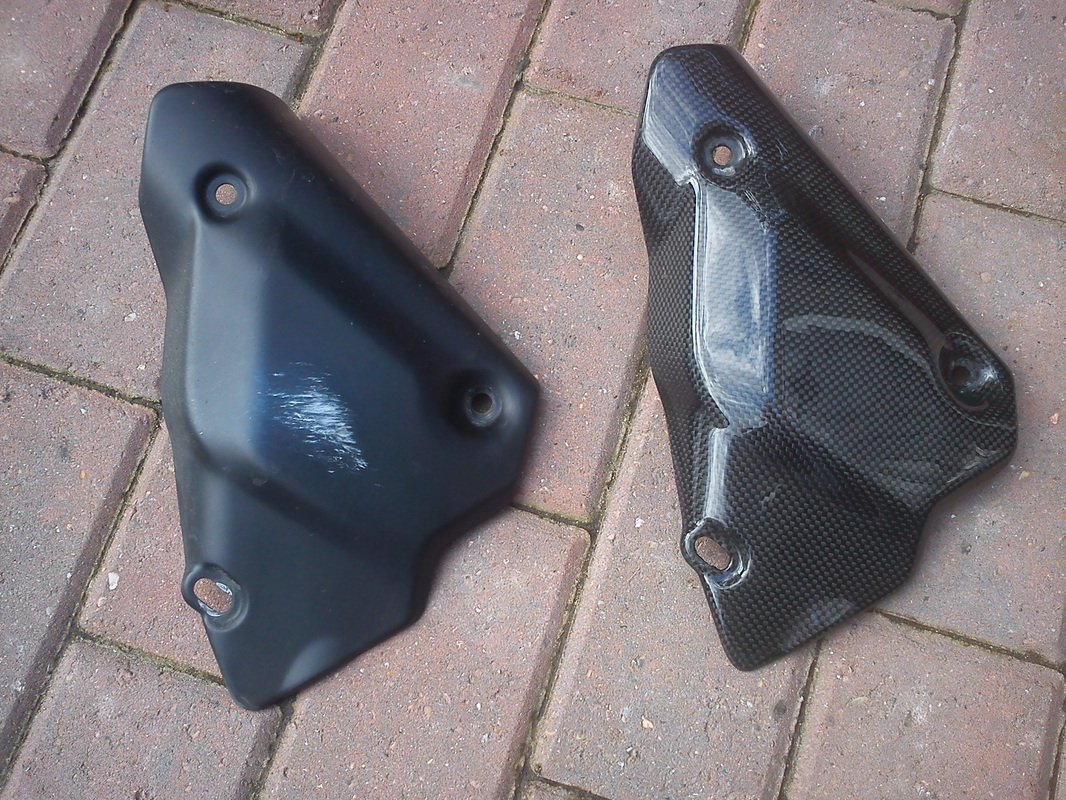
In the picture above you can see the original heat shield on the left and the new carbon one on the right. The original is metal, heavy and was already badly scratched when I got the bike so I quickly sources a replacement from a fellow user on the Ducati Forum for a fairly nominal fee. Ultimately purely a cosmetic upgrade, the new guard is a vast improvement and the weave matches up nicely with the carbon of the front and rear huggers, heel guards, tank pad, key guard and front sprocket cover.
R&G clutch / water pump covers
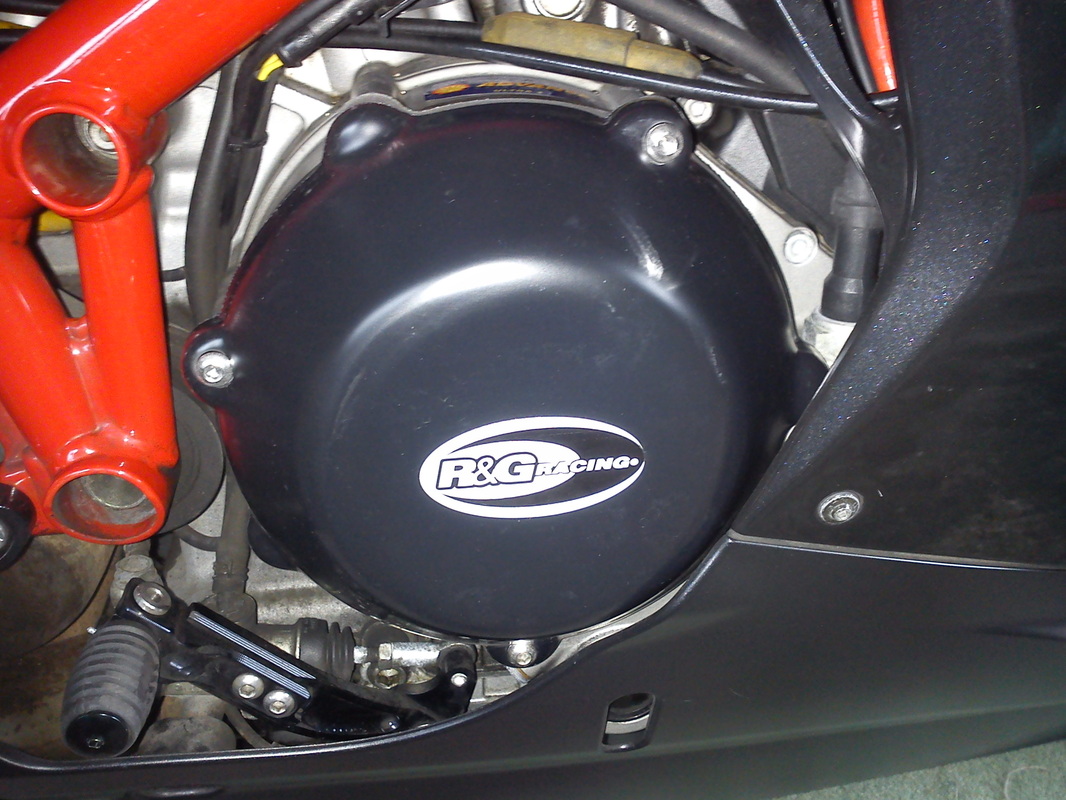
After dropping a sizeable sum of money on a new clutch set up, buying some crash protection seemed a fairly logical choice. I've used various different products from R&G over the years and use the mushrooms and bar ends on the Ninja so I know the quality is first rate. I picked up the water pump and clutch set for £90 direct from R&G at Motorcycle Live at the end of 2012, which was much less that buying them individually from the net. Installation was easy and took less than five minutes as I popped them on when the fairing panels were already off for other work. The water pump is fully covered by the left fairing panel, but the clutch cover remains on full display.
Evotech open clutch cover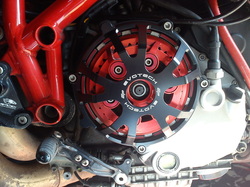
Needing an open clutch cover to allow the clutch to breath in the hot weather, I had plenty to choose from. I looked at a genuine Ducati Performance cover, but at the wrong side of £200, I looked elsewhere. I was originally thinking about getting at Oberon one, but instead went for this Evotech one, which has a nicer pattern and was about £15 cheaper than the £100 Oberon option. stomp grips
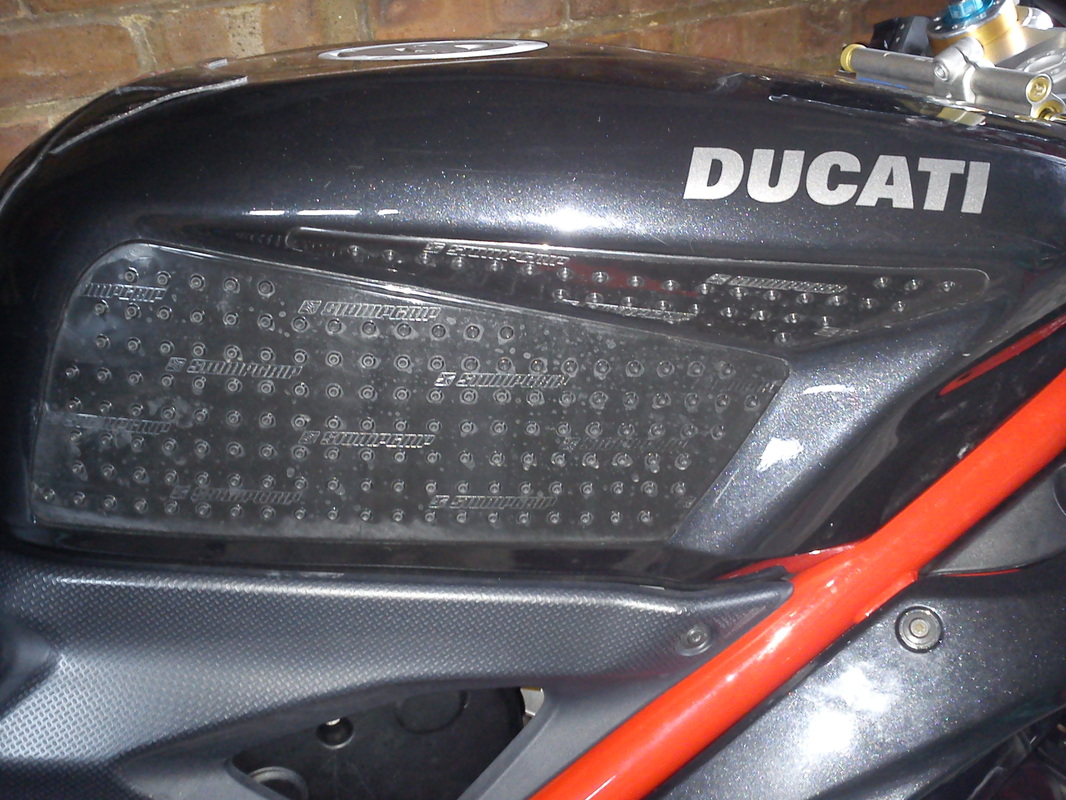
It didn't take long on my test ride before I slipped forward and crashed myself against the tank, so these were pretty much the first modification I made. These give a far greater level of grip through the legs when riding the bike and although they are more designed for track use when you are relying on the inside of your outside leg to grip the bike in the corners, they are very useful in normal daily riding when wanting to protect oneself from any painful impacts with the tank at the lights. I was initially a little worried about how these would look on the bike, but the black on black works really well and they look like they are supposed to be there.
|
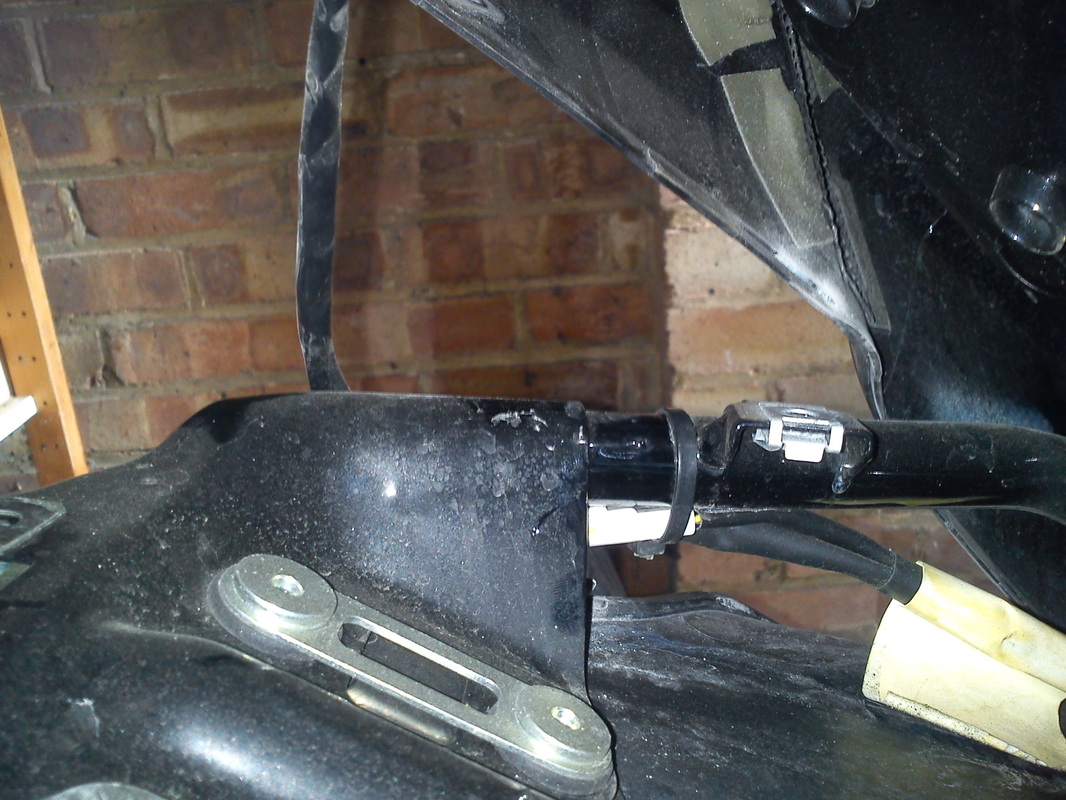
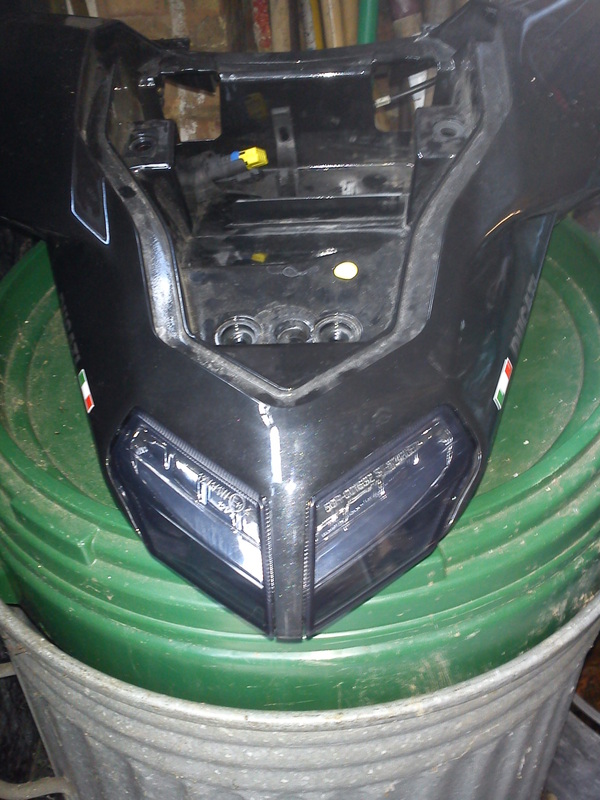
integrated rear lights / tail tidy
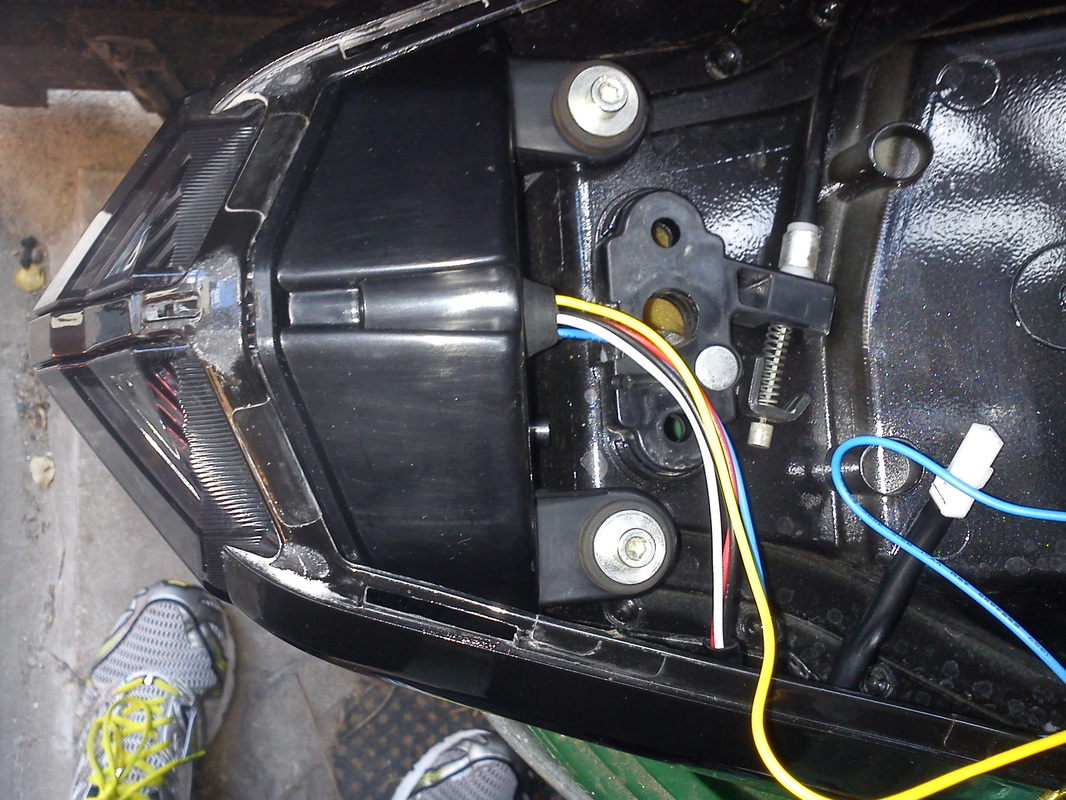
The 1098s is clearly a beautiful bike, but it really suffered with a messy rear. I felt that the numberplate housing and indicators, which were clearly an afterthought / compromise for the road bike, looked really out of place and needed to be tidied up. I had seen several bikes with an integrated rear tail light I thought that this would work really well with a slightly smaller plate. I ordered an R&G tail tidy http://www.rg-racing.com/ as I think that their products are of an excellent quality and wouldn't compromise the aesthetics of what I was trying to achieve and searched the web for the light. Originally I wanted a red one, but this wouldn't work as the amber lights wouldn't shine through properly, so I settled on a dark one from Moto-tuner who sold it through Ebay.
To install the light and tail tidy, I had to take the back of the bike apart, which after searching the web and being systematic, was pretty easy. I made a point of making note of where all the wires needed to be routed and I removed the back end.The first thing I did was remove the original number plate hanger. With the back off, it was easy to see which wires were used for the running / brake light and which were used for the indicators. Because I needed the connectors for the new light, I cut the original wires, this made allowed a really quick and easy release of the hanger, as I didn't have to feed the connectors through the very small holes at the top. With the back off it was a simply case of releasing two bolts and replacing the hanger. With this done I turned my attention to the light. I cut the wires from the new light down to a more moderate length and as this light came with resistors already in place, all I had to do attach the connectors from original set up. I choose to do this with simple bullet connectors which would make any future modification easier. It turns out this was a very wise move.Once the light was fully installed, I put it all back together and was pleased with the results. About a week later I noticed that one of the four running lights at the back had stopped working. I took the rear apart again to check all the connections, which were all fine. I contacted the seller and following a quick email conversation and replacement part was on its way. The new light went in very quickly, leaving the tidy rear end I was after.
To install the light and tail tidy, I had to take the back of the bike apart, which after searching the web and being systematic, was pretty easy. I made a point of making note of where all the wires needed to be routed and I removed the back end.The first thing I did was remove the original number plate hanger. With the back off, it was easy to see which wires were used for the running / brake light and which were used for the indicators. Because I needed the connectors for the new light, I cut the original wires, this made allowed a really quick and easy release of the hanger, as I didn't have to feed the connectors through the very small holes at the top. With the back off it was a simply case of releasing two bolts and replacing the hanger. With this done I turned my attention to the light. I cut the wires from the new light down to a more moderate length and as this light came with resistors already in place, all I had to do attach the connectors from original set up. I choose to do this with simple bullet connectors which would make any future modification easier. It turns out this was a very wise move.Once the light was fully installed, I put it all back together and was pleased with the results. About a week later I noticed that one of the four running lights at the back had stopped working. I took the rear apart again to check all the connections, which were all fine. I contacted the seller and following a quick email conversation and replacement part was on its way. The new light went in very quickly, leaving the tidy rear end I was after.

previous and past tweeks
zero gravity replacement screen
When removing all the fairing panels to work on the coolant system, I noticed that the original screen was damaged on all by two of the eight mounting points. I knew that having to faff around and refit the broken screen would have annoyed me intently, so I contacted Demon Tweeks www.demon-tweeks.co.uk and ordered a standard replacement Zero Gravity Screen. I could have gone for a double bubble or a tint, but liked the lines or the original so didn't see the need to change it. Darker screens are okay, I have one on the Ninja for example, but I thought the black on black would have been a little too much and so choose to stick with the clear. I would sttill have this if I hadnt it smashed in my accident at Brands Hatch in June 2013.
|
metaltech racing rearsets
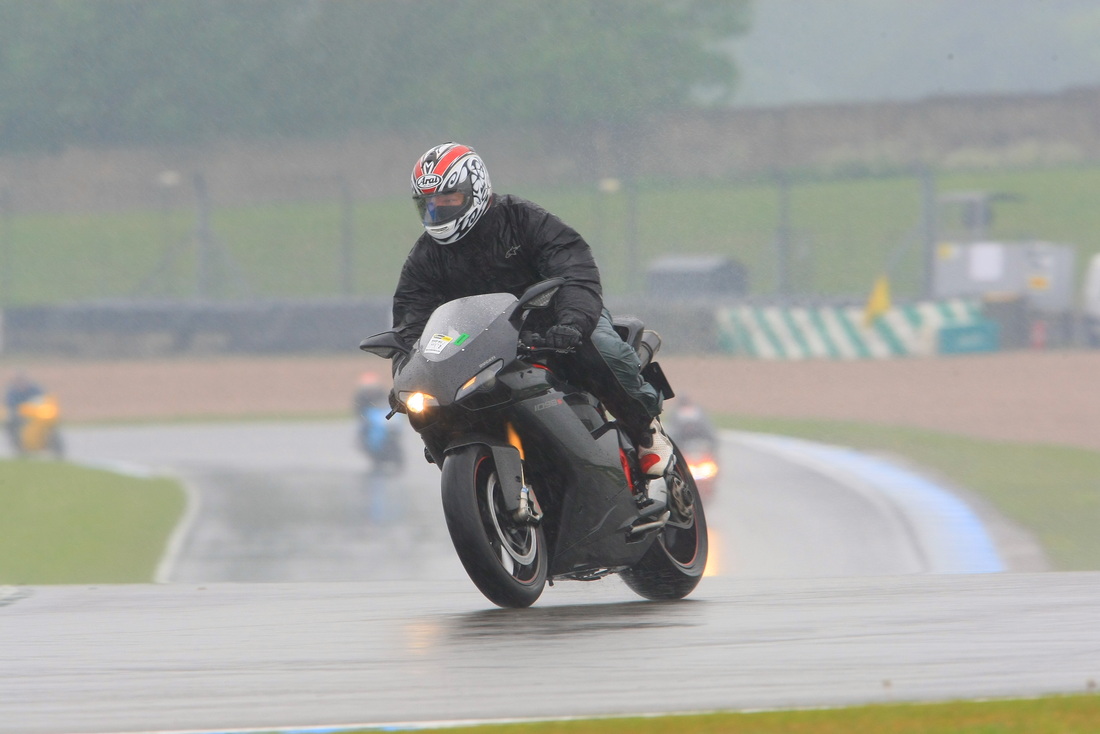
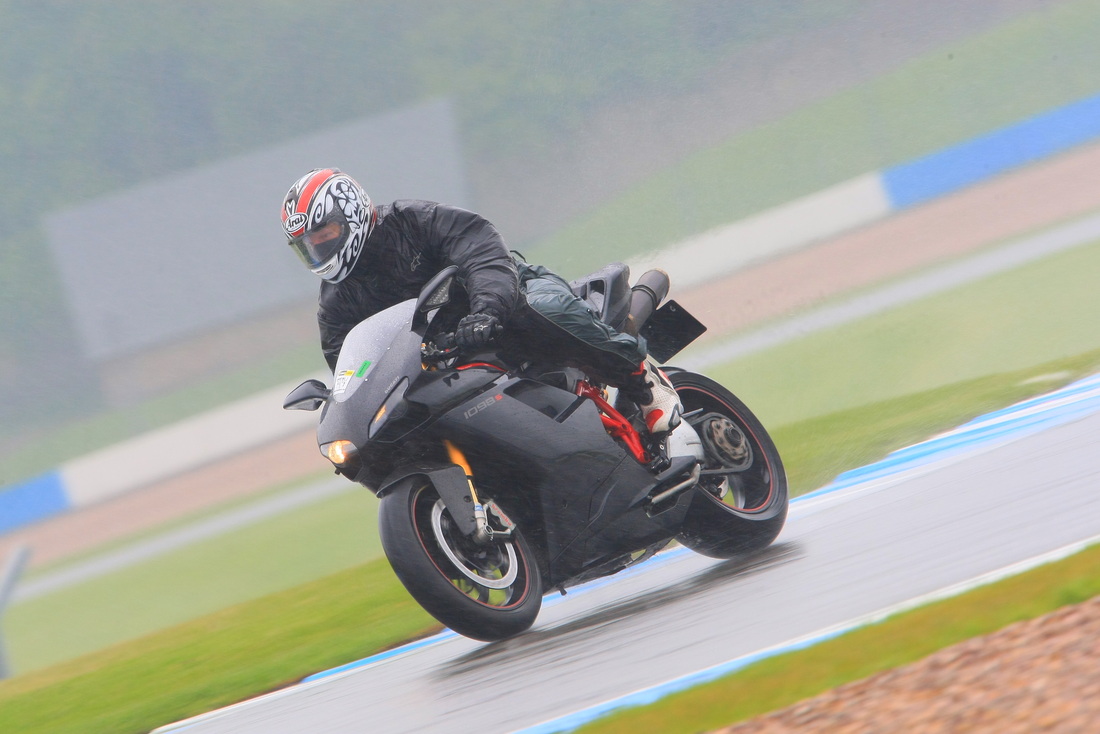
When I first started taking the Ducati to the track I had a real problem with ground clearence. In 2012 I was going through a set of magnesium toe sliders every three sessions. I needed some replacements and I had some choices with which sets to go for. There was the popular Gilles or R&G options, but I went for a set of Metaltech Racing sets http://www.metaltechracing.com/ which I got from Metropolis. Artur and I spent a few hours getting the old pegs off and setting up the new ones, which have raised my feet a few inches higher, giving my feet lots more ground clearance without sacrificing comfort. The best thing is they are adjustable, so when I decide a really long trip is in order, I can drop the pegs a few notches to give my knees an easier time. These came off the bike on June 2014 and not because I wasn't happy with them, but the left peg was destroyed in my Silverstone crash in 2014 and decided to change to a different brand.
|
Riding the dream
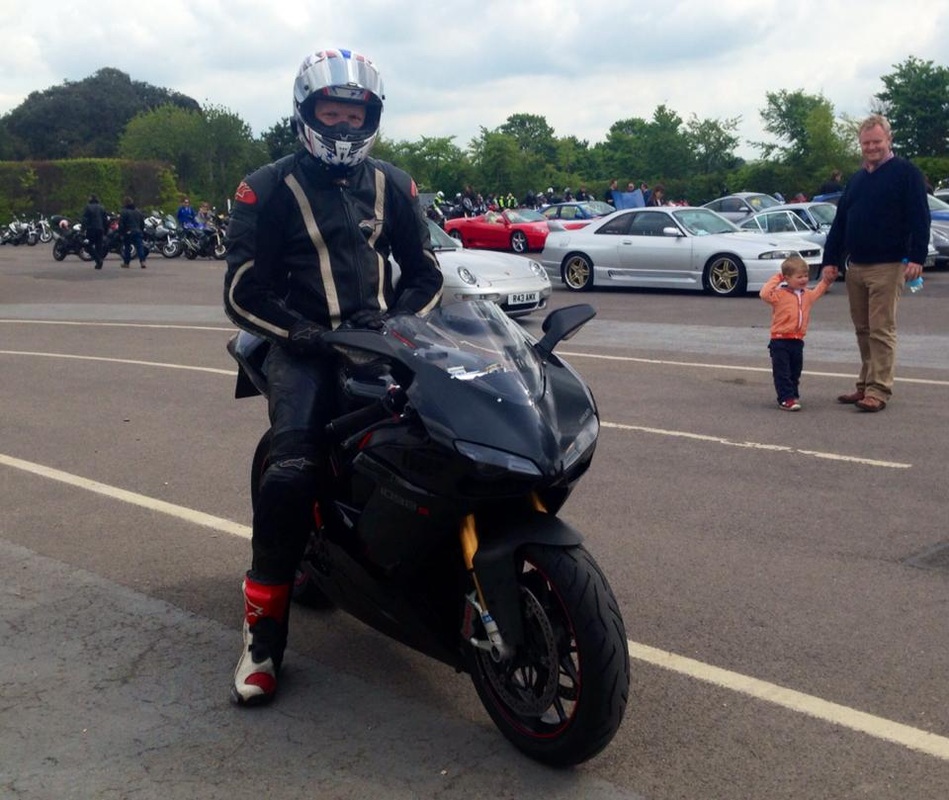
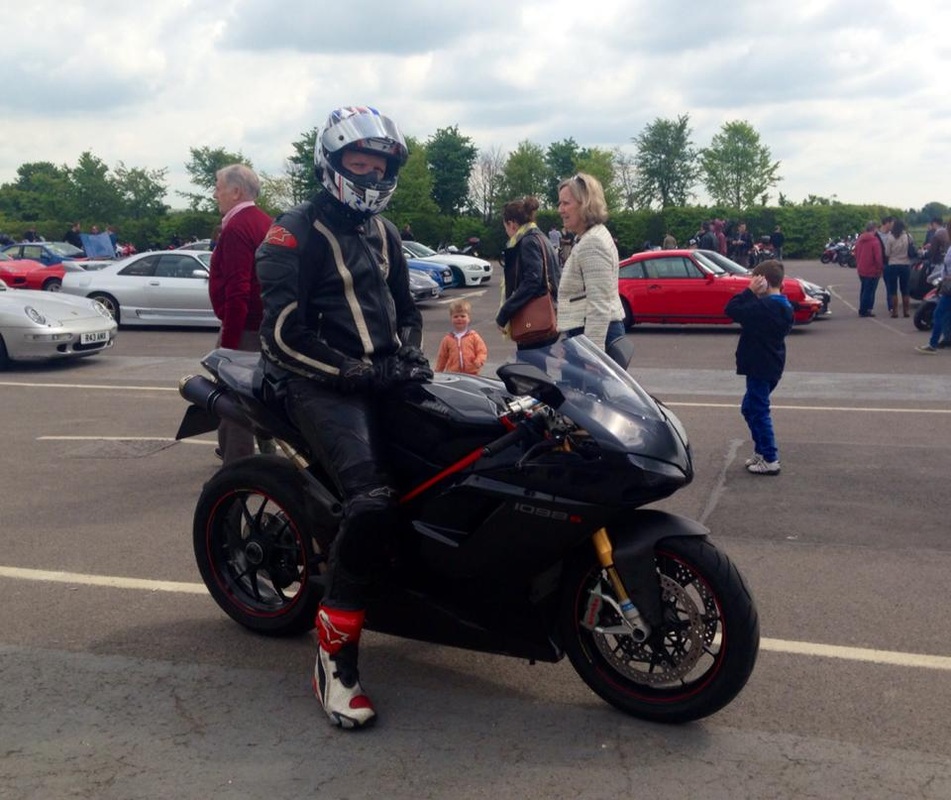
After a nasty accident several months before that saw the demise of my beloved 03 Z1000 but thankfully not me, I was in the position to buy another bike. When it comes to my motorcycling I have always been loyal to the first dealership I ever walked into and I promised Mike that one day I would buy a bike from him.
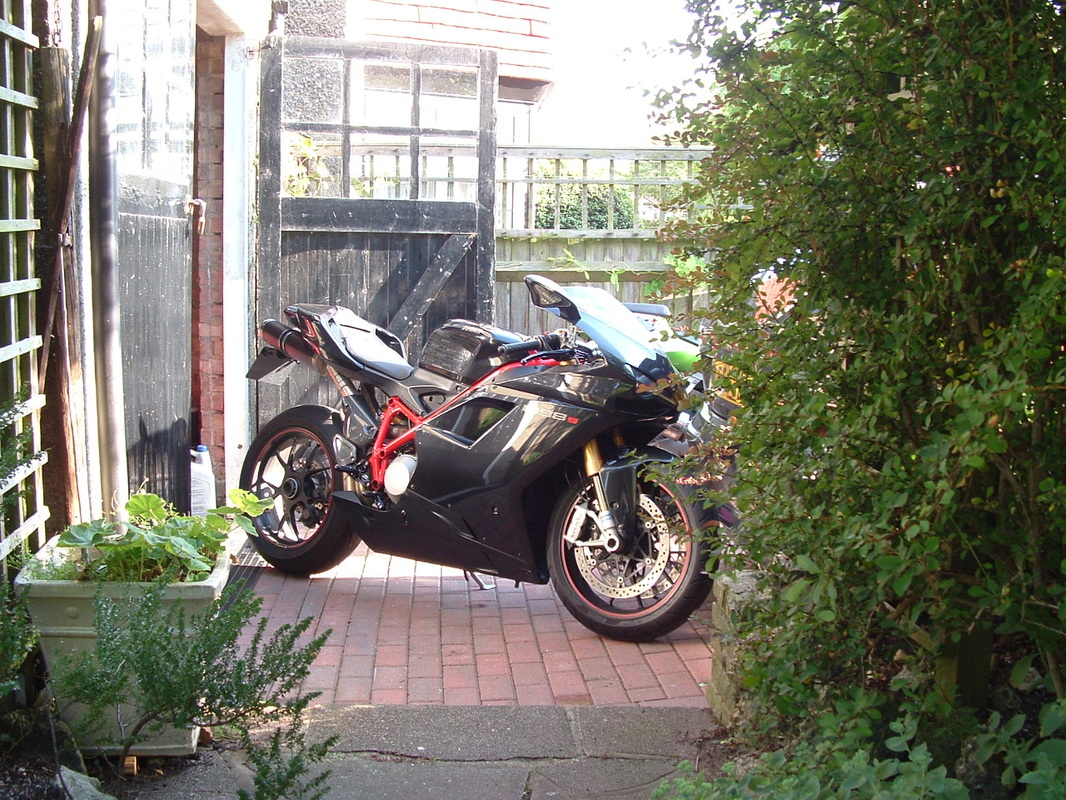
I fell in love with the idea and the look of the Ducati when I first joined the motorcycle community and wanted to find out if the reality was as good as the dream. Looking at their website I saw they had an 848 in stock, but as I walked in my plan went straight out the window when I saw what was sat next to the matt black Duke. I was drawn in by the red frame and gold forks and I found myself staring straight down the nose of black 1098s, just like the one I first saw in print five years ago. Sitting at the very top of my price range, it had a few little marks, but after seeing it, the 848 just wasn’t going to cut it. Mike could see I was struck and suggested a test ride and we agreed that I’d come back in a few days giving them time to make sure it was ready.
After work, I raced down to the dealer and parked my Zx7r around the back and bounced into the showroom. Mike could see I was excited, but when I said I’ll just be out for twenty minutes or so, he suggested taking it out for a good forty just so I could be sure and get a feel for the big twin. I slung my leg over the bike and the difference between the 1098 and Zx7 was like night and day. Where the Kawasaki felt low and wide, the Ducati was thin, had my bum up in the air, my hands low and my face over the headstock. I knew that this bike meant business.
I had no pre-planned route and pulled away knowing I was sat on something special. It rumbled as I made my way out onto more open roads and it didn’t take long before I felt at home. I just kept riding and riding and after a while I knew what had to be done and I made my way back to the dealership in Barnet. When I walked in Mike was stood there laughing whilst tapping his wristwatch. I’d been gone over two hours and I couldn’t disguise the smile on my face and ten minutes later I had agreed to buy it.
They say that you should never meet your heroes for fear of being disappointed, but for me riding the Ducati that afternoon exceeded all my hopes and expectations. Now every time I ride the bike I’m reminded of that afternoon back in October of 2011 and the smile inside my helmet is always just as wide.
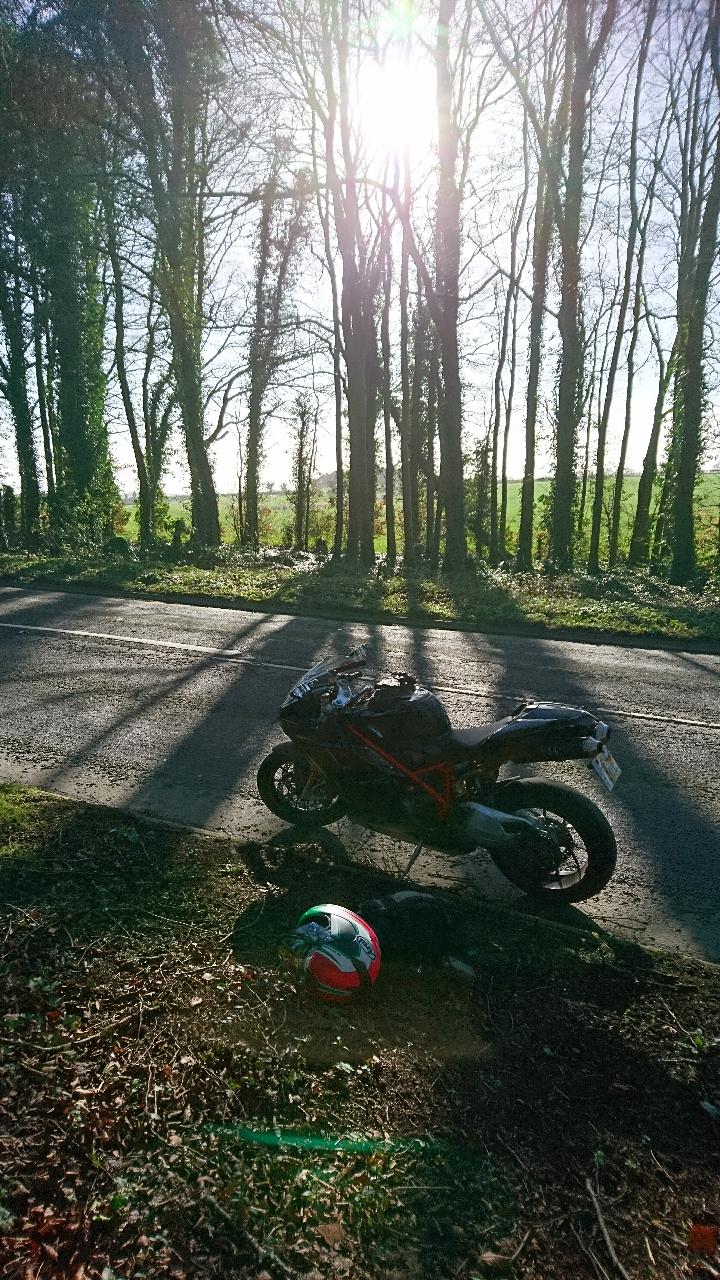
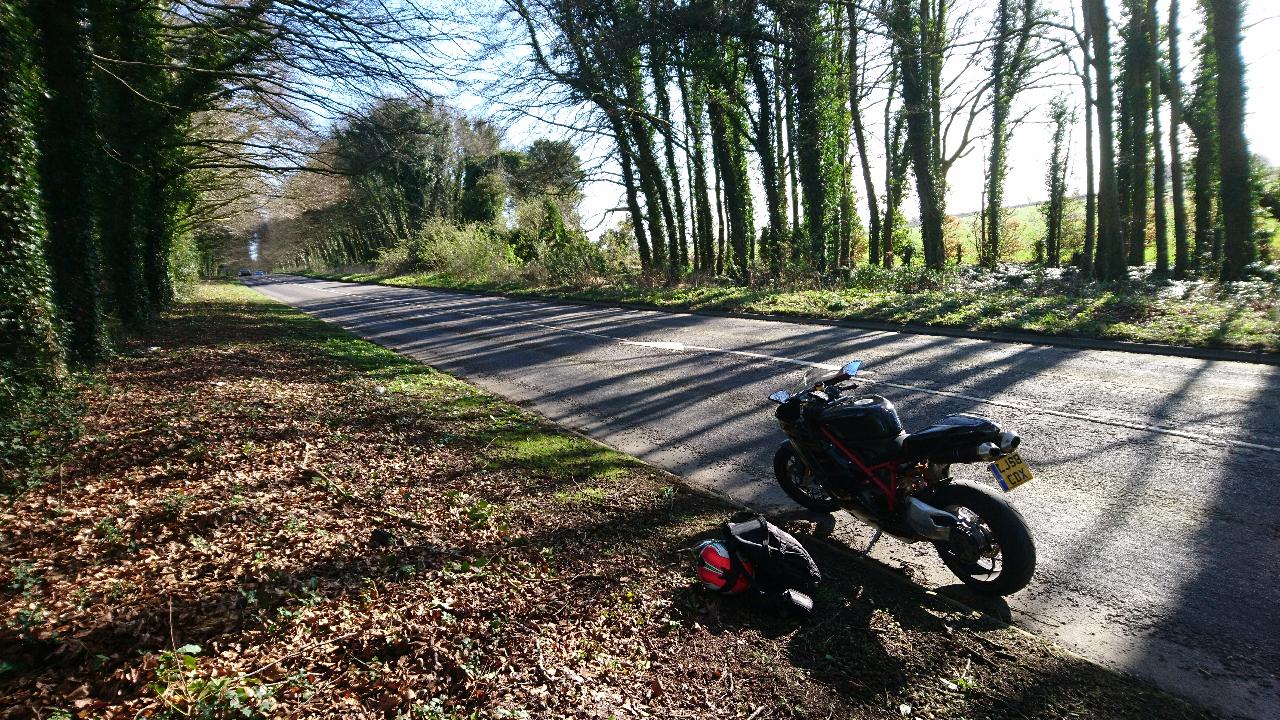
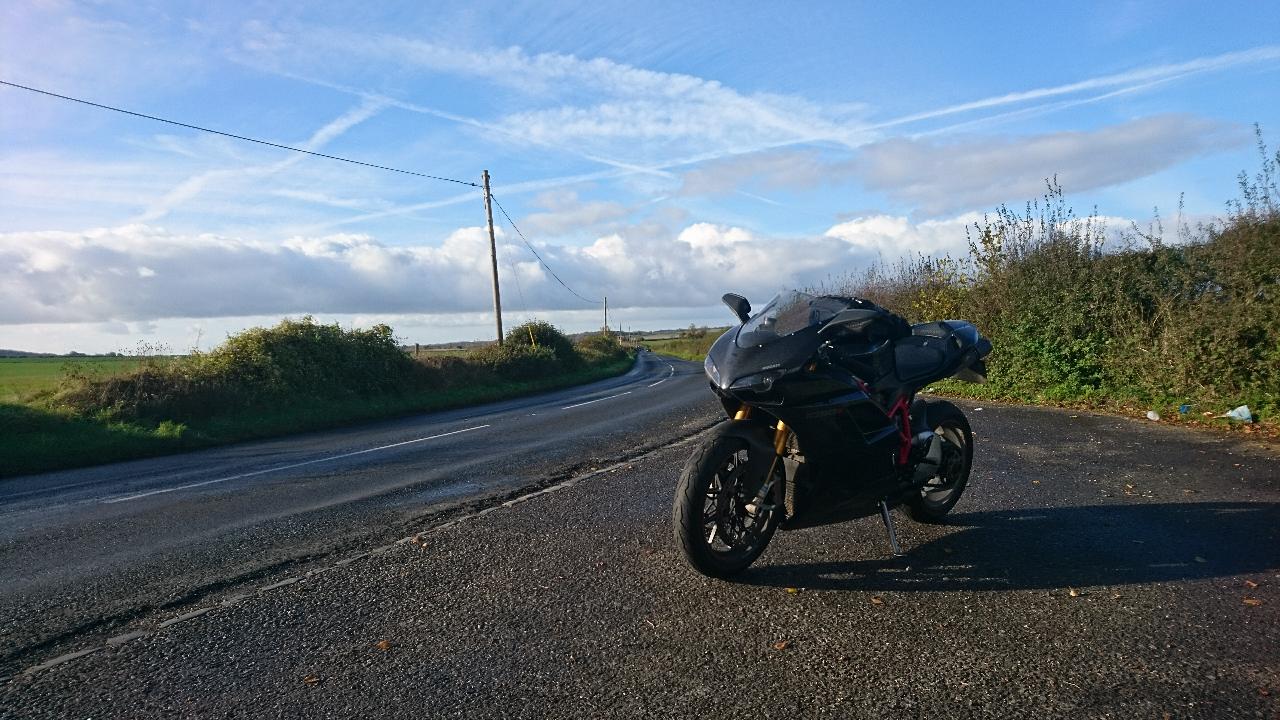
last ride of 2012
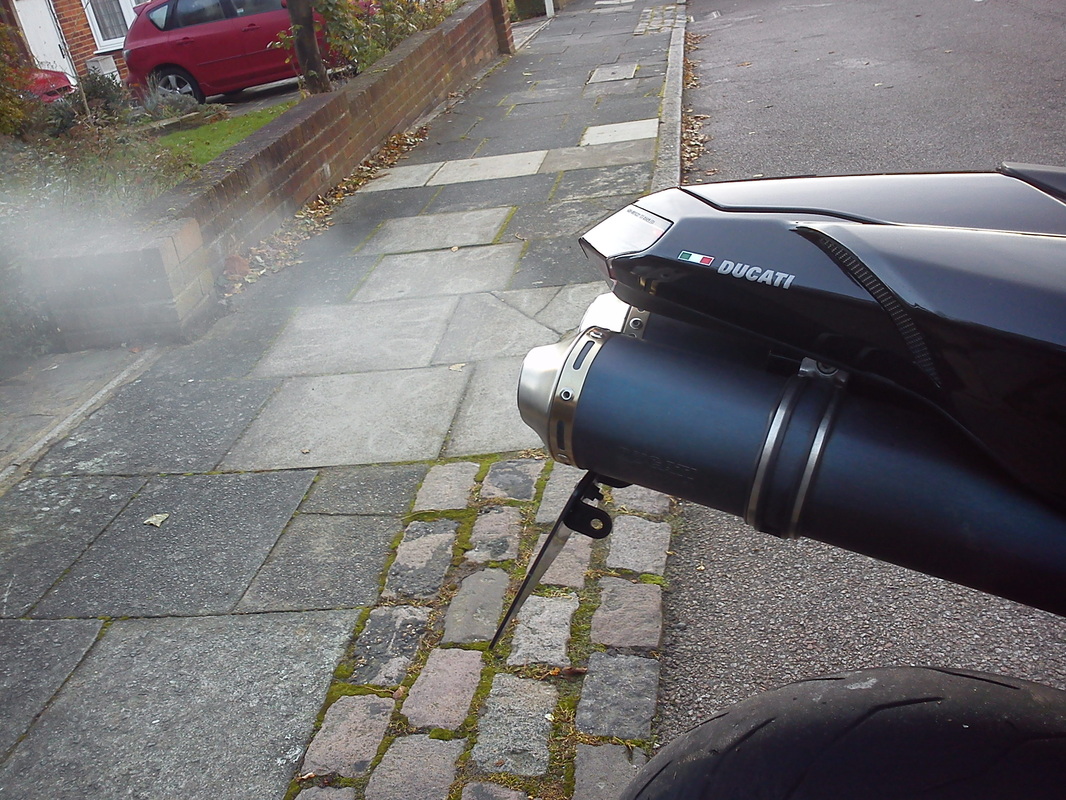
Leaving the house, the dash is telling me that the temperature is only 4 degrees and that the time is 09:15. I know one of those is wrong as the clocks changed last week and I haven’t bothered to change to display. It’s still flippin cold thou. It was a rare moment. I had a free weekend and the forecast was favourable, so I decided yesterday that instead of having my usual Saturday morning coffee in my local High Street, I was going to head out on the bike for an hour or so and grab one somewhere else.
The bike is sat outside the house warming up, white vapour pulsing out of the twin exhausts. Apart from the rattle from the bike, it was a fairly still and quiet morning and I knew the roads would be quite, albeit a little damp with dew and greasy. This wasn’t going to be the morning for full committal corning and diving on the brakes at the last moment.
Once I get out of town, I’ve got clear roads, blue sky and a low sun casting long shadows on my left. The familiar shape distorted by hedges, sign posts and junctions. I’m wearing my Alpinestars 365 Gore tex gloves but in ten minutes my fingers have started to hurt. In half an hour I won’t be able to feel my hands, let alone my fingers. My Zx7 has recently had some heated grips installed which really help take the bite out. If I thought I might ride the Ducati in the winter, I may have considered getting some more, but I’m not so it’s a mute point.
I head up past the M25, a road I’ve talked about everyday for the last ten years, making my way towards St Albans, a wonderfully picturesque Roman town sandwiched between the aforementioned M25, the M1 the A1(M) in Hertfordshire. Despite the chill, I’m enjoying the ride. The bike feels great and I remember why I bought it. This stretch on the A1081 is an arrow straight dual carriageway and after passing the only three vehicles on the road, I crack the throttle open briefly and get that brief adrenaline rush that I’ve been looking for.
In the outskirts of town, with the bright winter sun slowing warming the air directly behind me, a lorry is reversing into a junction. Sat in the road is a little silver hatchback with its hazards on. If I didn’t see the 60ft white lorry across the road, I don’t think the little flashing yellow lights are going to help me, but thanks anyway.
I park up in my usual spot in front of the 15th Century Church tower, a building with a full and fascinating history, which continues to dominate the market place at the southern end of the high street. My hands are so cold now that I can’t feel a thing and fumble a bit removing my gloves and helmet. It’s around 08:30 and the market sellers are setting up their stalls for the day and I retreat to the sanctuary of the coffee shop, its hot coffee, classical music and sweet bakery goodness.
Once I had warmed up I wandered up through town. One market stall selling woollen clothing was really busy and the man at the mobile phone stall didn’t know what I was talking about let alone have one in stock. A few minutes later I found myself in HMV looking at their sale CDs as I had read on the Digitalfix forum that the re-mastered versions of Kiss’ albums were on sale for only £3. I had seen them play at Wembley on their Sonic Boom over Europe tour in May 2010 with a friend and although we hadn’t really heard too much of their music, the show was such that by the time they left the stage myself and Simon had been converted.
On the way back home, the temperature had risen, but so had the volume of traffic. Swings and roundabouts I guess. I was warmer, but enjoying the ride just a little less. The early morning out had been just what I needed and despite it being just a little too cold, had been just the ride I had wanted before I put this bike away for the winter. I plan on taking the panels off and giving a really good clean and a good spray with some ACF-50 to keep any corrosion at bay over the next three or four months as it patiently waits under its cover in the garage. I’ll be doing some reading regarding fuel stabilisers and battery chargers just to make sure that come that first ride on 2013 around March or April, all I’ll have to do take of the cover, turn it over and head back out for an early morning coffee.
|
|
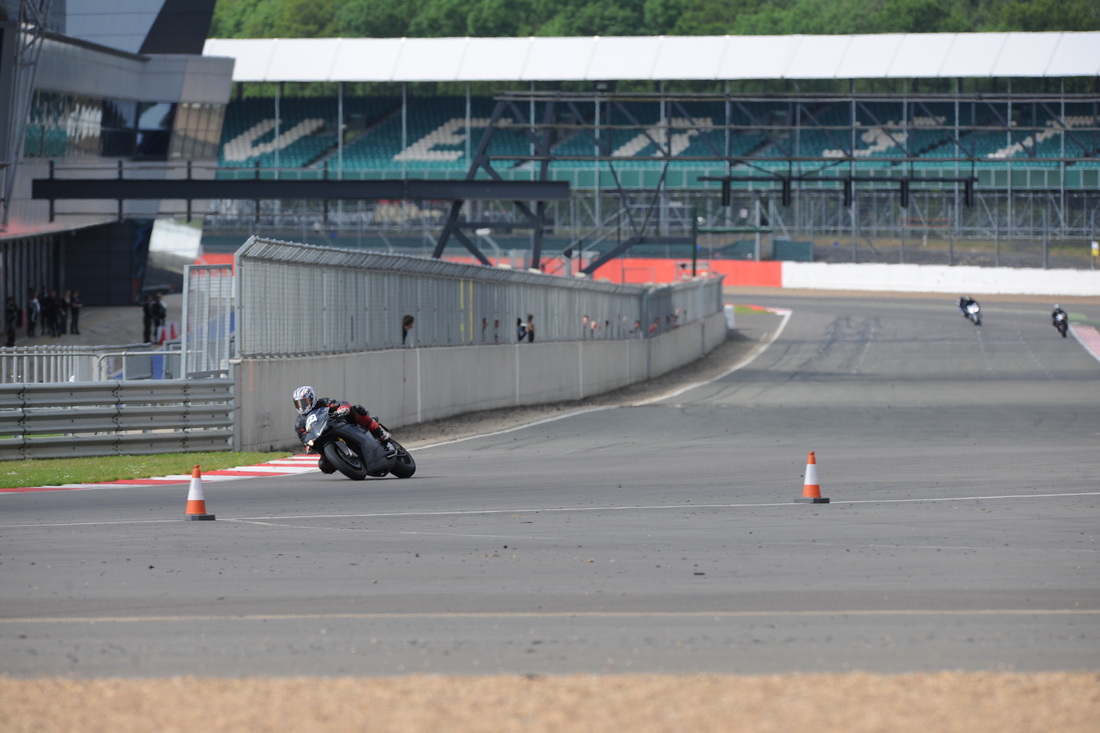
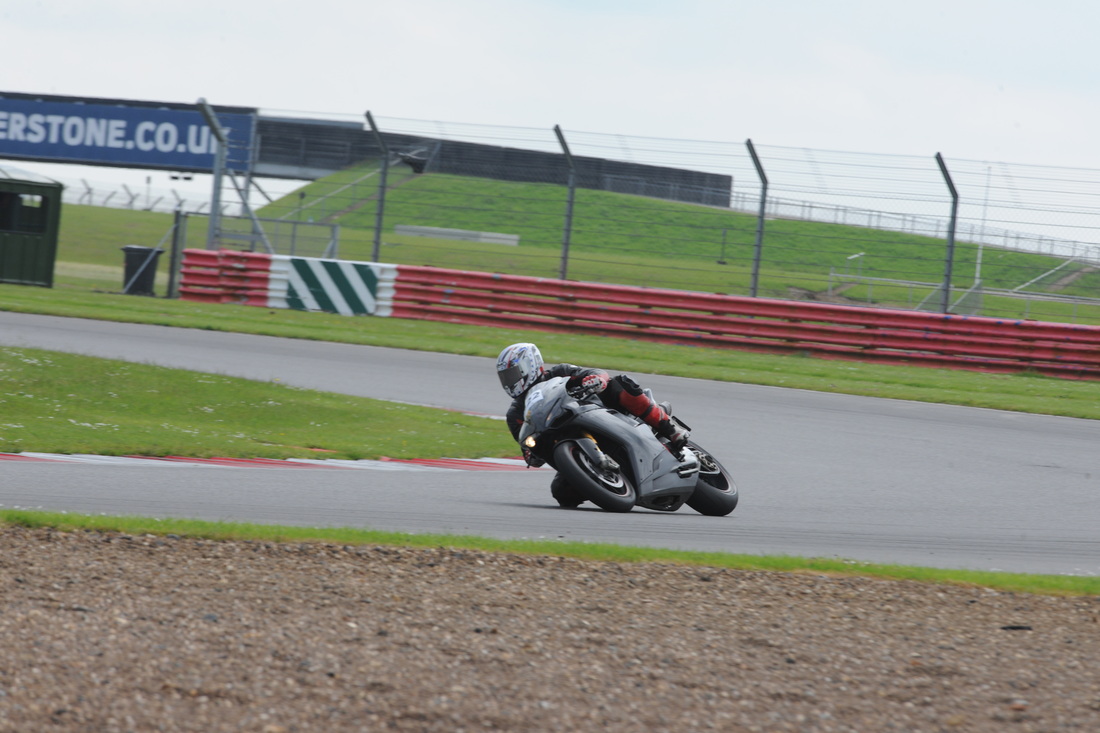
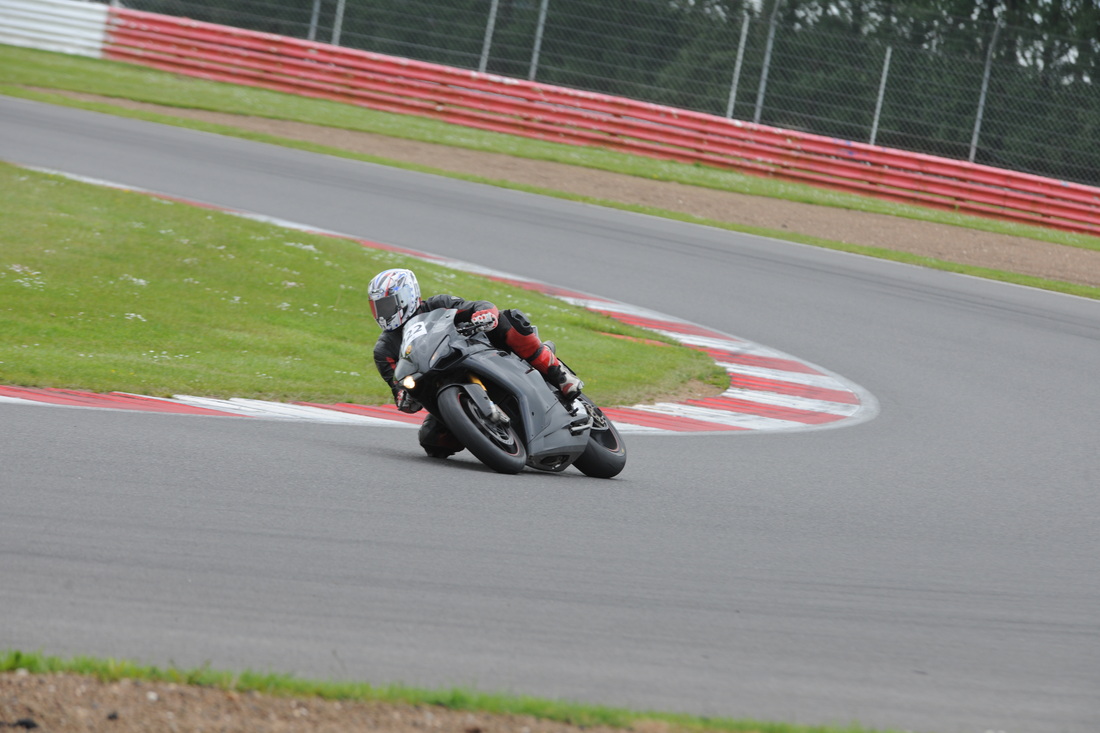
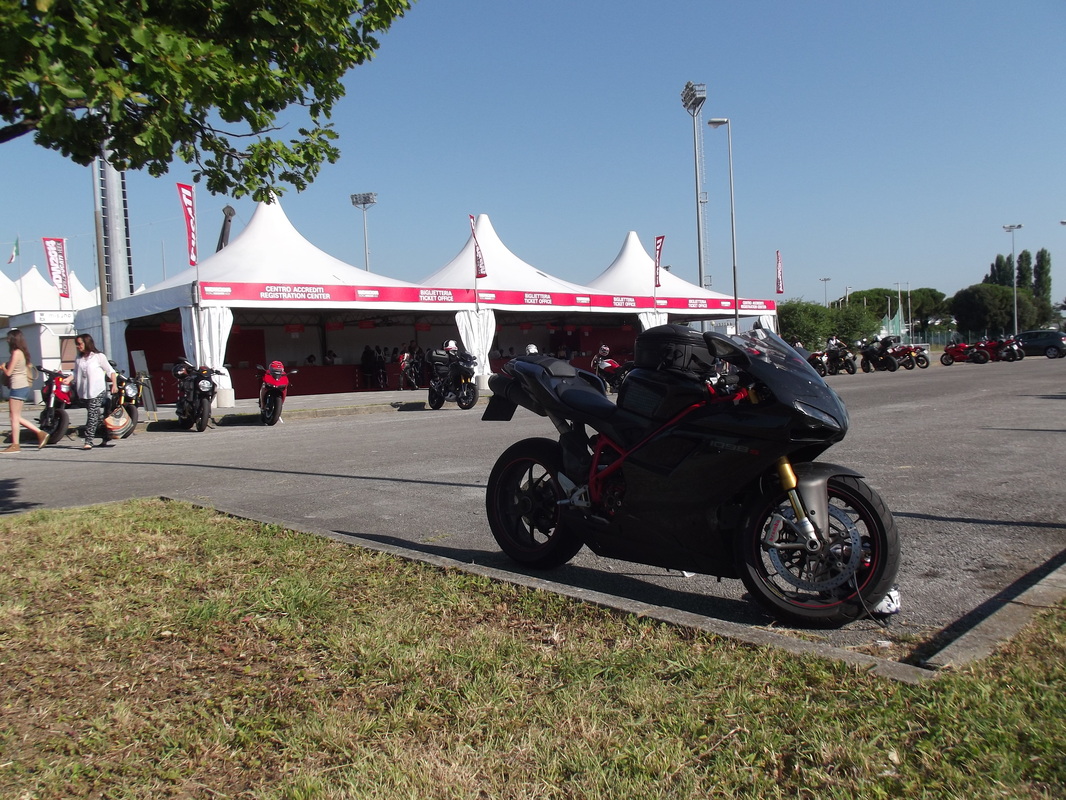
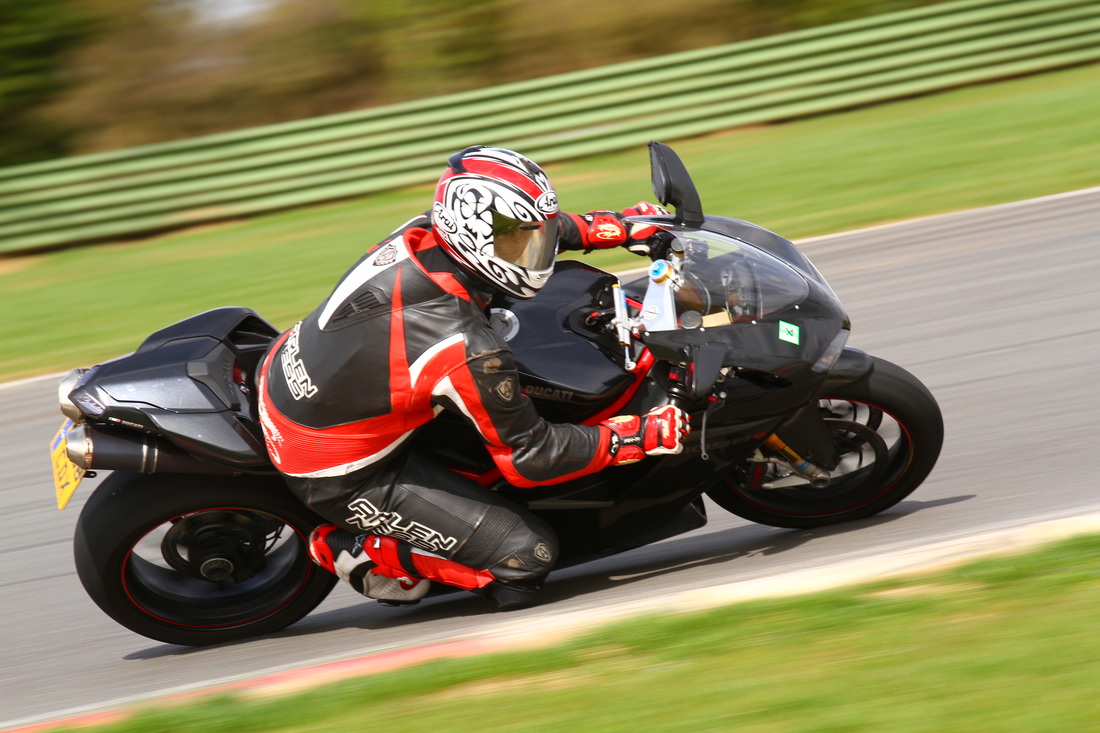
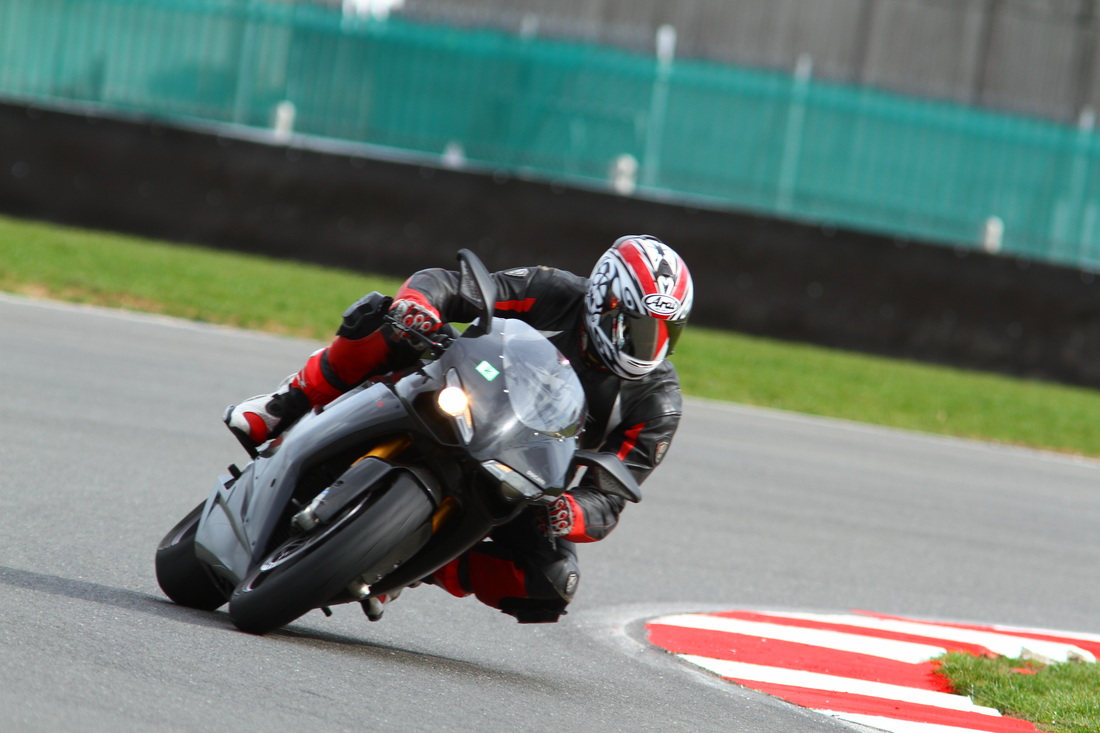
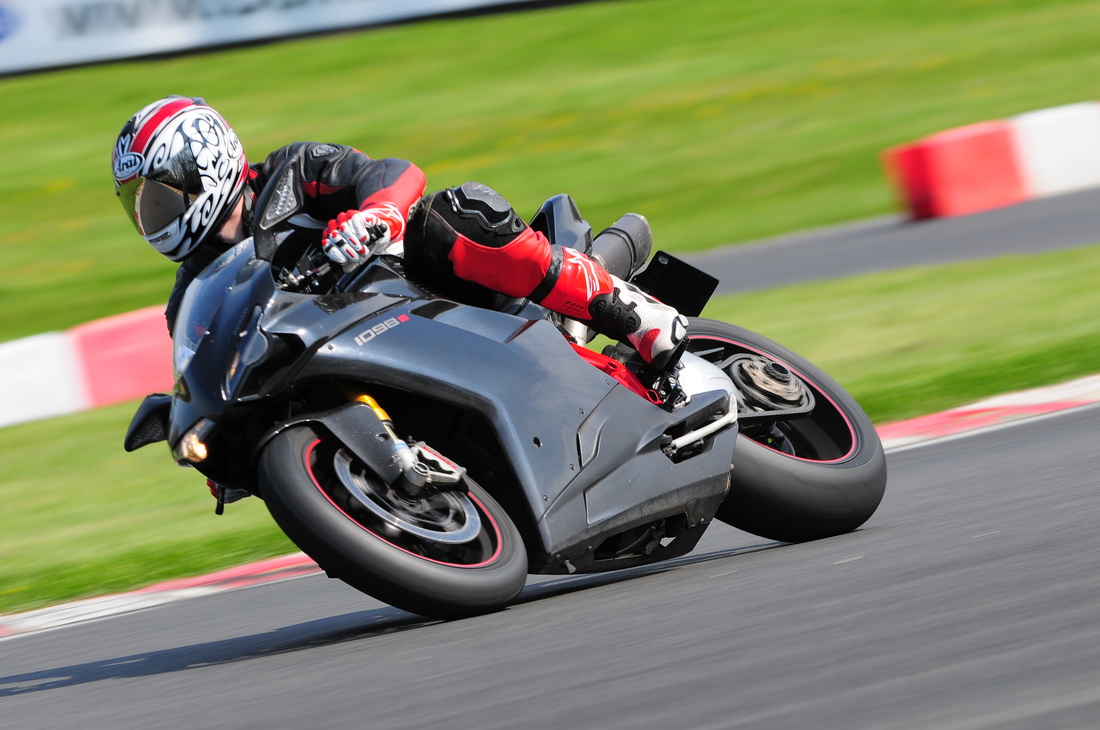
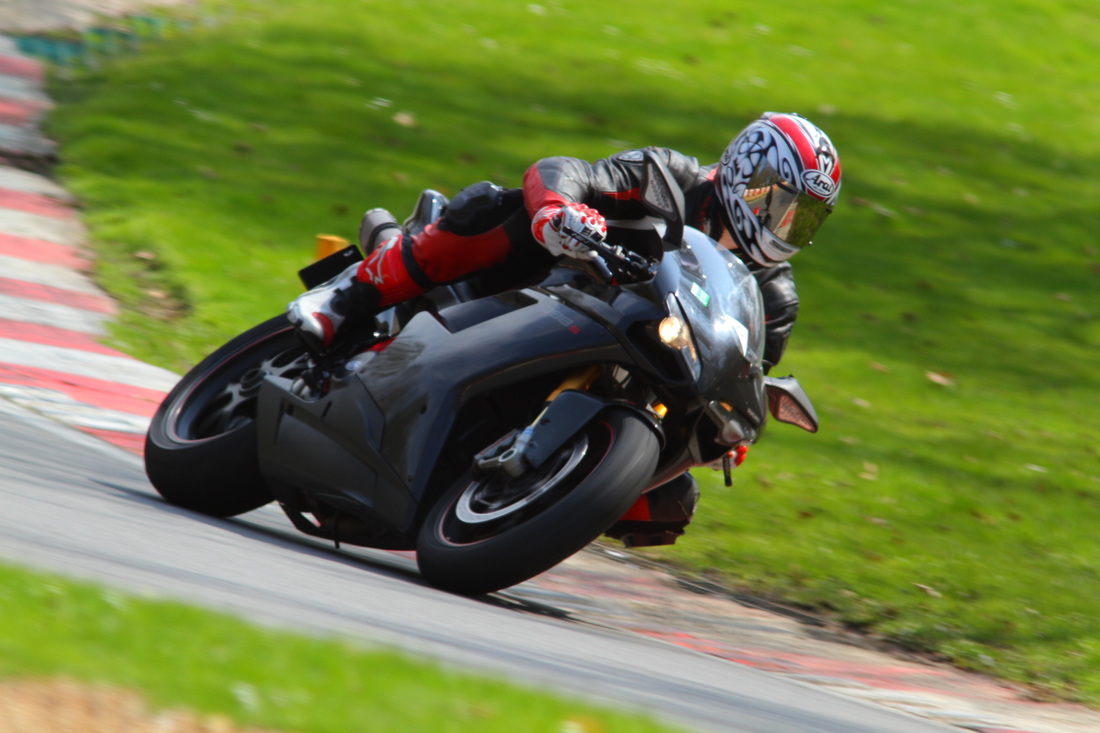
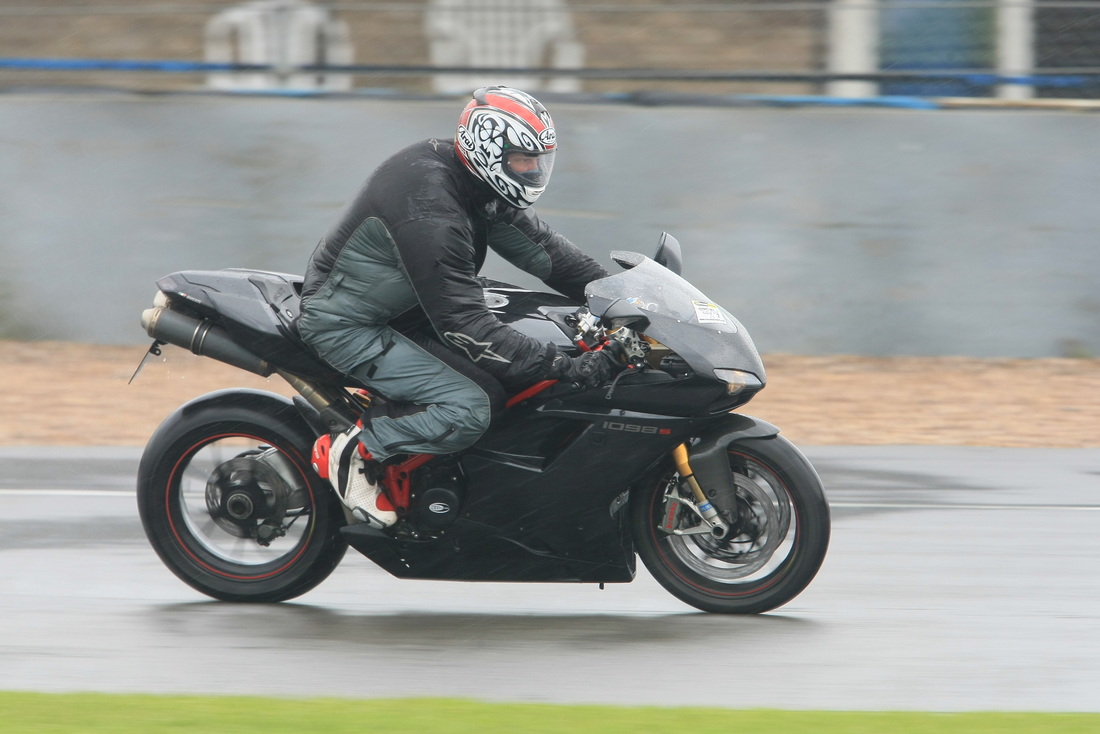
Snetterton 300: may 2012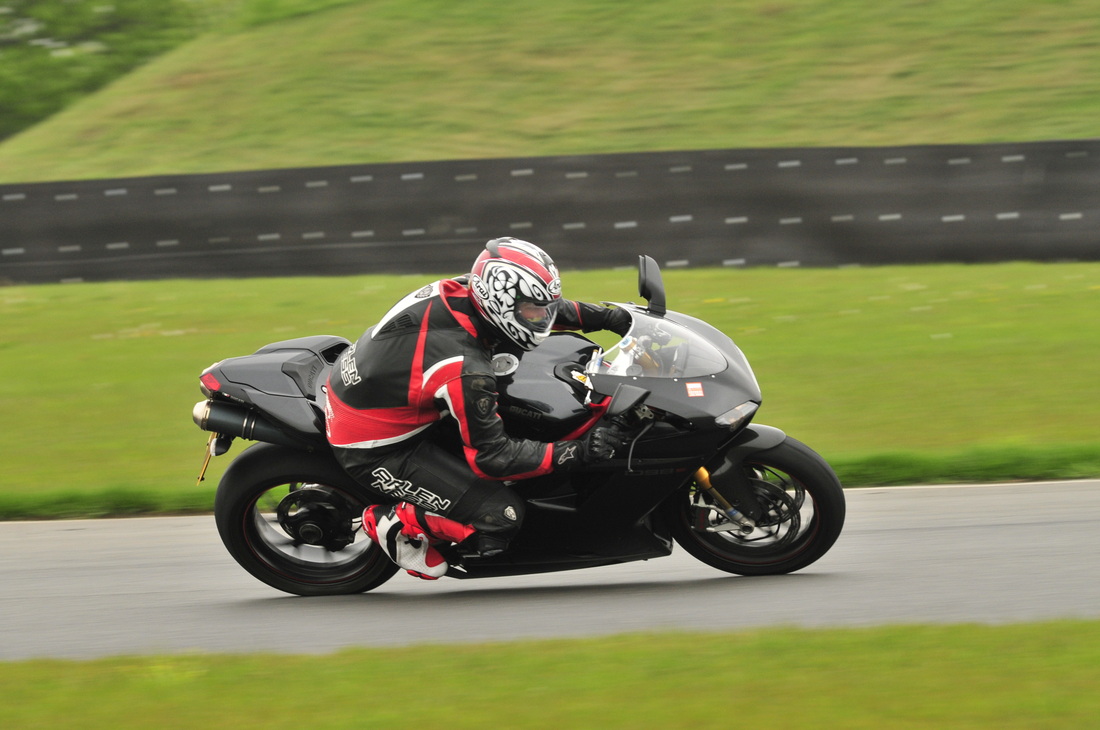 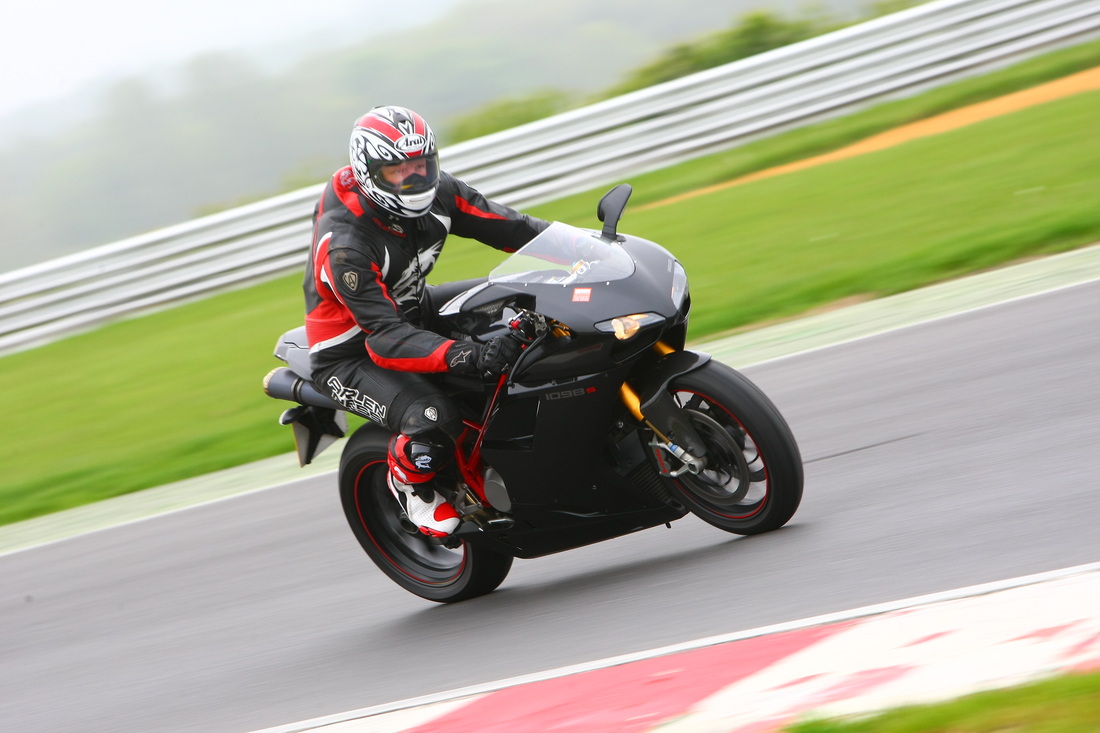  Silverstone: july 2012 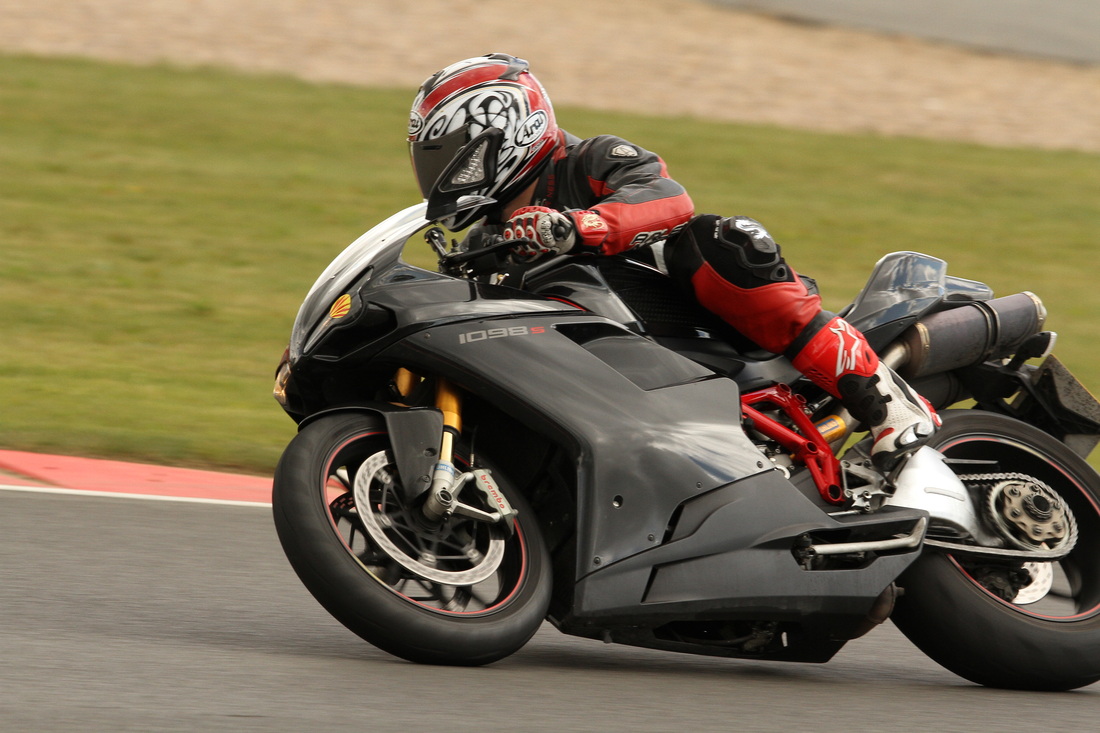 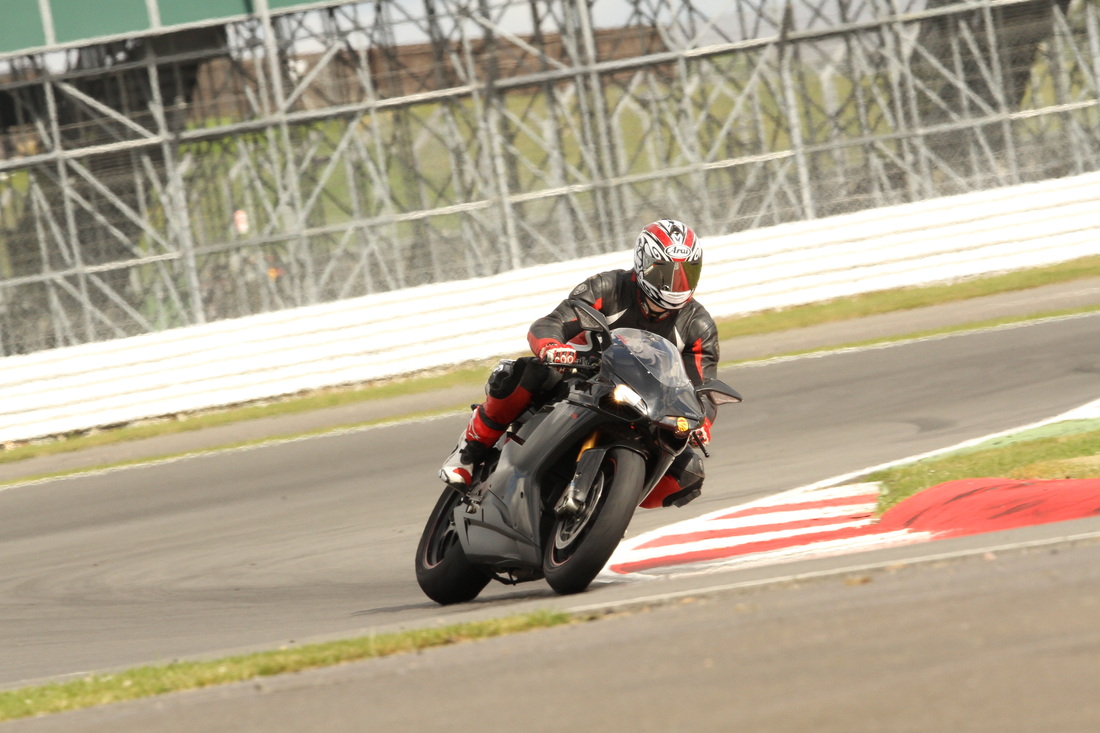 Home: november 2012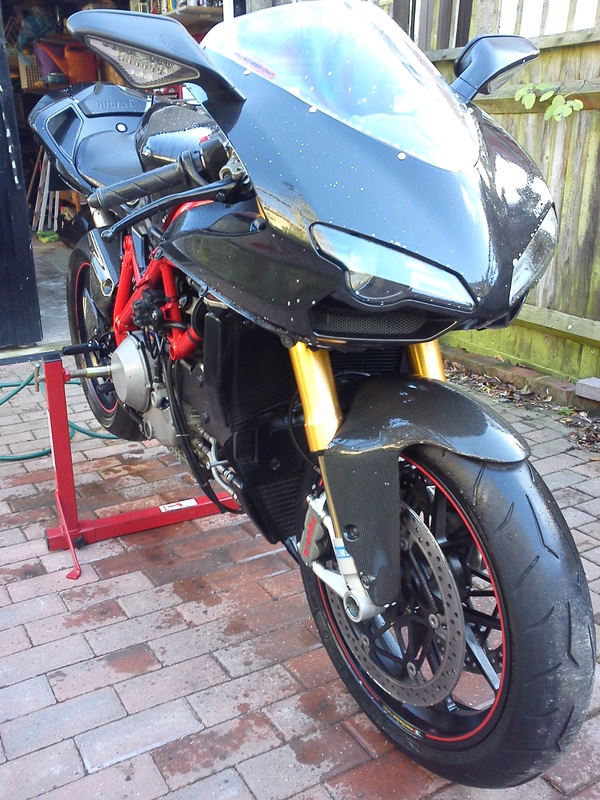 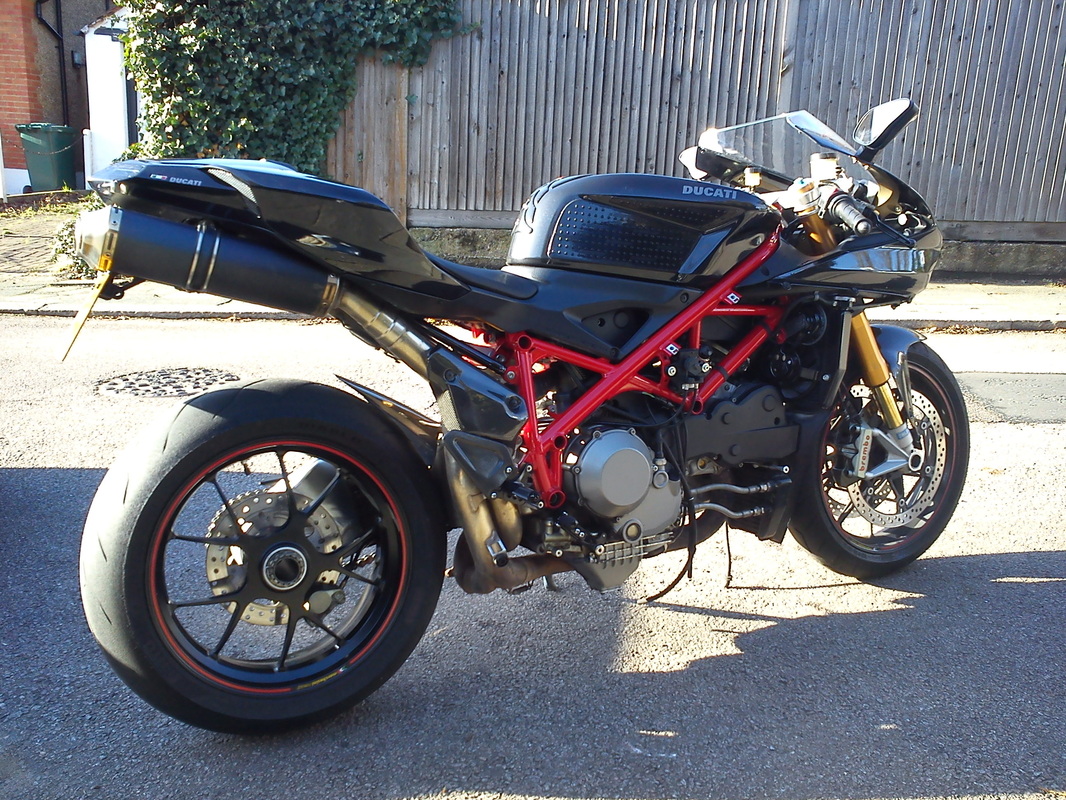 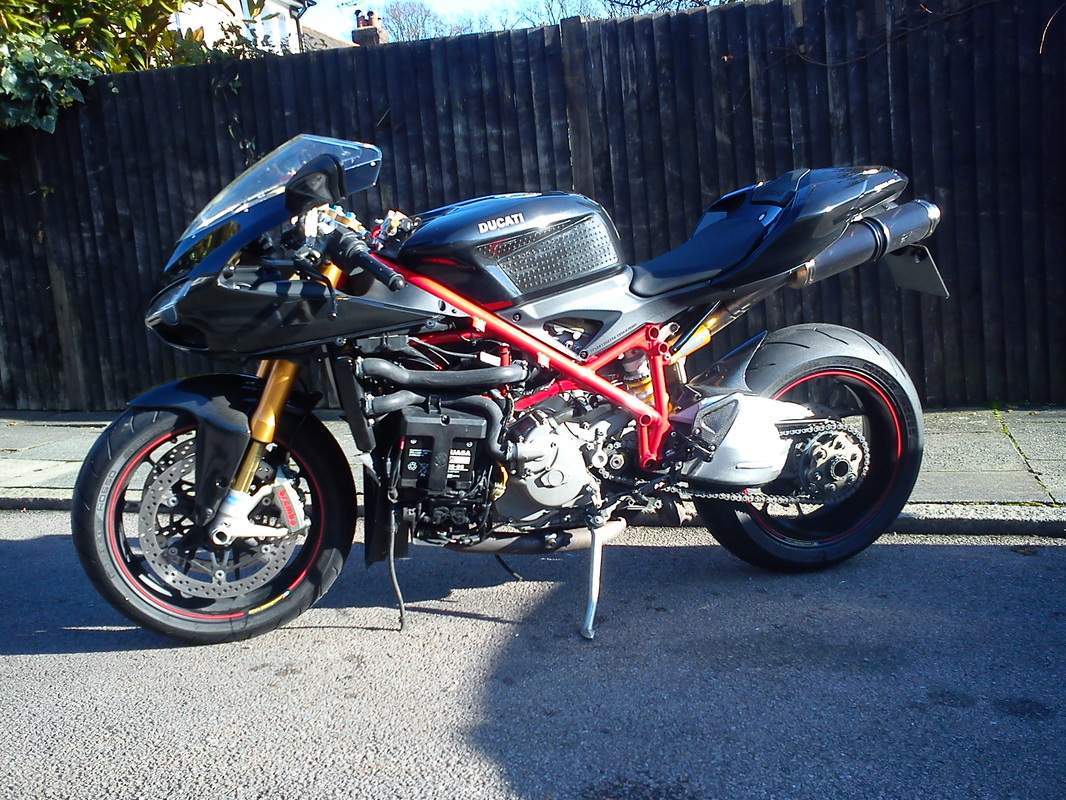 Snetterton 300: april 2013Brands hatch gp: may 2013brands hatch gp: sept 2013 |
Brands hatch indy: july 2012   Brands hatch indy: sept 2012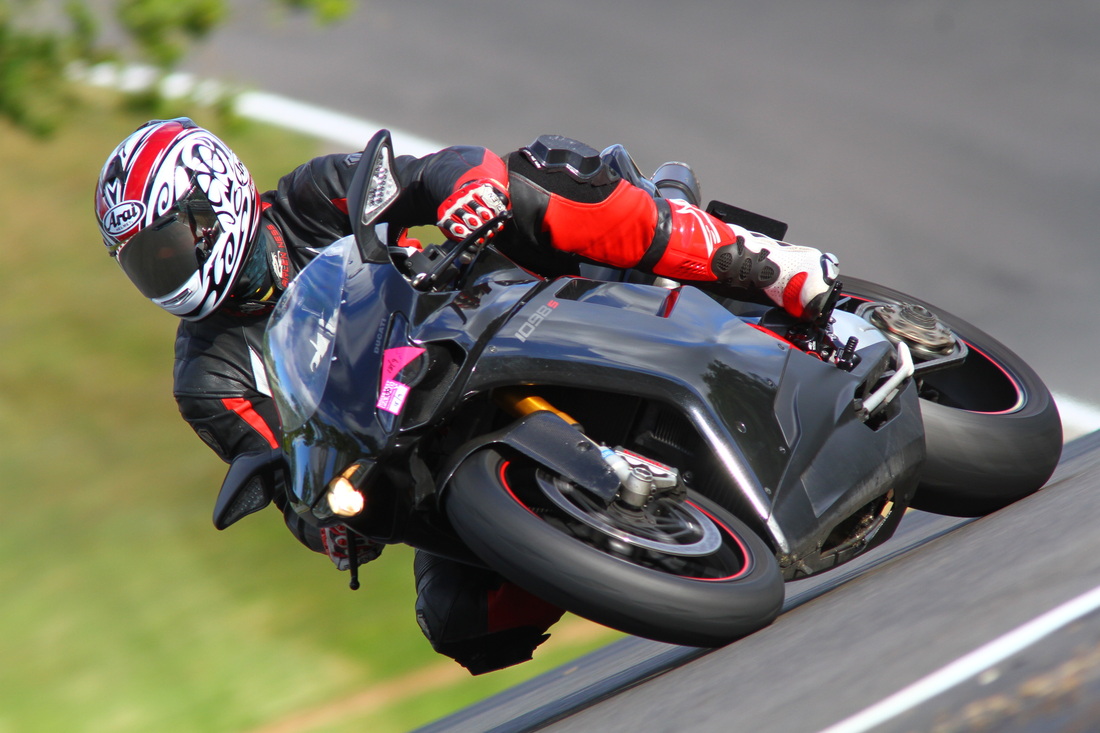 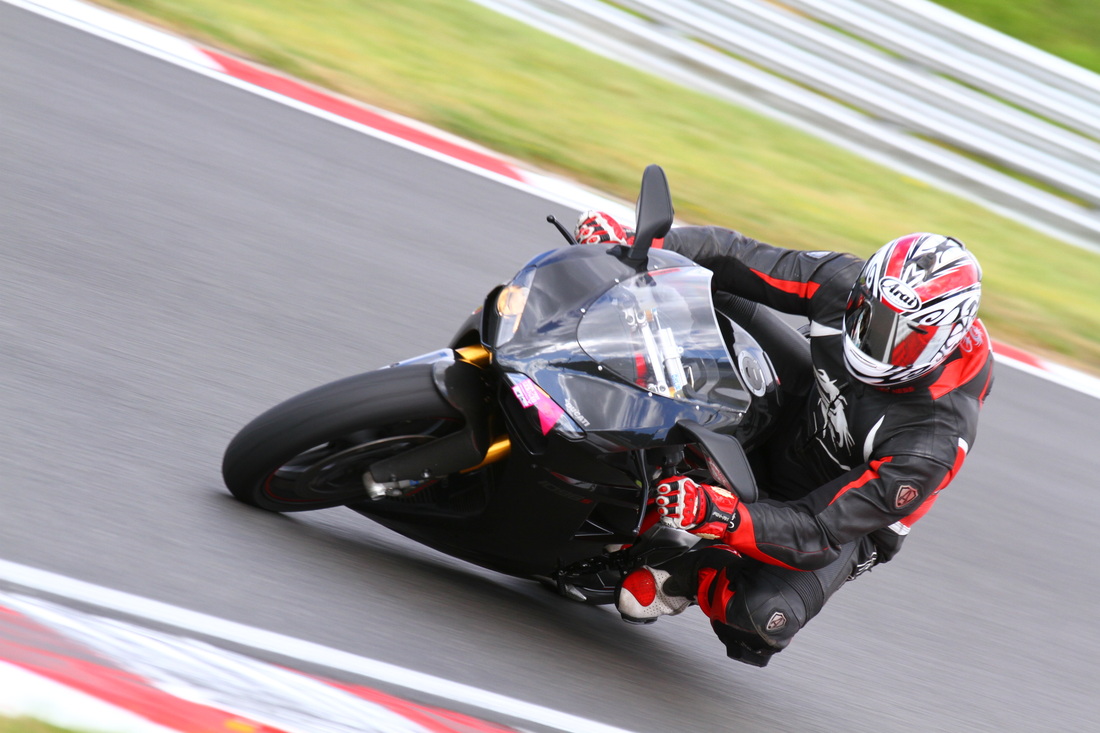  home: march 2013Home: april 2013donington: may 2013Home: sept 2013 |
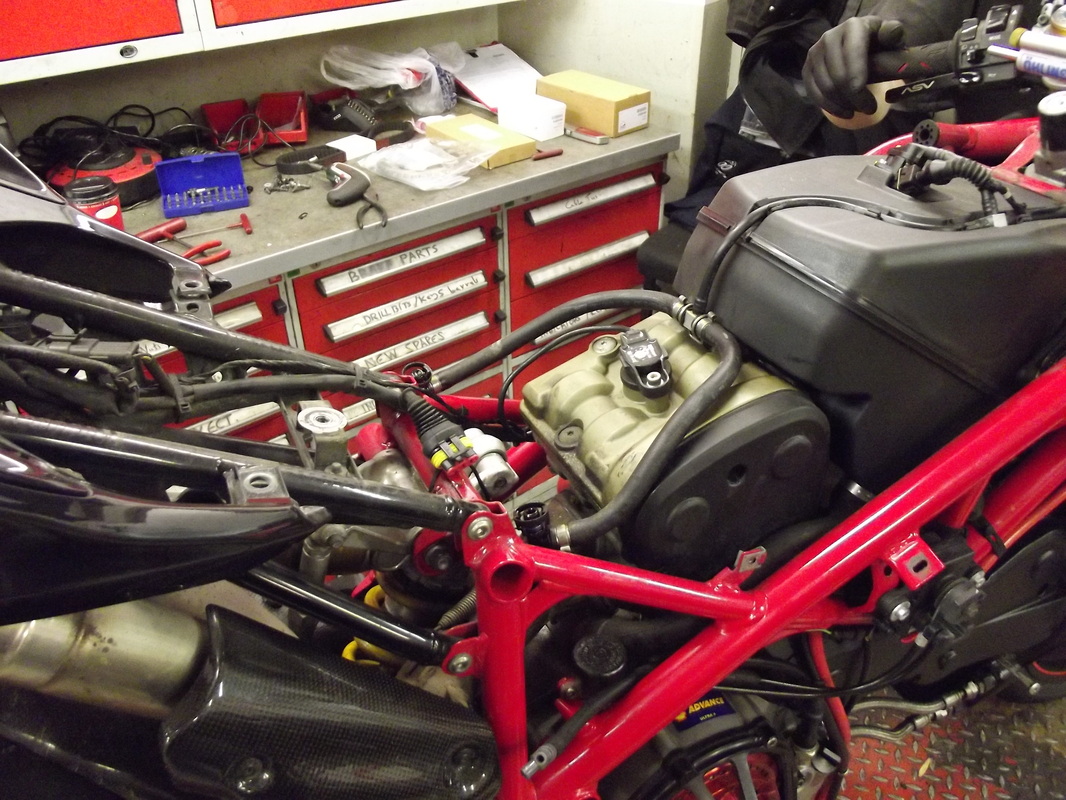
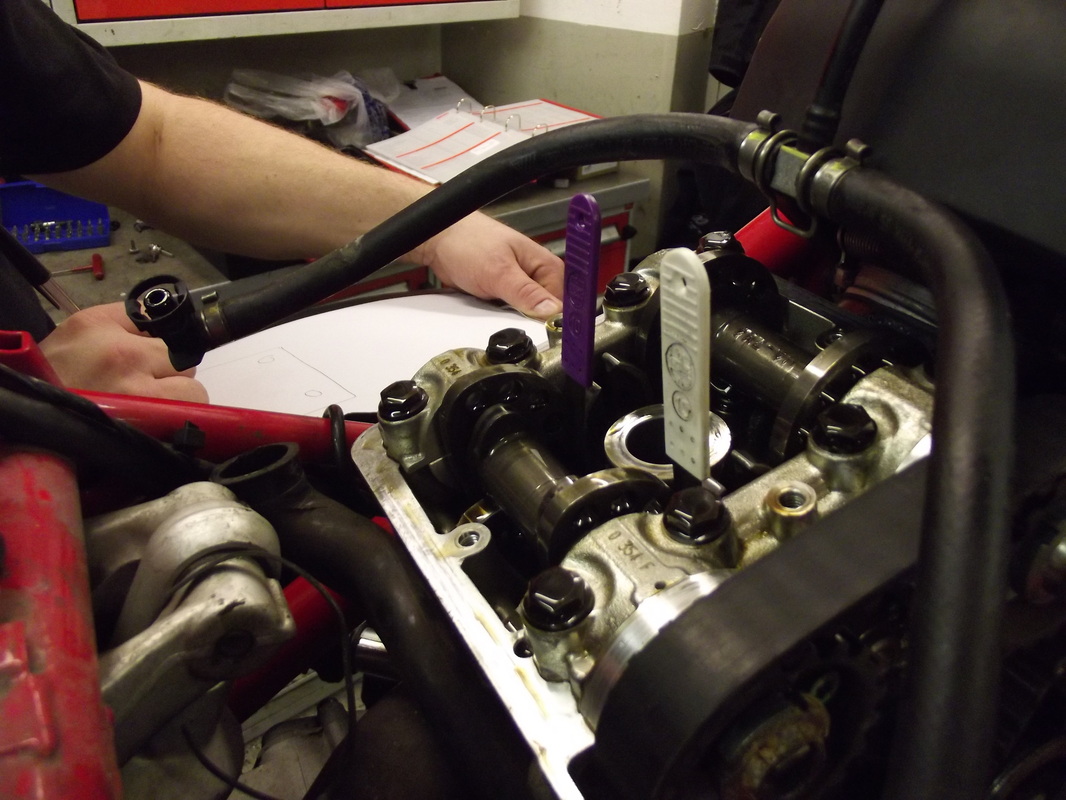
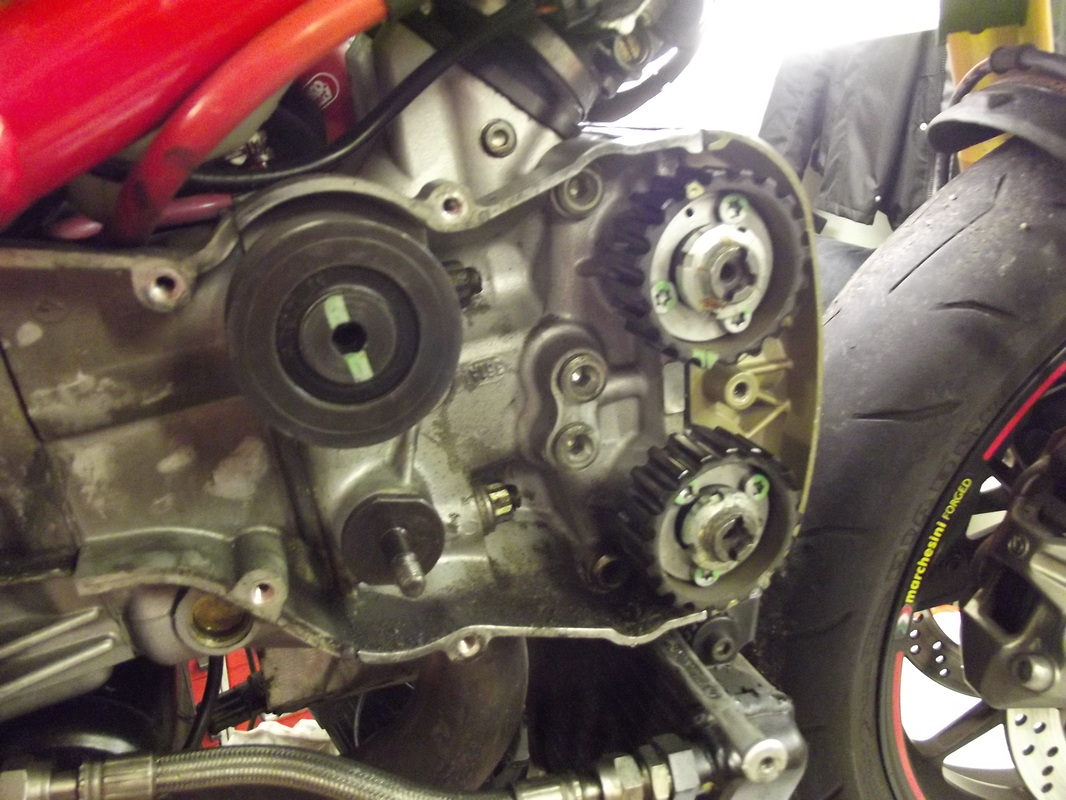
workshop: feb 2014 (desmo service)
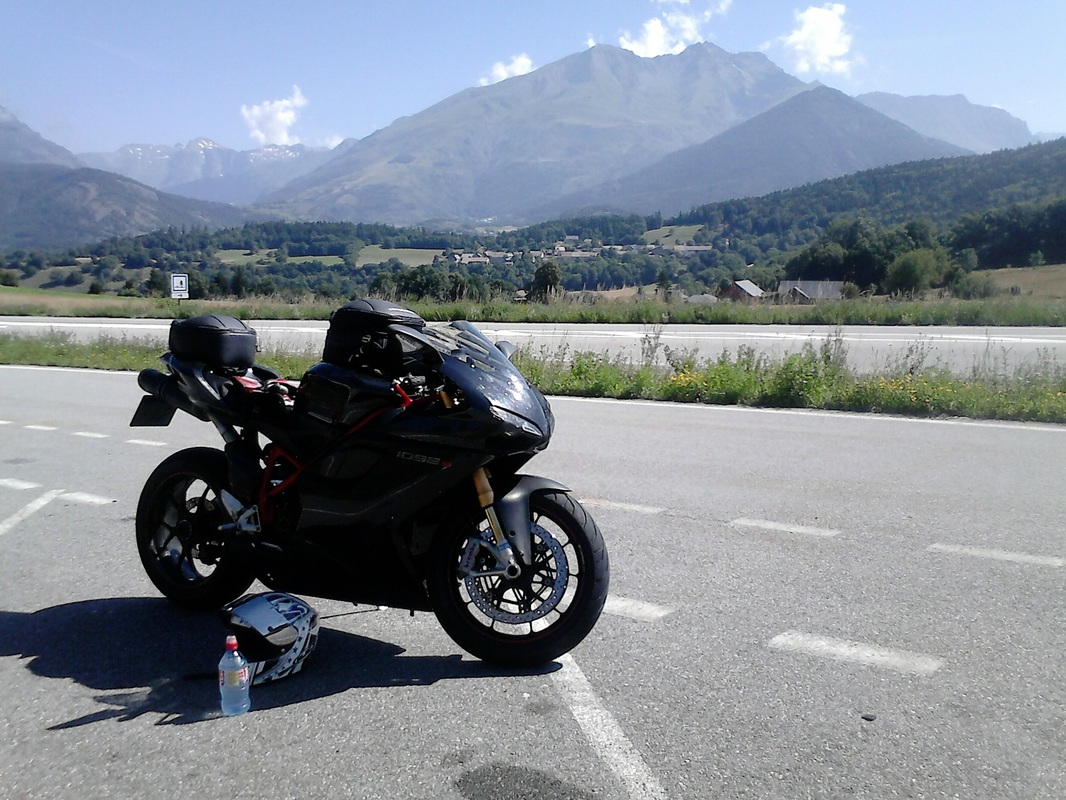
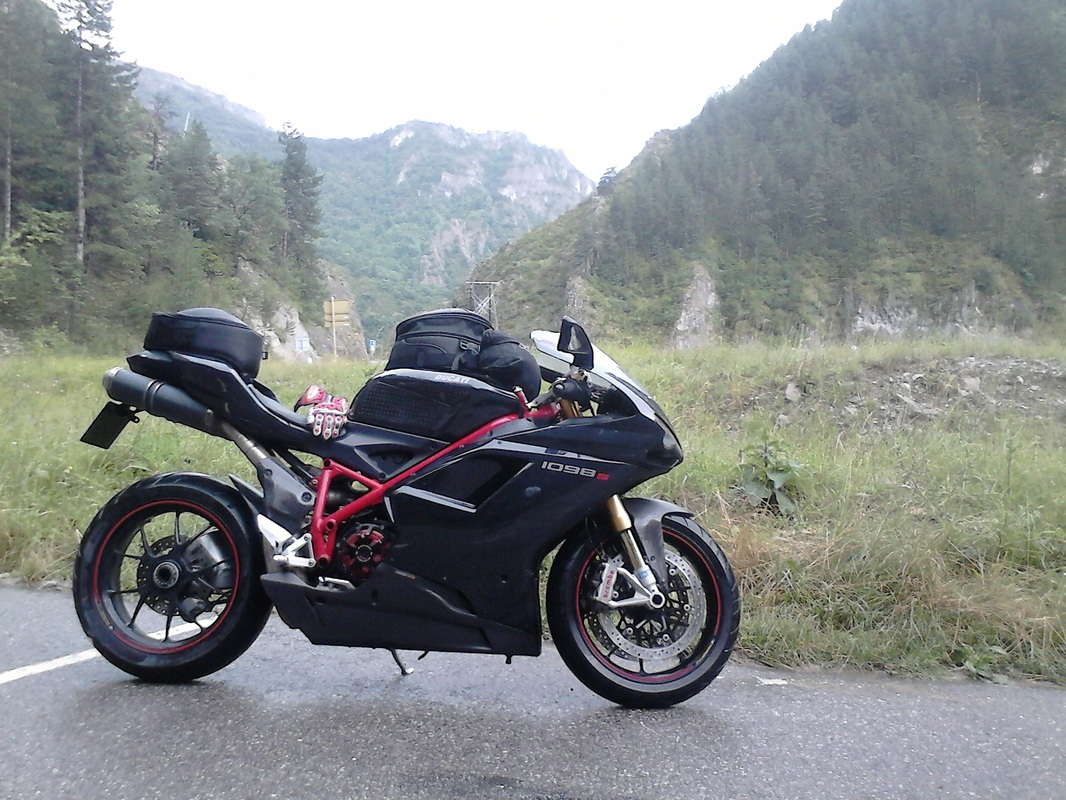
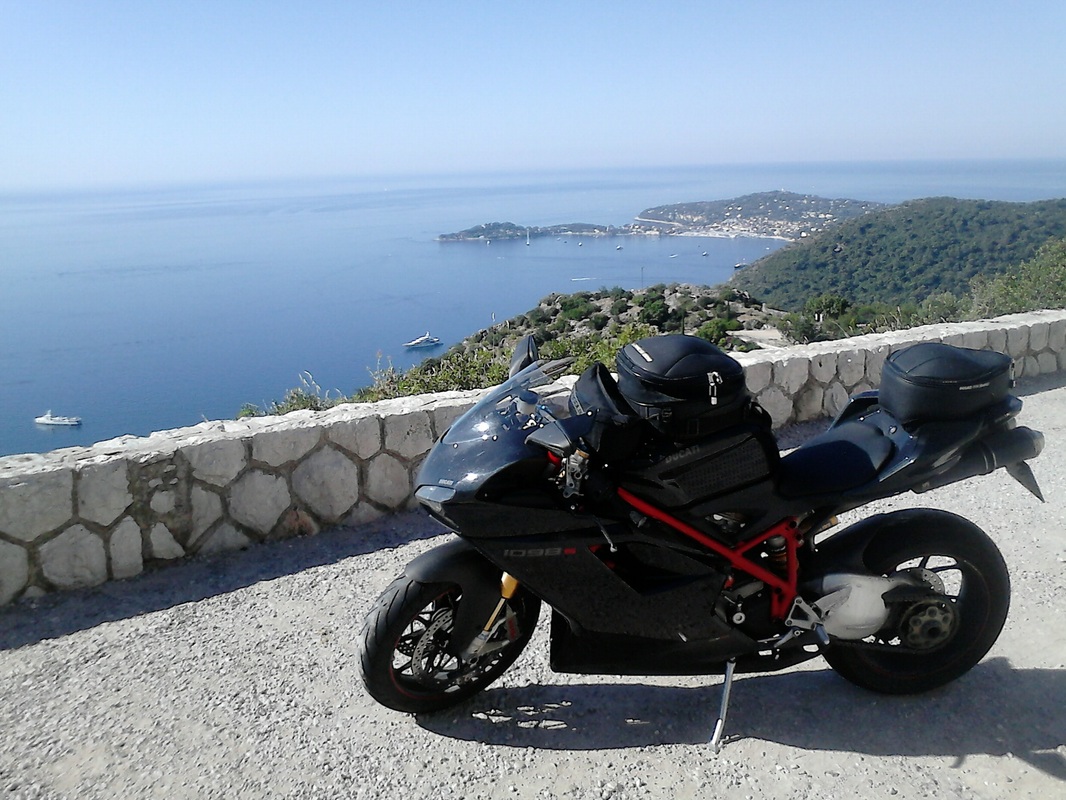
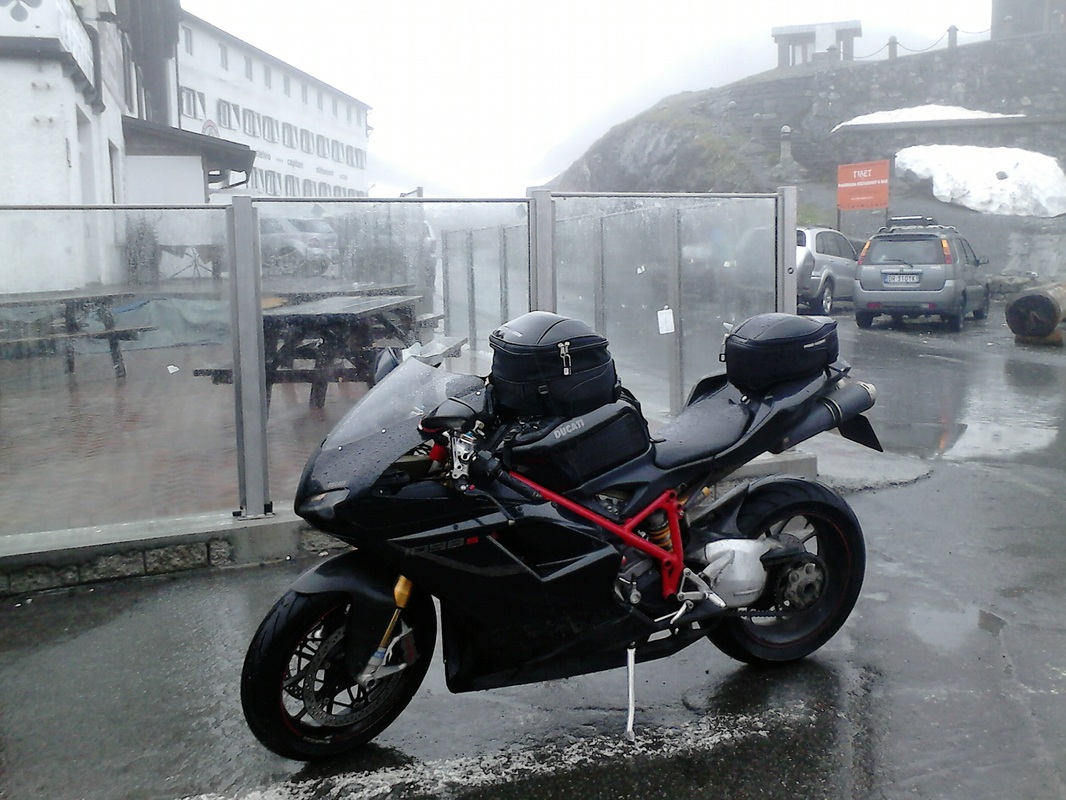
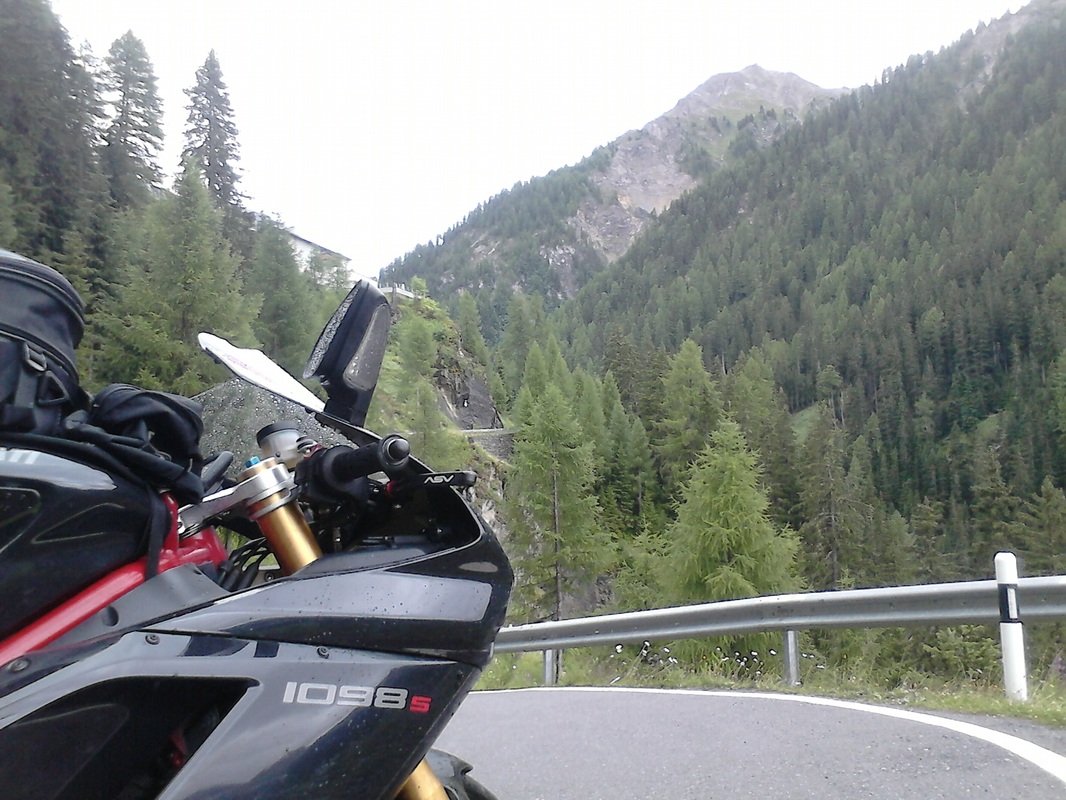
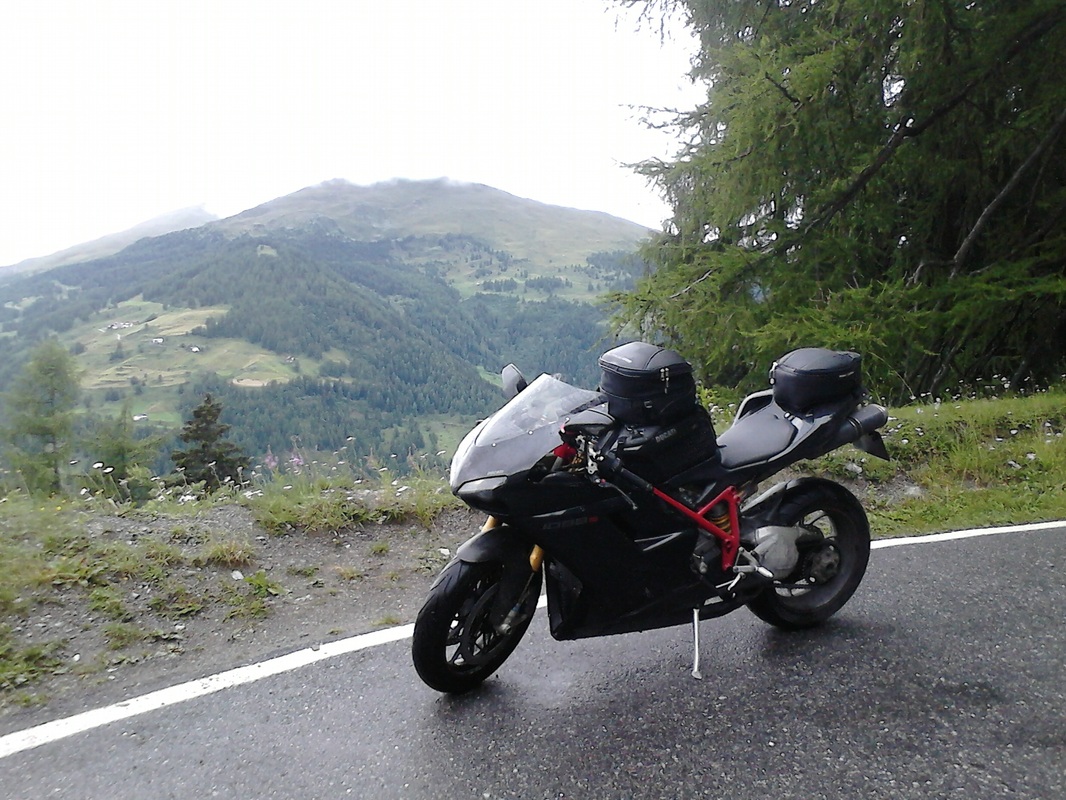
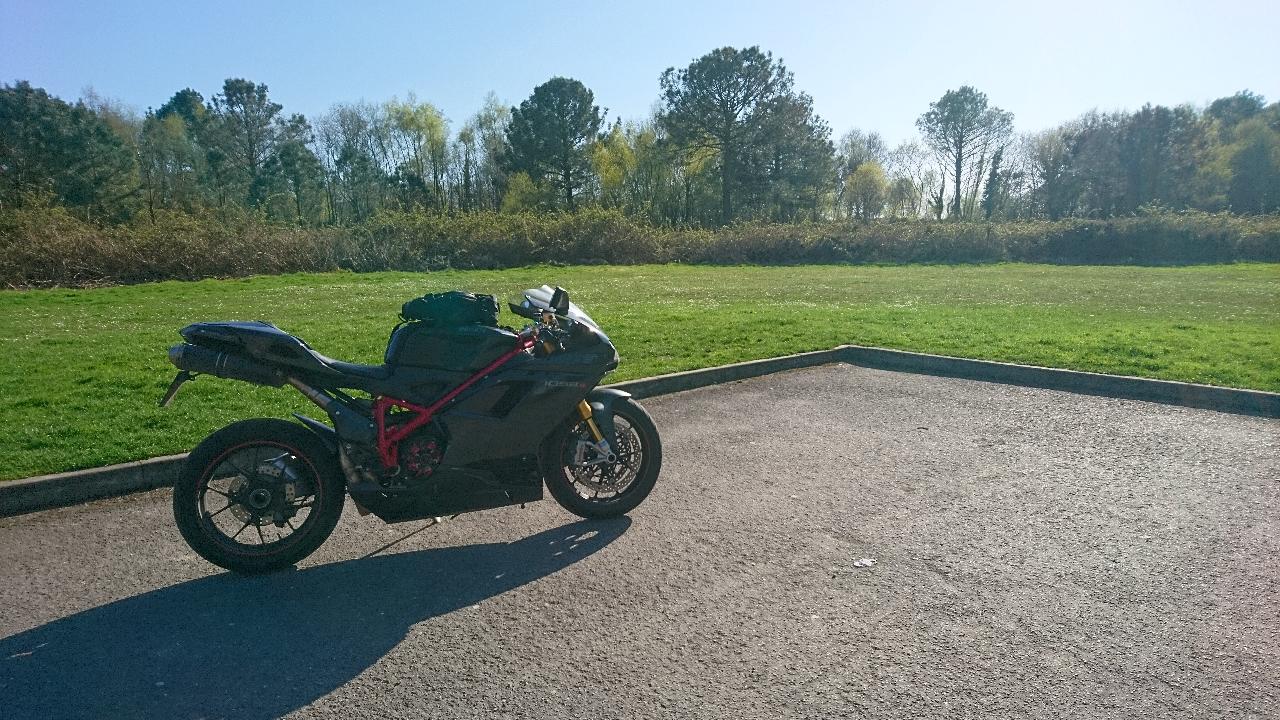
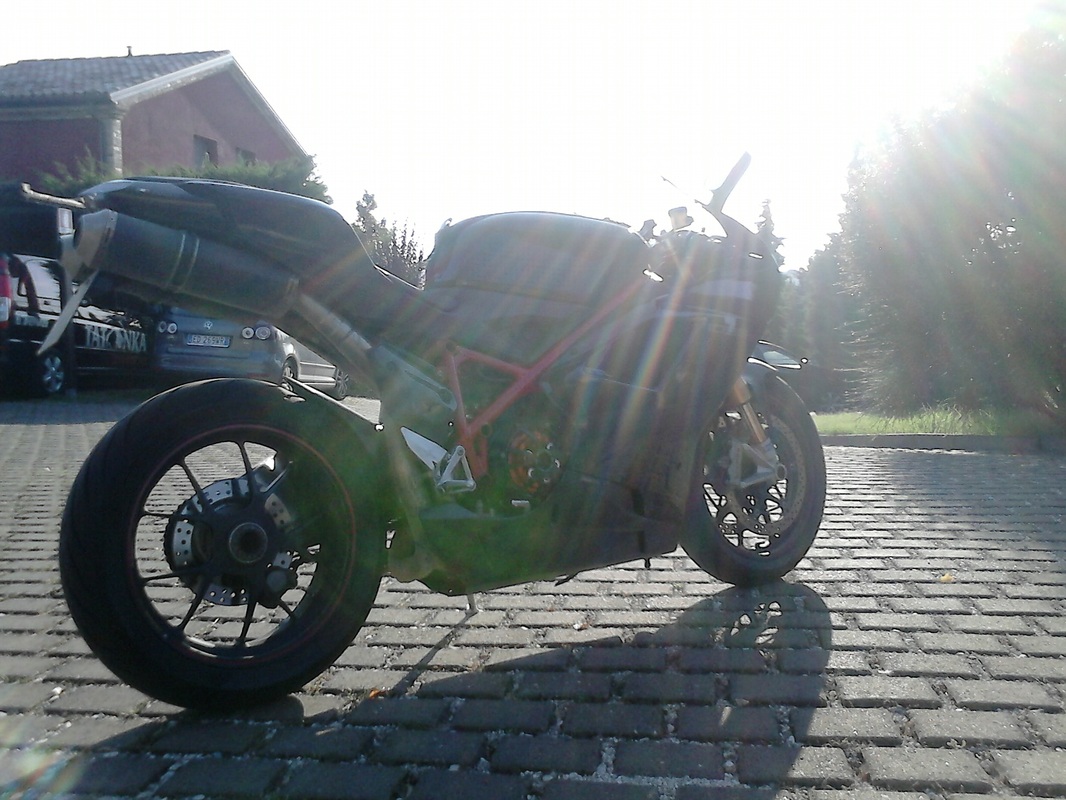
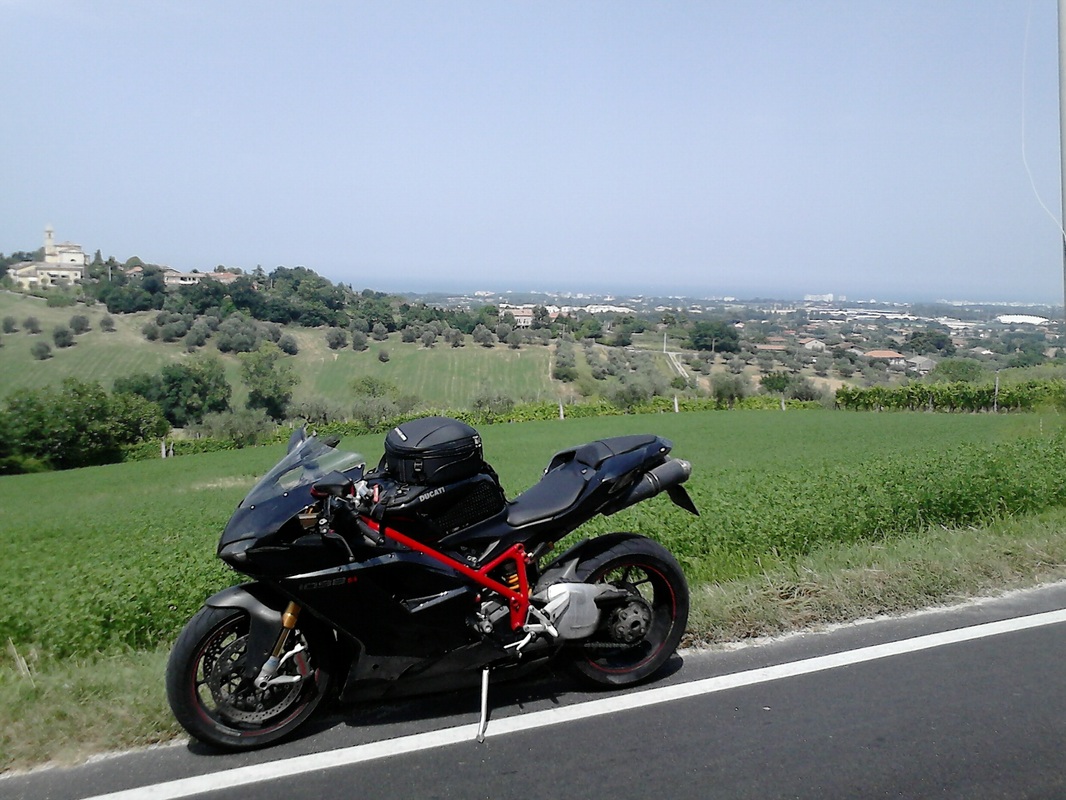
home - march 2014goodwood - may 2014Silverstone - june 2014france - july 2014switzerland - july 2014dorset - September 2015wiltshire - march 2017DORSET APRIL 2018 |
france - march 2014Brands Hatch - may 2014home - july 2014italy - july 2014Home - august 2015home - august 2016dorset - november 2017 |